
Auxiliary Fuse Box
Directions to create and install
The auxiliary fuse box will safely power your accessories.
At the time of writing this guide I have three accessories on my Road Star that require power. All of them are protected by a fuse and one of them has a relay. Having all three connected directly to the battery, overloaded the terminals so I decided to eliminate that problem.
Robert Van Horn commented on one of my posts on Facebook and suggested that I add a Relayed Auxiliary Power Source for all my accessories. He provided some of the resources that you will see here.
Supplies (links included)
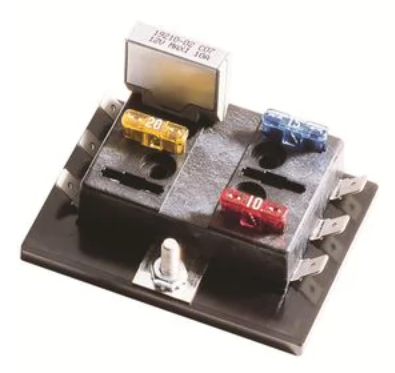
- Bussmann 6-Position ATC Fuse Panel
https://www.autozone.com/electrical-and-lighting/fuse-block/bussmann-6-position-atc-fuse-panel/32322_0_0 - 7 Terminal Ground Bar Kit
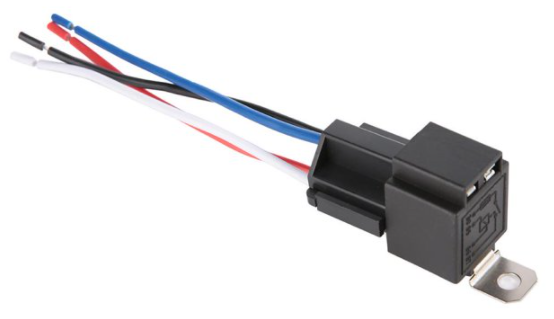
https://www.homedepot.com/p/Square-D-7-Terminal-Ground-Bar-Kit-PK7GTACP/202353316 - 12V 30A Car Fuse Relay Switch Harness Set SPST 4-Pin 14 AWG Hot Wires (30a) fuse
https://www.walmart.com/ip/OTVIAP-6pcs-12V-30A-Car-Fuse-Relay-Switch-Harness-Set-SPST-4-Pin-14-AWG-Hot-Wires/509514645 - Standard Ignintion Wire Terminal ST230 (tap)
https://www.oreillyauto.com/detail/c/standard-ignition/standard-ignition-wire-terminal-clip/std0/st230?q=fuse+tap&pos=0


The auxiliary fuse box is powered by the battery via a relay. When the ignition is turned ON the auxiliary terminal is HOT and triggers the relay ON allowing power to reach the 6 terminal fuse box.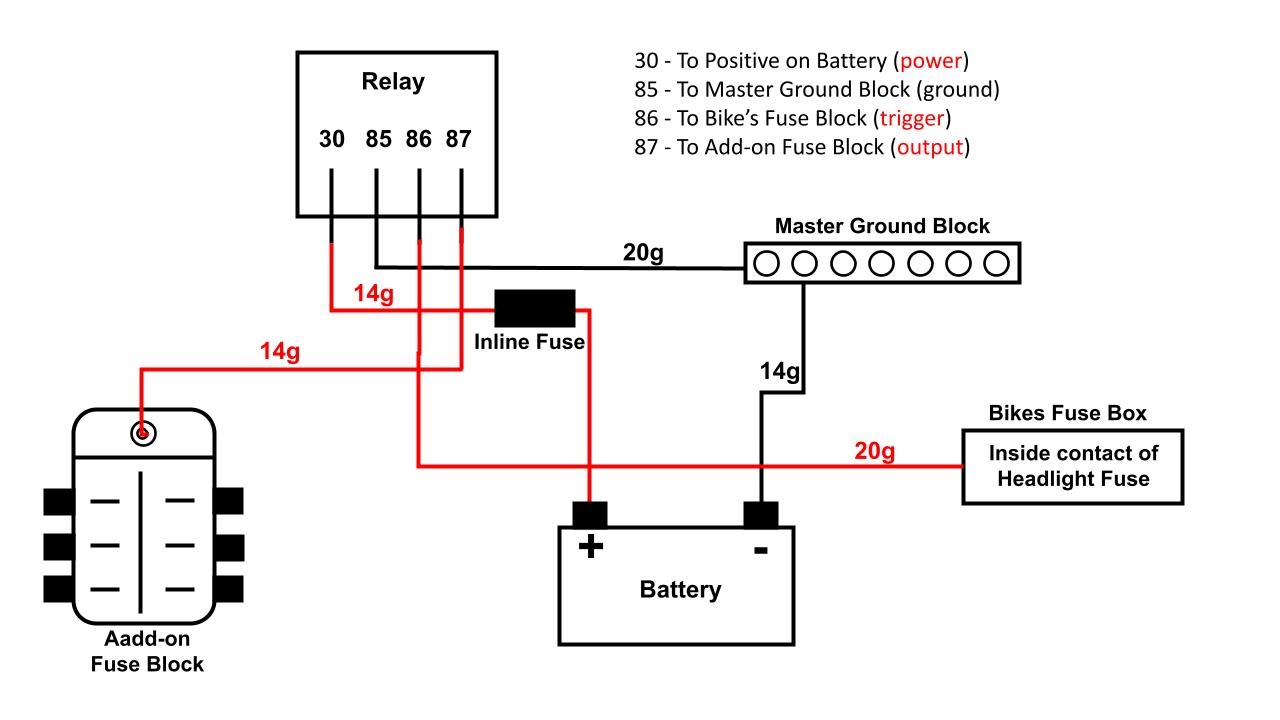
The relay makes it so that your accessories only have power when the key is on.
The relay draws enough power to tell the relay to stay open so I decided to tap into the light fuse.
- I fed the wire up through the access hole on the side of the fuse box and then added the wire terminal (ST230) to tap into the fuse block. That gets connected to #86 (trigger) on the relay with a 20g wire.
- Connect the positive from the battery with a 14g wire with an inline fuse to #30 (power) on the relay. This will power the Auxiliary fuse block via the relay.
- Connect the negative from the battery with a 20g wire to the 7 Terminal Ground Bar. Connect to the 7 Terminal Ground Bar to #85 (negative) on the relay with a 20g wire.
- Connect a 14g wire from the 6-Position ATC Fuse Panel screw to #87 (output) on the relay. This wire will power the fuse panel when the relay is triggered (key is turned on).
I located the relay and fuse panel near the battery where the tool kit was. I put a plastic cap over this connection and added some black tape. It is a positive connection so I wanted to be sure it didn’t short out.I located the 7 terminal ground bar right next to the battery on the negative side.