Adapting 4.5″ buckets for your LED passing lights
In order to install 4.5″ LED passing lights you will need to adapt the lights to your OEM Yamaha buckets or buy 4.5″ buckets.
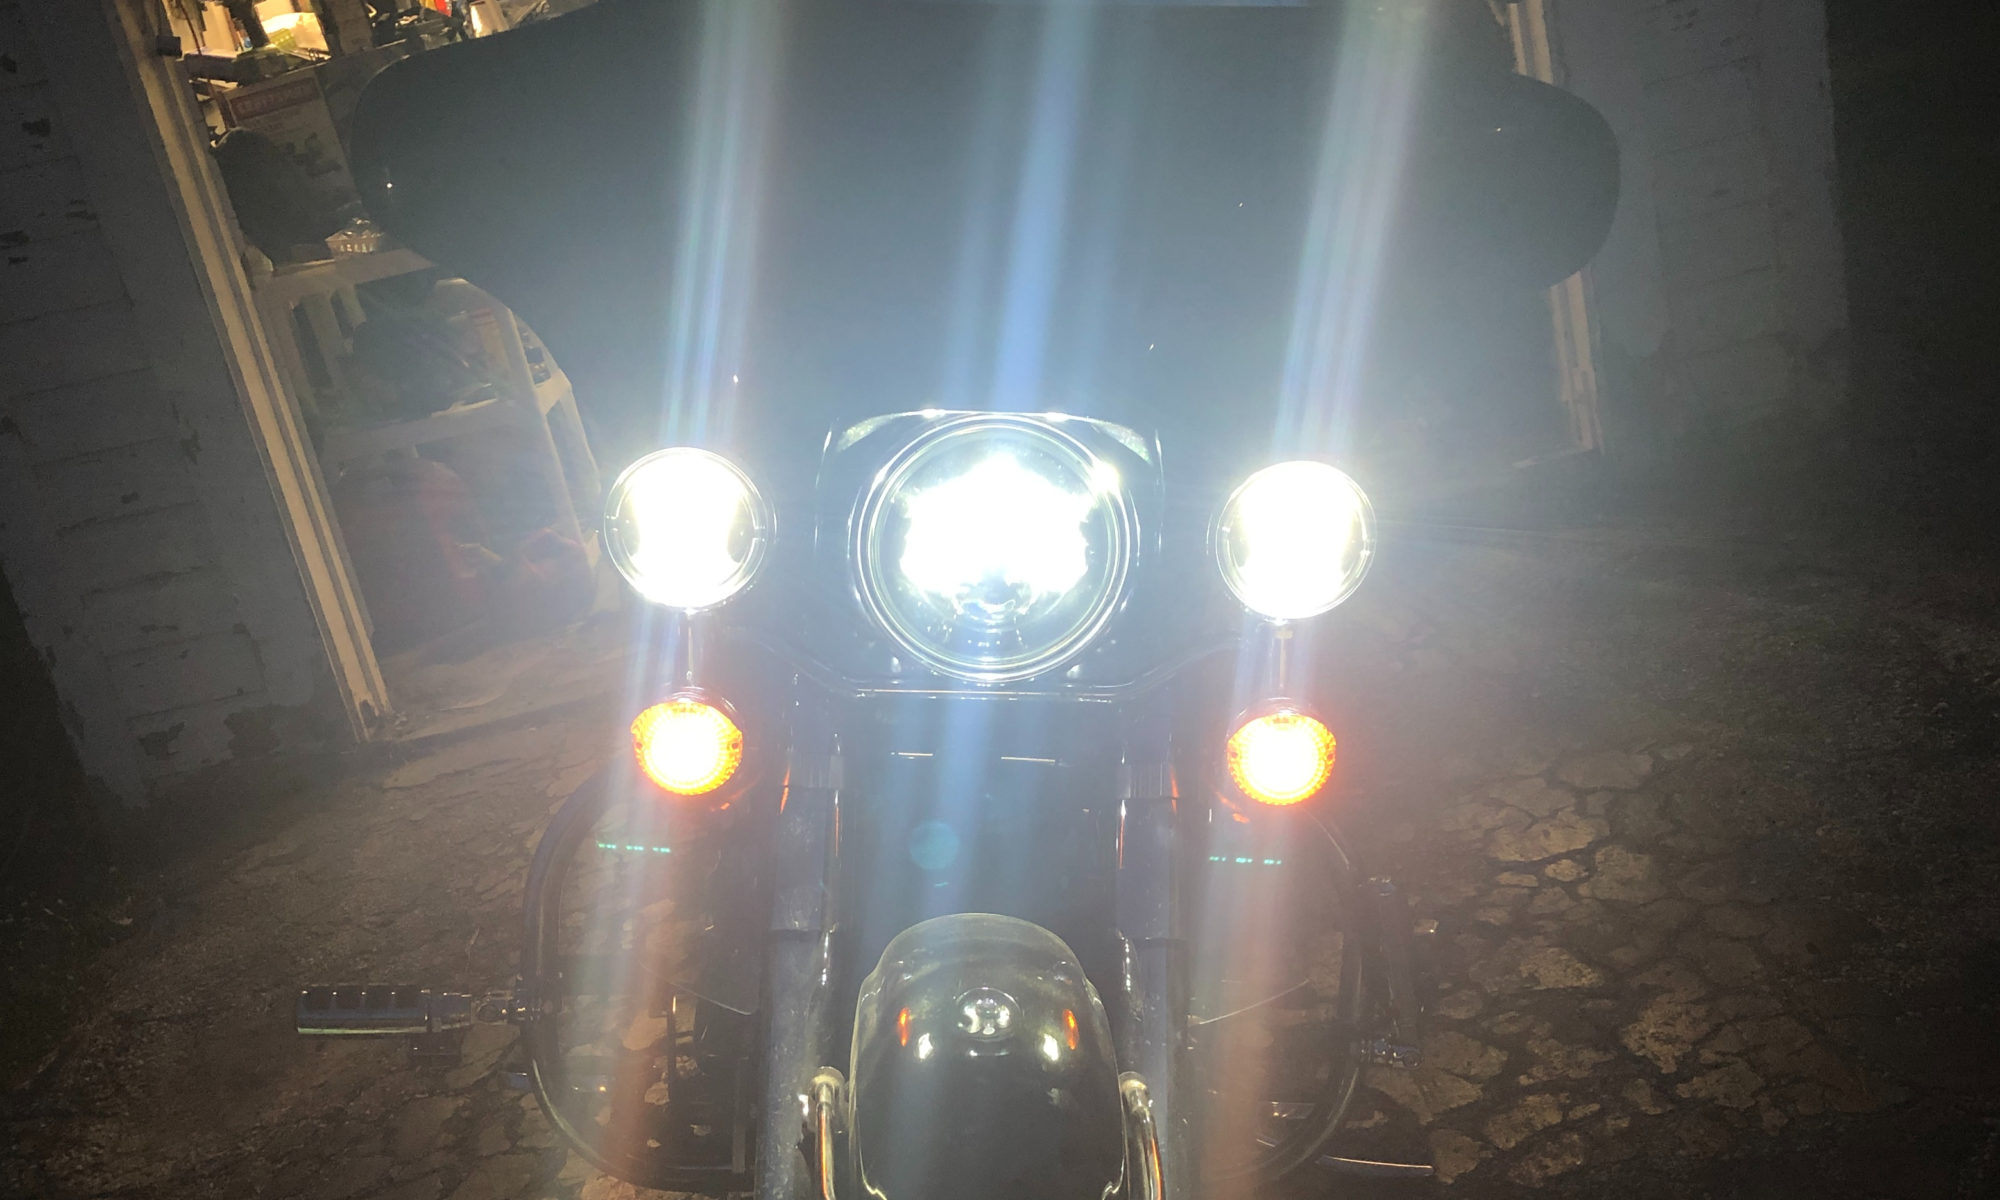
This is a great option to upgrade your factory lights and give you better visibility all around. There are a number of options out there but I got mine from Sunpie on Amazon (chrome version). At under $100 it is a great upgrade. They come in the silver or black version. The headlight is plug and play but the passing lights will require that you adapt them to your 4.7″ buckets or buy 4.5″ buckets. Both options require minimal adaptation/modification.
To adapt them to the 4.7″ buckets other owners report wrapping the outer rim of the passing lamp with black tape in order to make up the .2″. I don’t like the idea of using black tape to do that (for so many reasons) so I picked up some large O-rings. The O-rings measure 4 3/8″ ID and 4 3/4″ OD. This way they cling to the light. I tried using just one O-ring but the lights turned in the housing as I was driving. I ended up using two to keep them in place. I got the O-rings on Amazon – 348 Buna-N O-Ring, 70A Durometer, Round, Black, 4-3/8″ ID, 4-3/4″ OD, 3/16″ Width (Pack of 5).
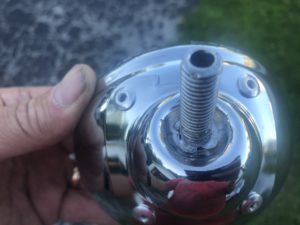
I wasn’t happy with this solution and didn’t like how they fit and looked. I also didn’t like the idea that they could vibrate out at any time. I ended up purchasing a set of 4.5″ buckets. I picked them on Amazon – SKTYANTS 4.5 inch Housing Bracket Mount Ring Bucket for Fog Passing Light Lamp Motorcycle Touring Electra(Chrome). There are number of different offerings but they all look to be the same. There is a bolt that is welded into the buckets that will need to be pushed out. Details and directions are as follows.
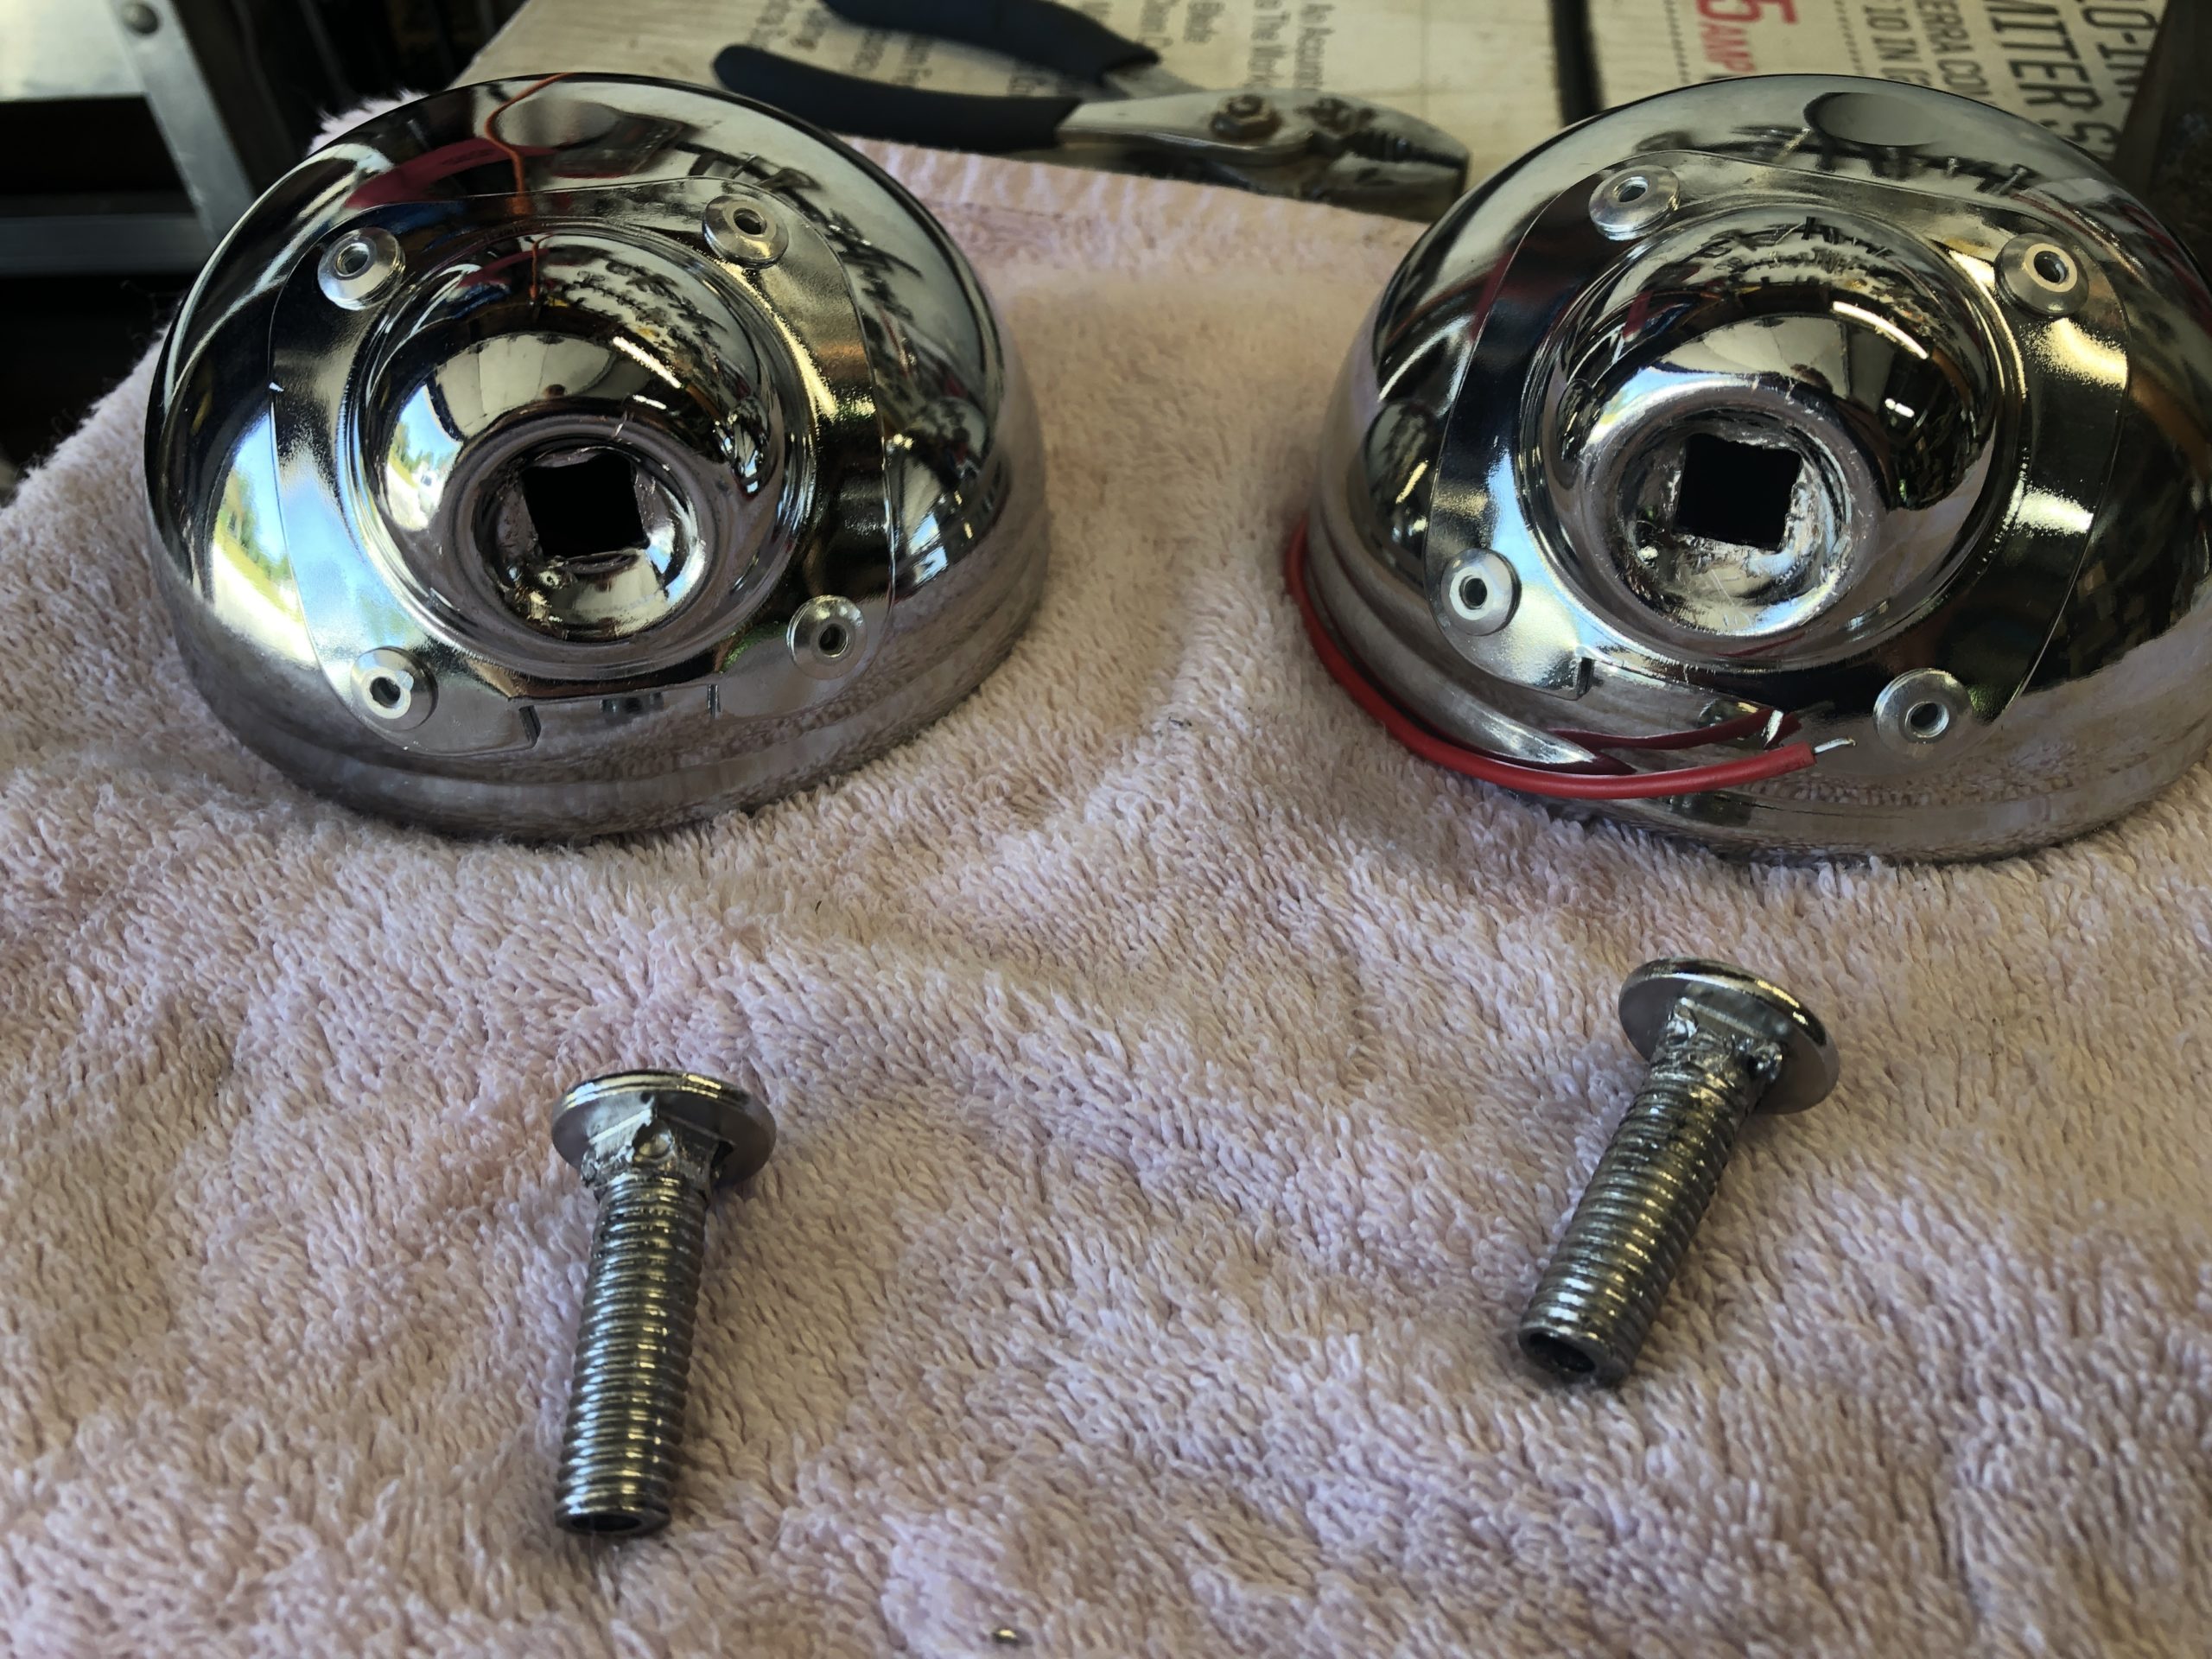
Pressing out the bolt from the new buckets
The bolts in my bucket were welded in the four corners. I suspect this is the case with most of them. They are small welds so I decided to work at the welds and try to remove them so I could push out the bolt.
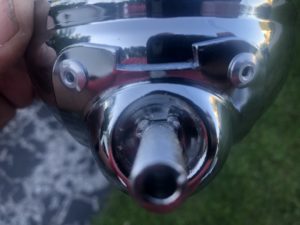
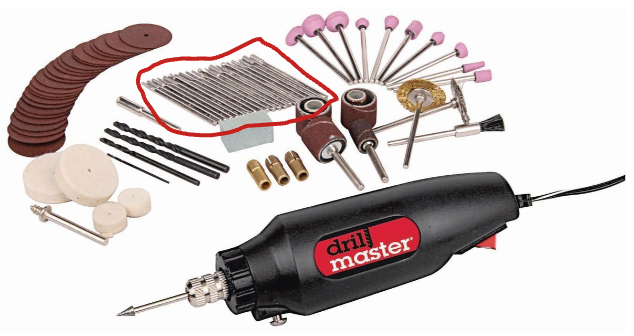
I ended up using a drill and the bits from my Harbor Freight Rotary Tool to work at the welds and break them up. I used the little grinding parts (circled). I found that the little bit with a circle cutter on it to work the best. I broke it or I would post a picture. I couldn’t find the chuck to hold those little bits in the rotary tool so I just used my drill.
Once I broke it up enough I used a hammer and pushed the bolts out. Michael Ellersick suggested that you “place the buckets open side down on a towel or rubber mat so it doesn’t scratch the front. Hold it firmly and wack the bolts into the bowl. A few decent hits (don’t go Hercules on it) and it should be loose enough to wiggle it loose. The Yamaha bolts should slip through and tighten down.” I gave it a couple nice blows and it pushed in a couple corners of the bolt which allowed me to wiggle the bolt and get it free. Pliers are handy when trying to do this. There are a few blemishes on the bottom but nothing major that affects the look or use of the buckets.
To install them you will need to remove your Yamaha bucket. Pull the ring that secures the lights, unplug and remove the lights. In the lefts side bucket (where the switch is) you will have a wire adapter that plugs into both of the connectors on the bike. Pull that and it will leave you will two connectors: one to the other light and one to power. Remove the bolts that secure the buckets. Once removed, you will need to carefully feed the wires through the hole in the bolt. I did it one at a time and was able to keep the connectors intact.
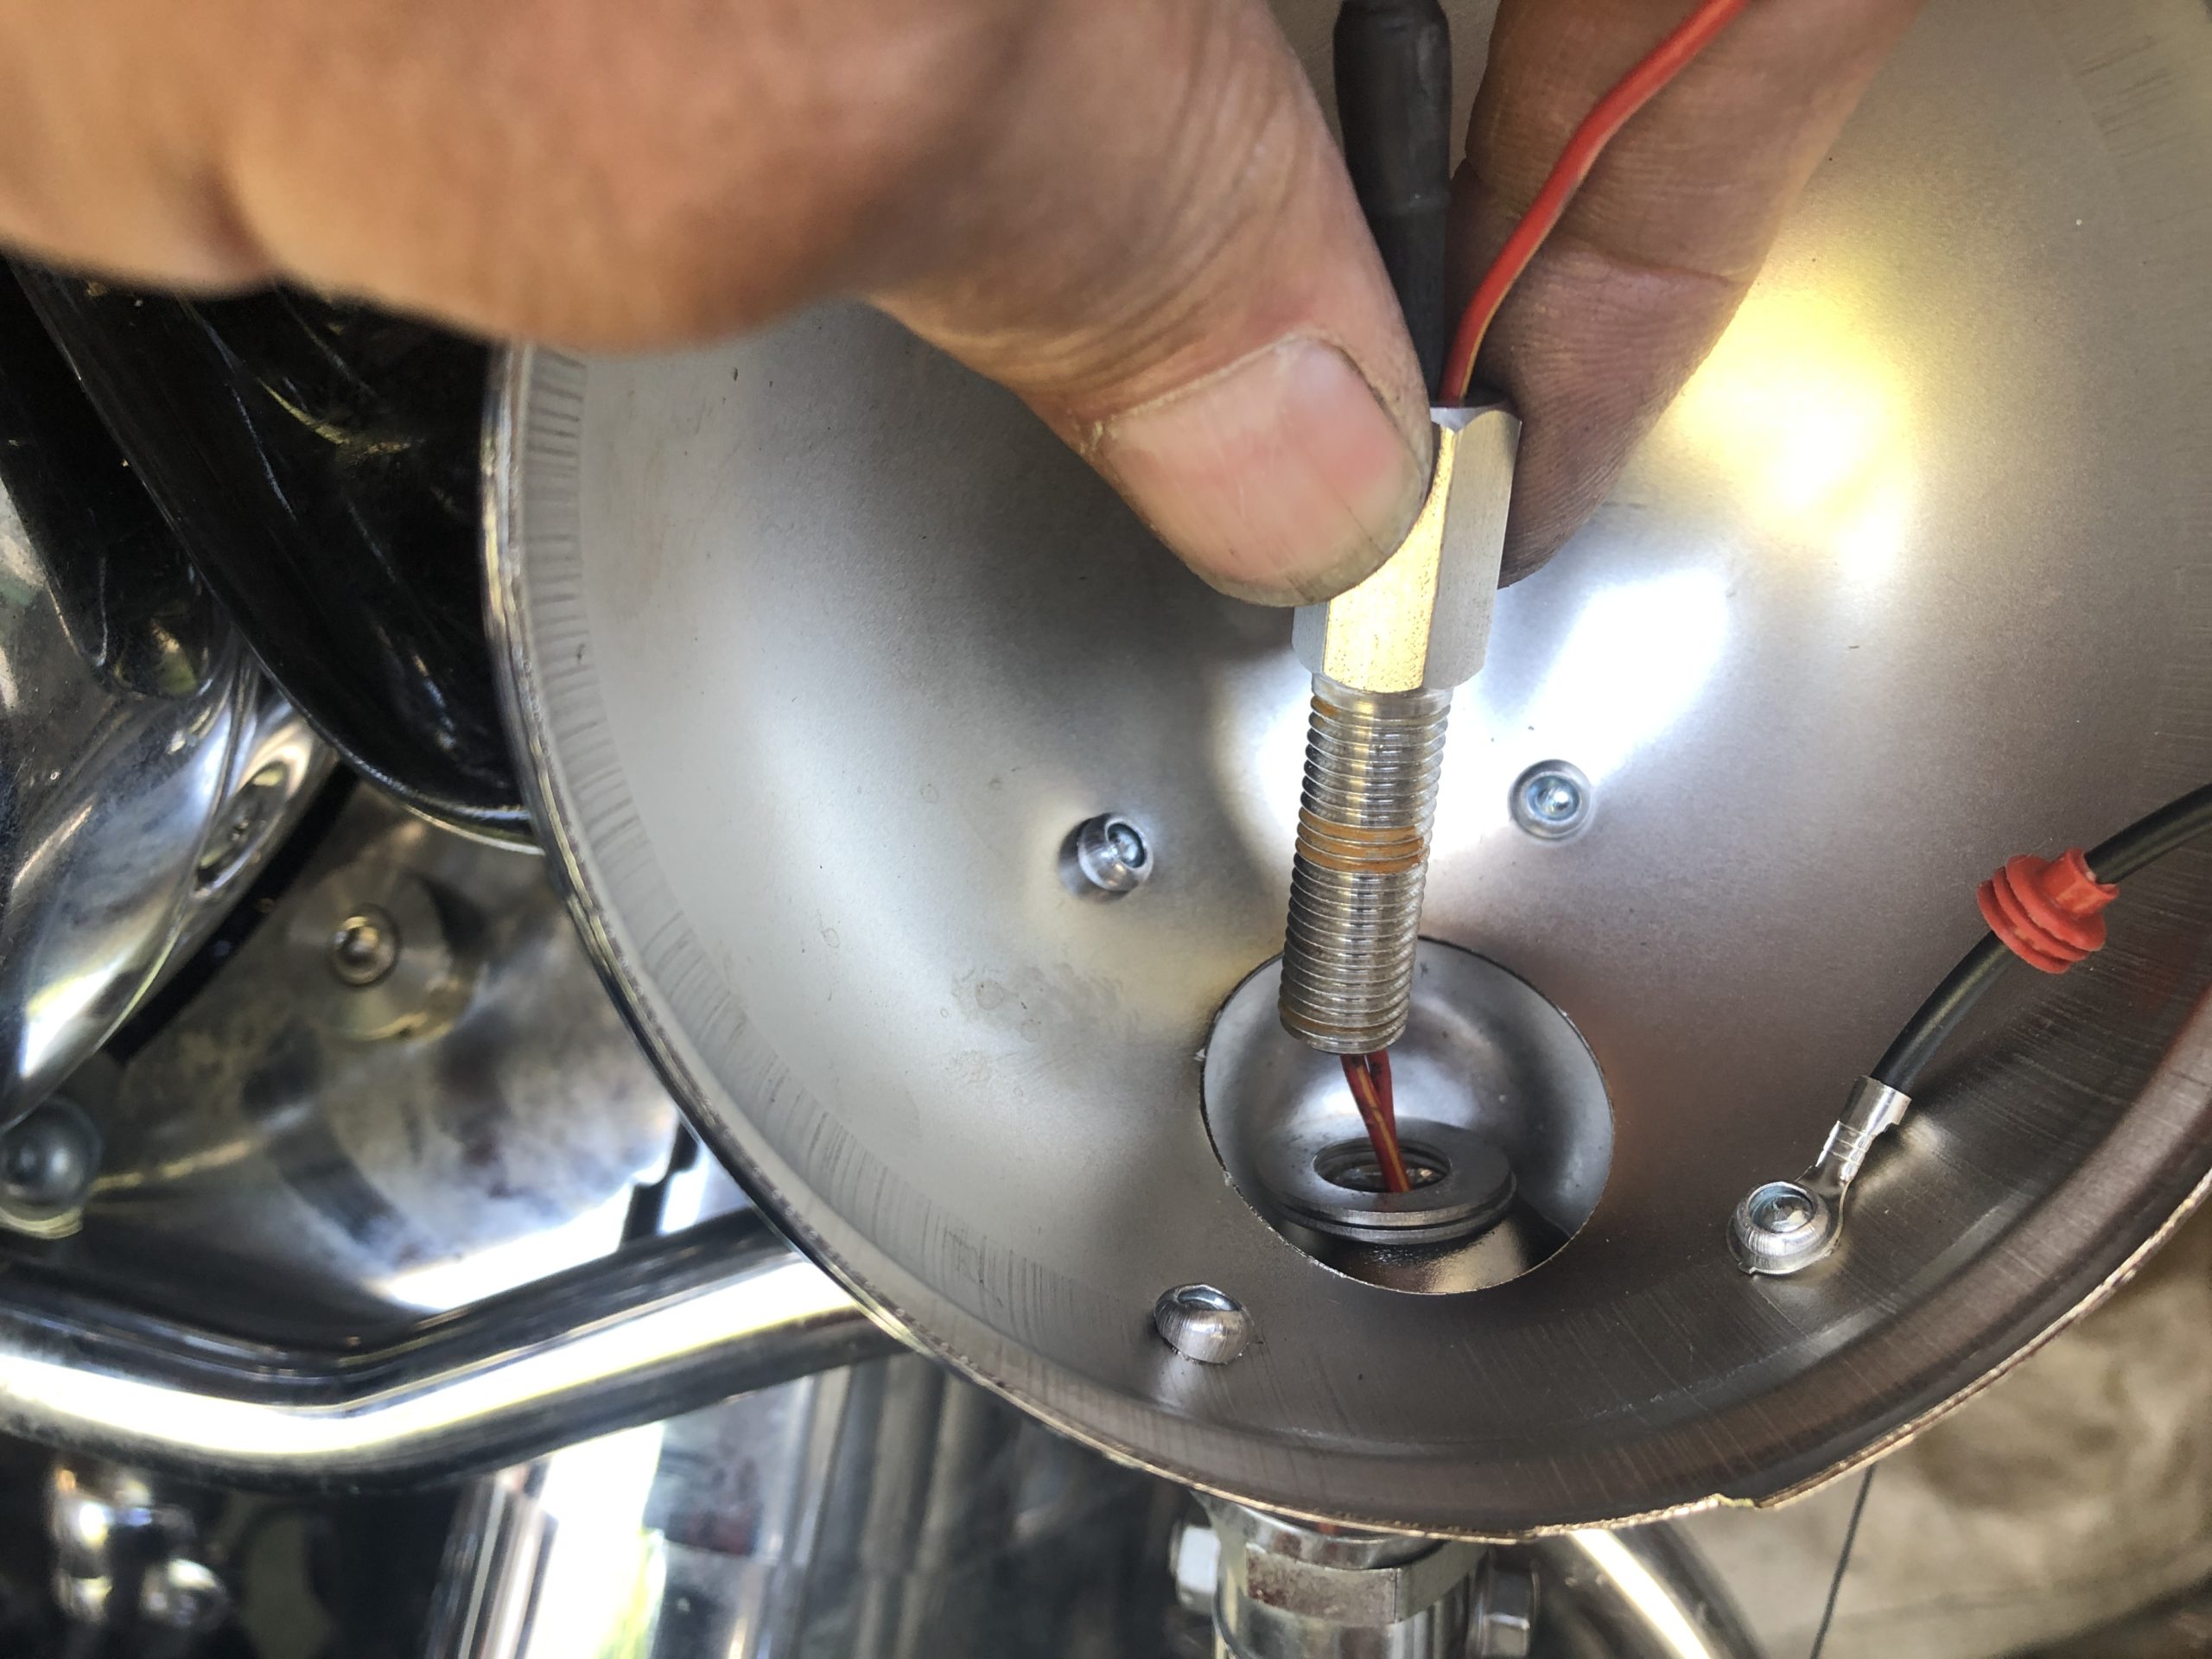
There is a washer in there so be sure to re-use it. With the new lights you will need to wire connectors to the wiring provided with the lights. The buckets I bought came with a connector and it didn’t fit properly to the Sunpie lights. So I used a straight pick and pushed it into the front of the black wire side (connector on the buckets) to release the terminal. I did the same thing to the connector provided with the lights. Then I pushed the black terminal (from bucket) into the connector that fits the lights. Very easy process, just be careful you don’t mess up the connector. It will snap into the new connector.
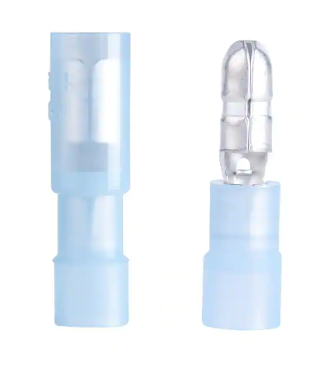
You can get bullet connectors from Home Depot that will connect to the OEM Yamaha bullet connectors.
I created a Y so that I could connect to both wires from the one wire off the light. I soldered the connection of the wires (on the Y connector) and used heat shrink tubing to cover it. You will want to ensure that connections are covered since this is the power side. Exposed wires will short on the bucket and blow your fuse. The other side only needs one connector. You will need to crimp a connectors on the negative wires connected to each bucket as well.

When installing the new lights you may want to use blue thread locker to help keep them in place. I never had issues with my buckets or blinkers turning but they were assembled from the factory. Keep in mind that you will need to direct the lights properly. It is not a difficult process but you will need to pay attention to it before you install the light and retainer ring since you cannot (don’t want to) turn them after they are assembled.
Reach out if you have any questions, etc.