Starter Clean & Rebuild
My bike is 19 years old at the time of writing up this tutorial and my starter is due for a rebuild. I had my battery tested by two stores and both returned a good report. I upgraded the cables with Dave Jenkins’ kit. But lately my starter doesn’t want to turn. It will engage but will not always turn. It is not the classic clicking sound. The starter engages and begins to turn but won’t go. So I decided to order a rebuild kit and go for it.
I watched a few videos but there weren’t any that were Road Star specific except one, but it wasn’t very instructional. I did watch a 3-part video that gave details on disassembly, cleaning, testing and reassembly of a starter from a four wheeler. They were very helpful in my preparations to do my rebuild (referenced below). I also referenced the repair manual. I provided an excerpt of what I used below.
Download the repair manual excerpt
Details and Instructions
Before you begin I suggest you watch the videos and look through the excerpt of the manual that I provided. This will give you a good foundation to perform the rebuild.
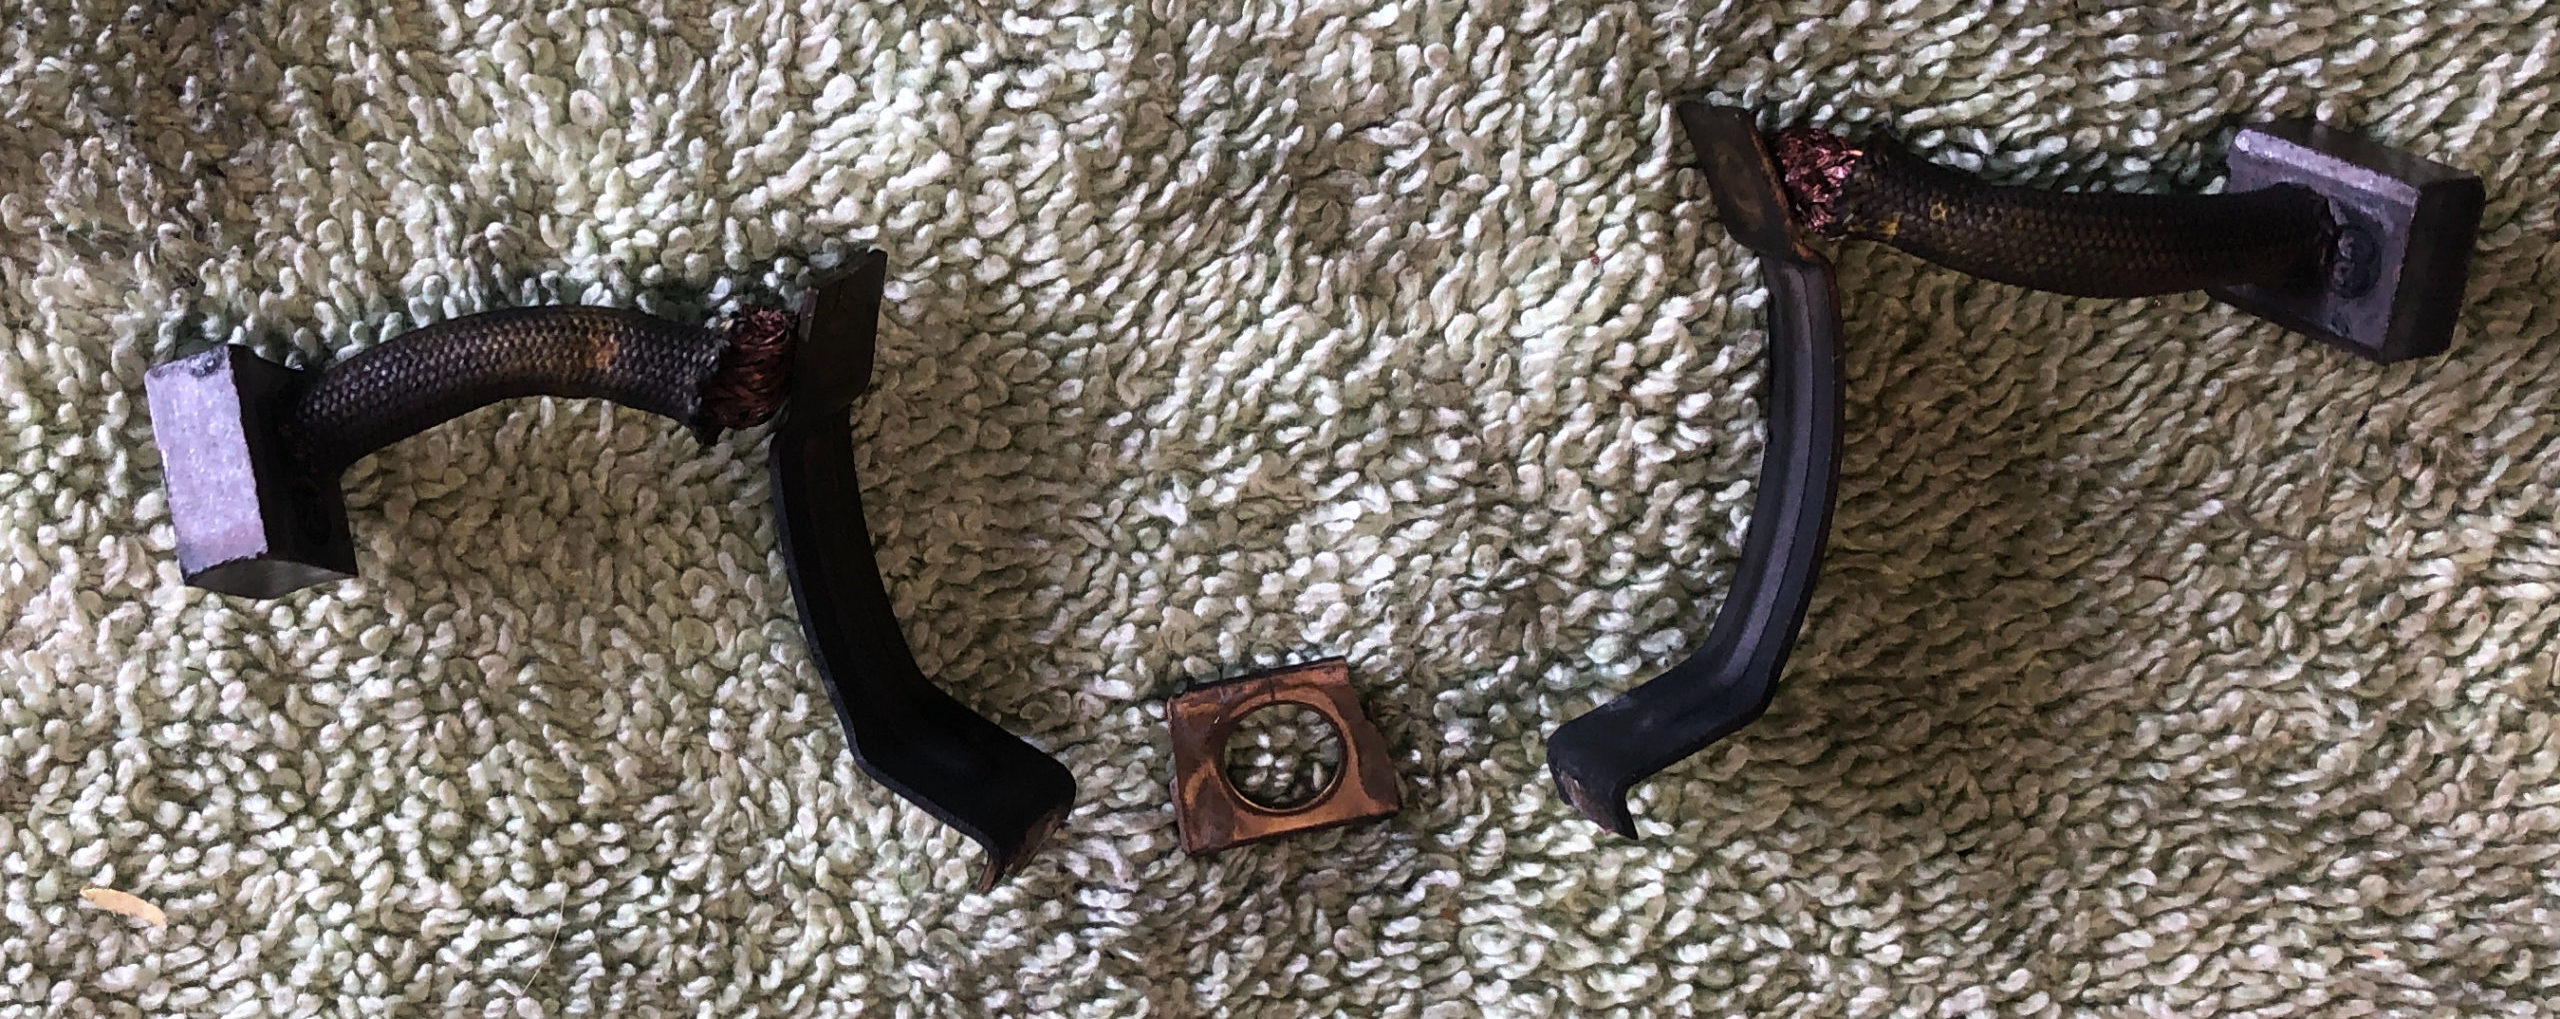
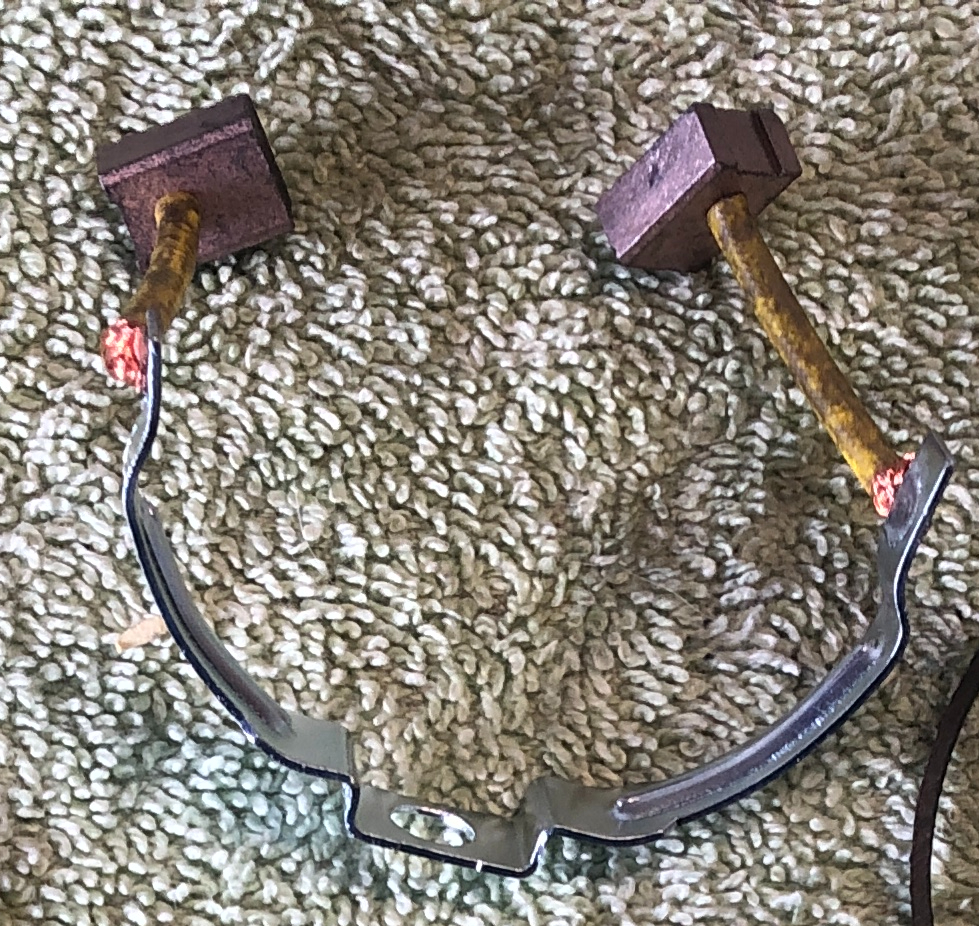
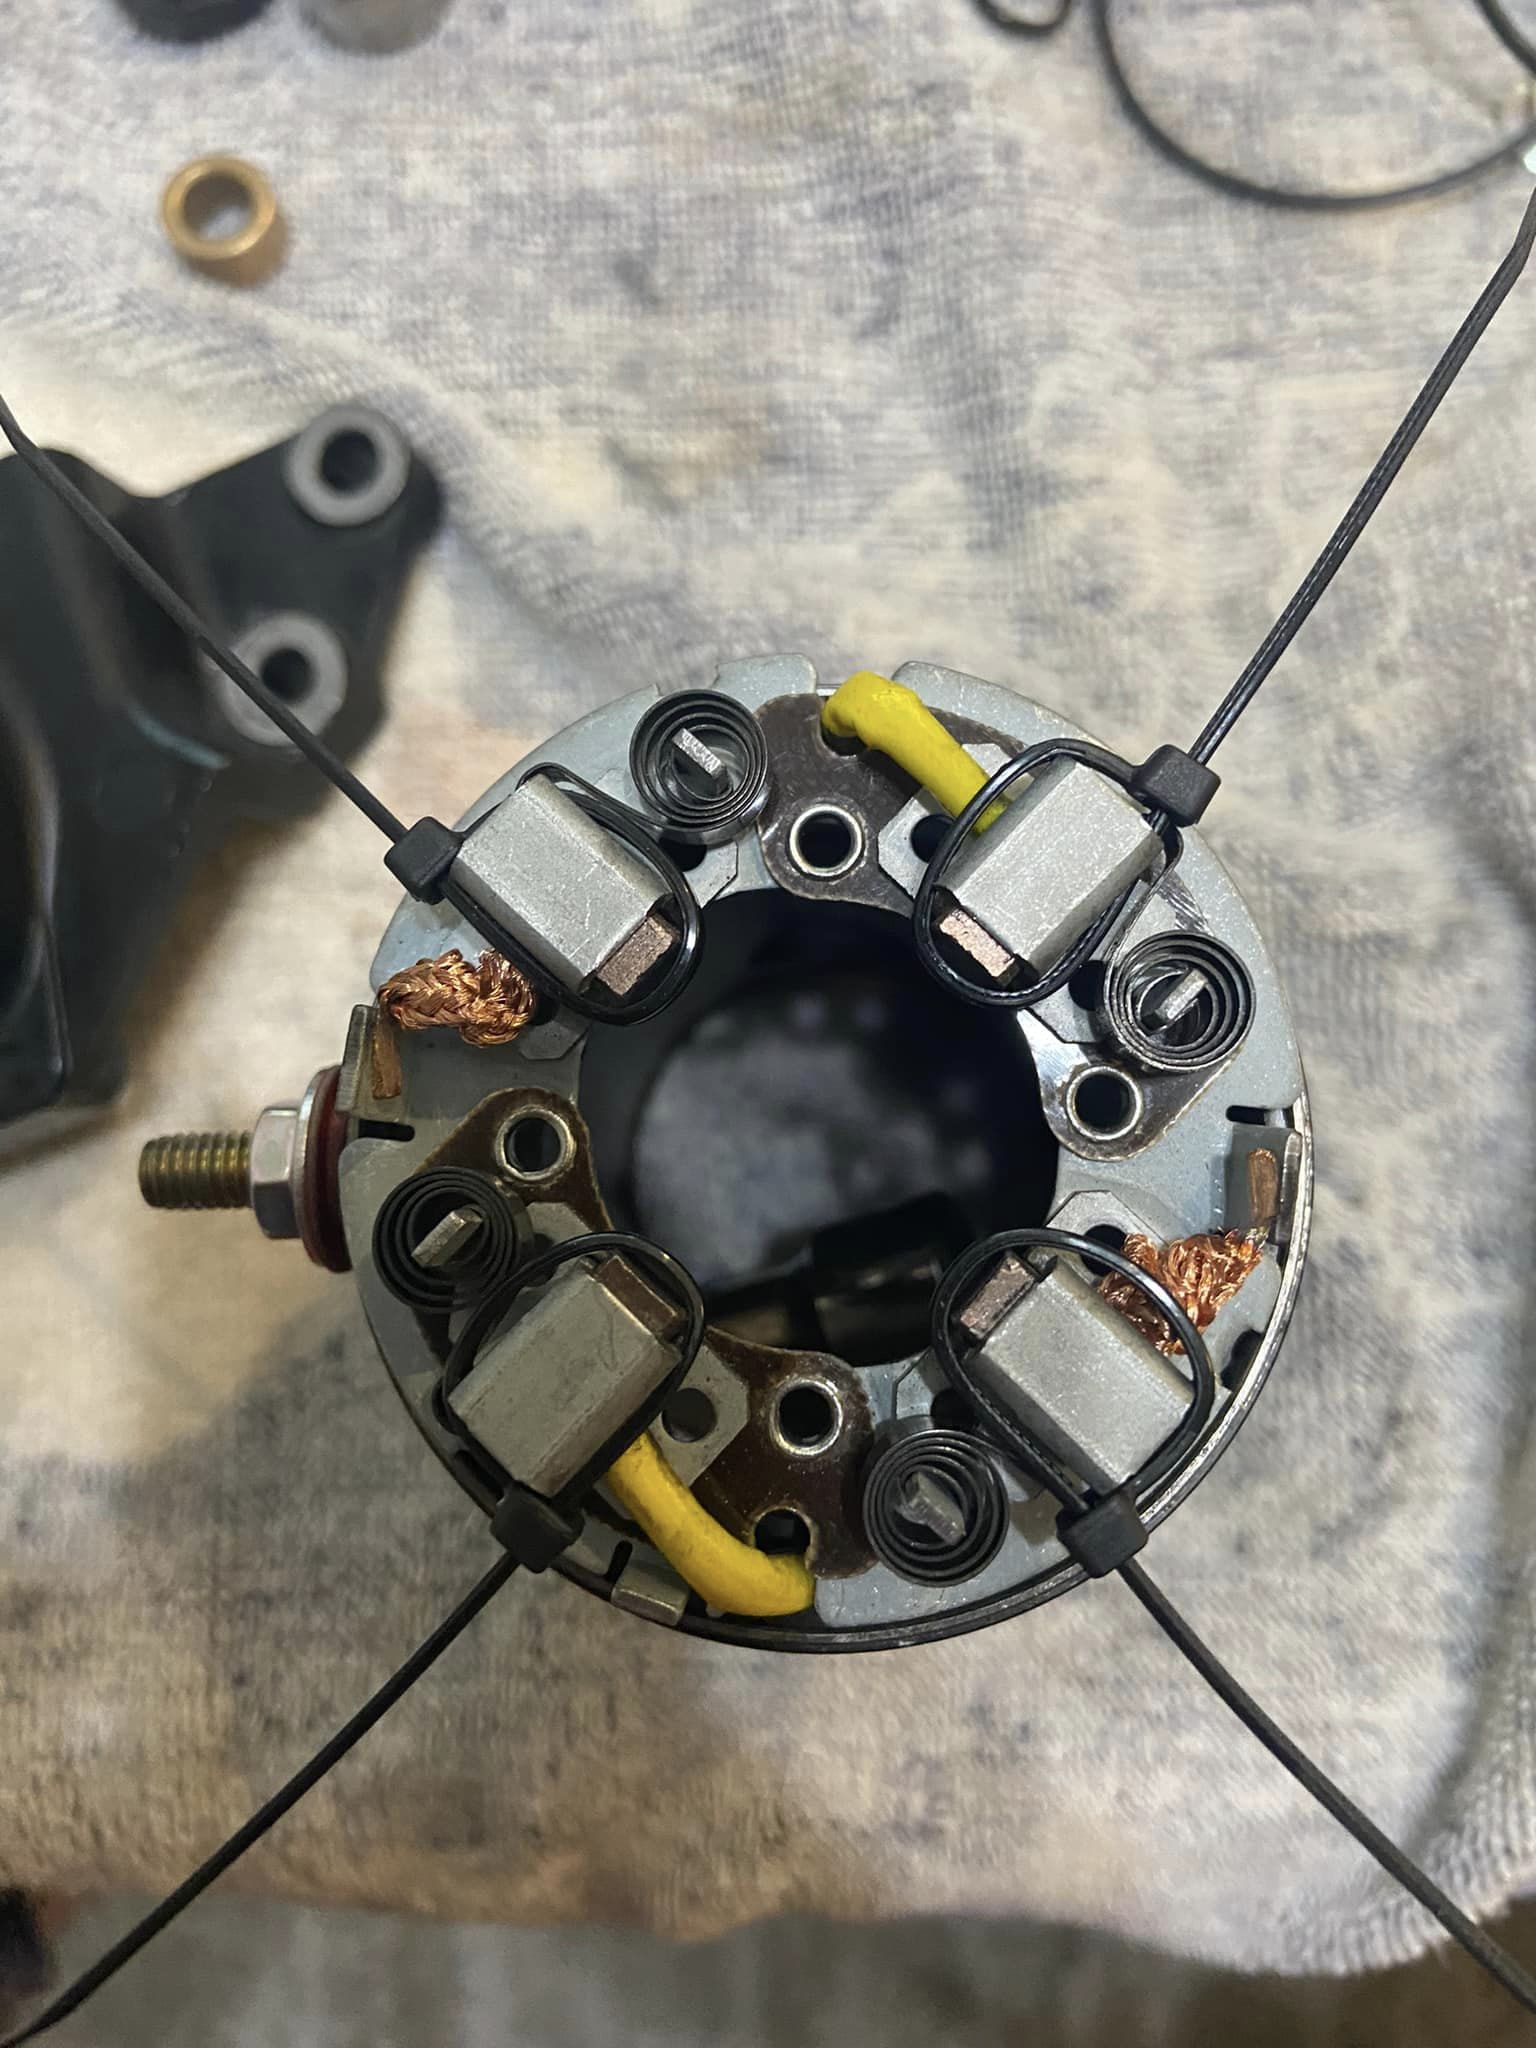
When I first opened my starter I wondered why I was having an issue with it. Everything was found to be within spec and nothing looked out of order. My battery tested as good (by two different shops) and I had recently upgraded my wiring to the wiring kit that David Jenkins sells (highly recommended). My starter would work sometimes but most of the time it initiated but wouldn’t turn. When I received the new kit I realized what my problem was. The positive brush holder that hugs the yoke was broken on both sides of the connecting bolt. In addition, part of it welded itself to the connecting bolt assembly. This is a common result when you have loose or bad connection(s). I had to file it a bit so it would fit in the new brush holder.
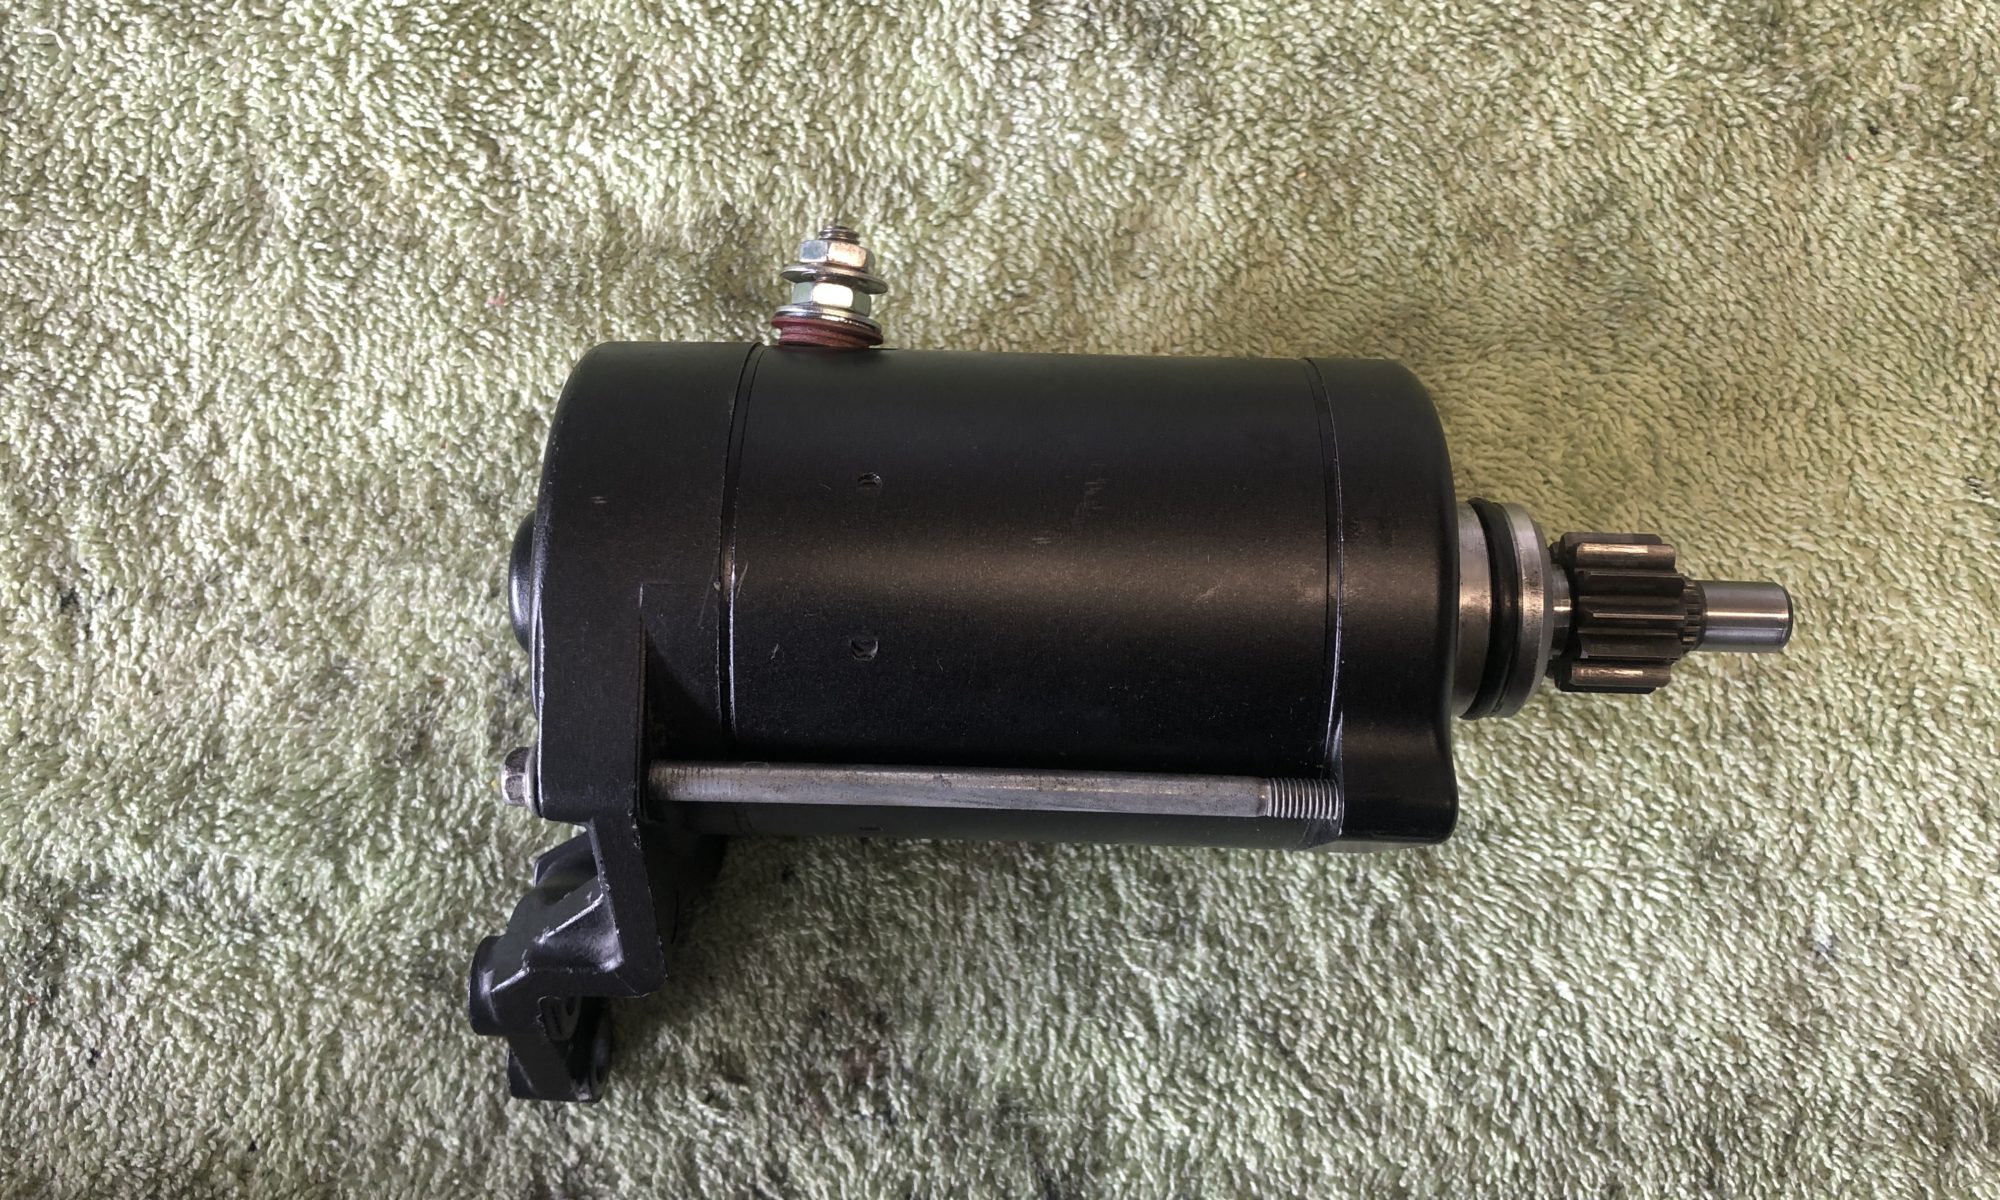
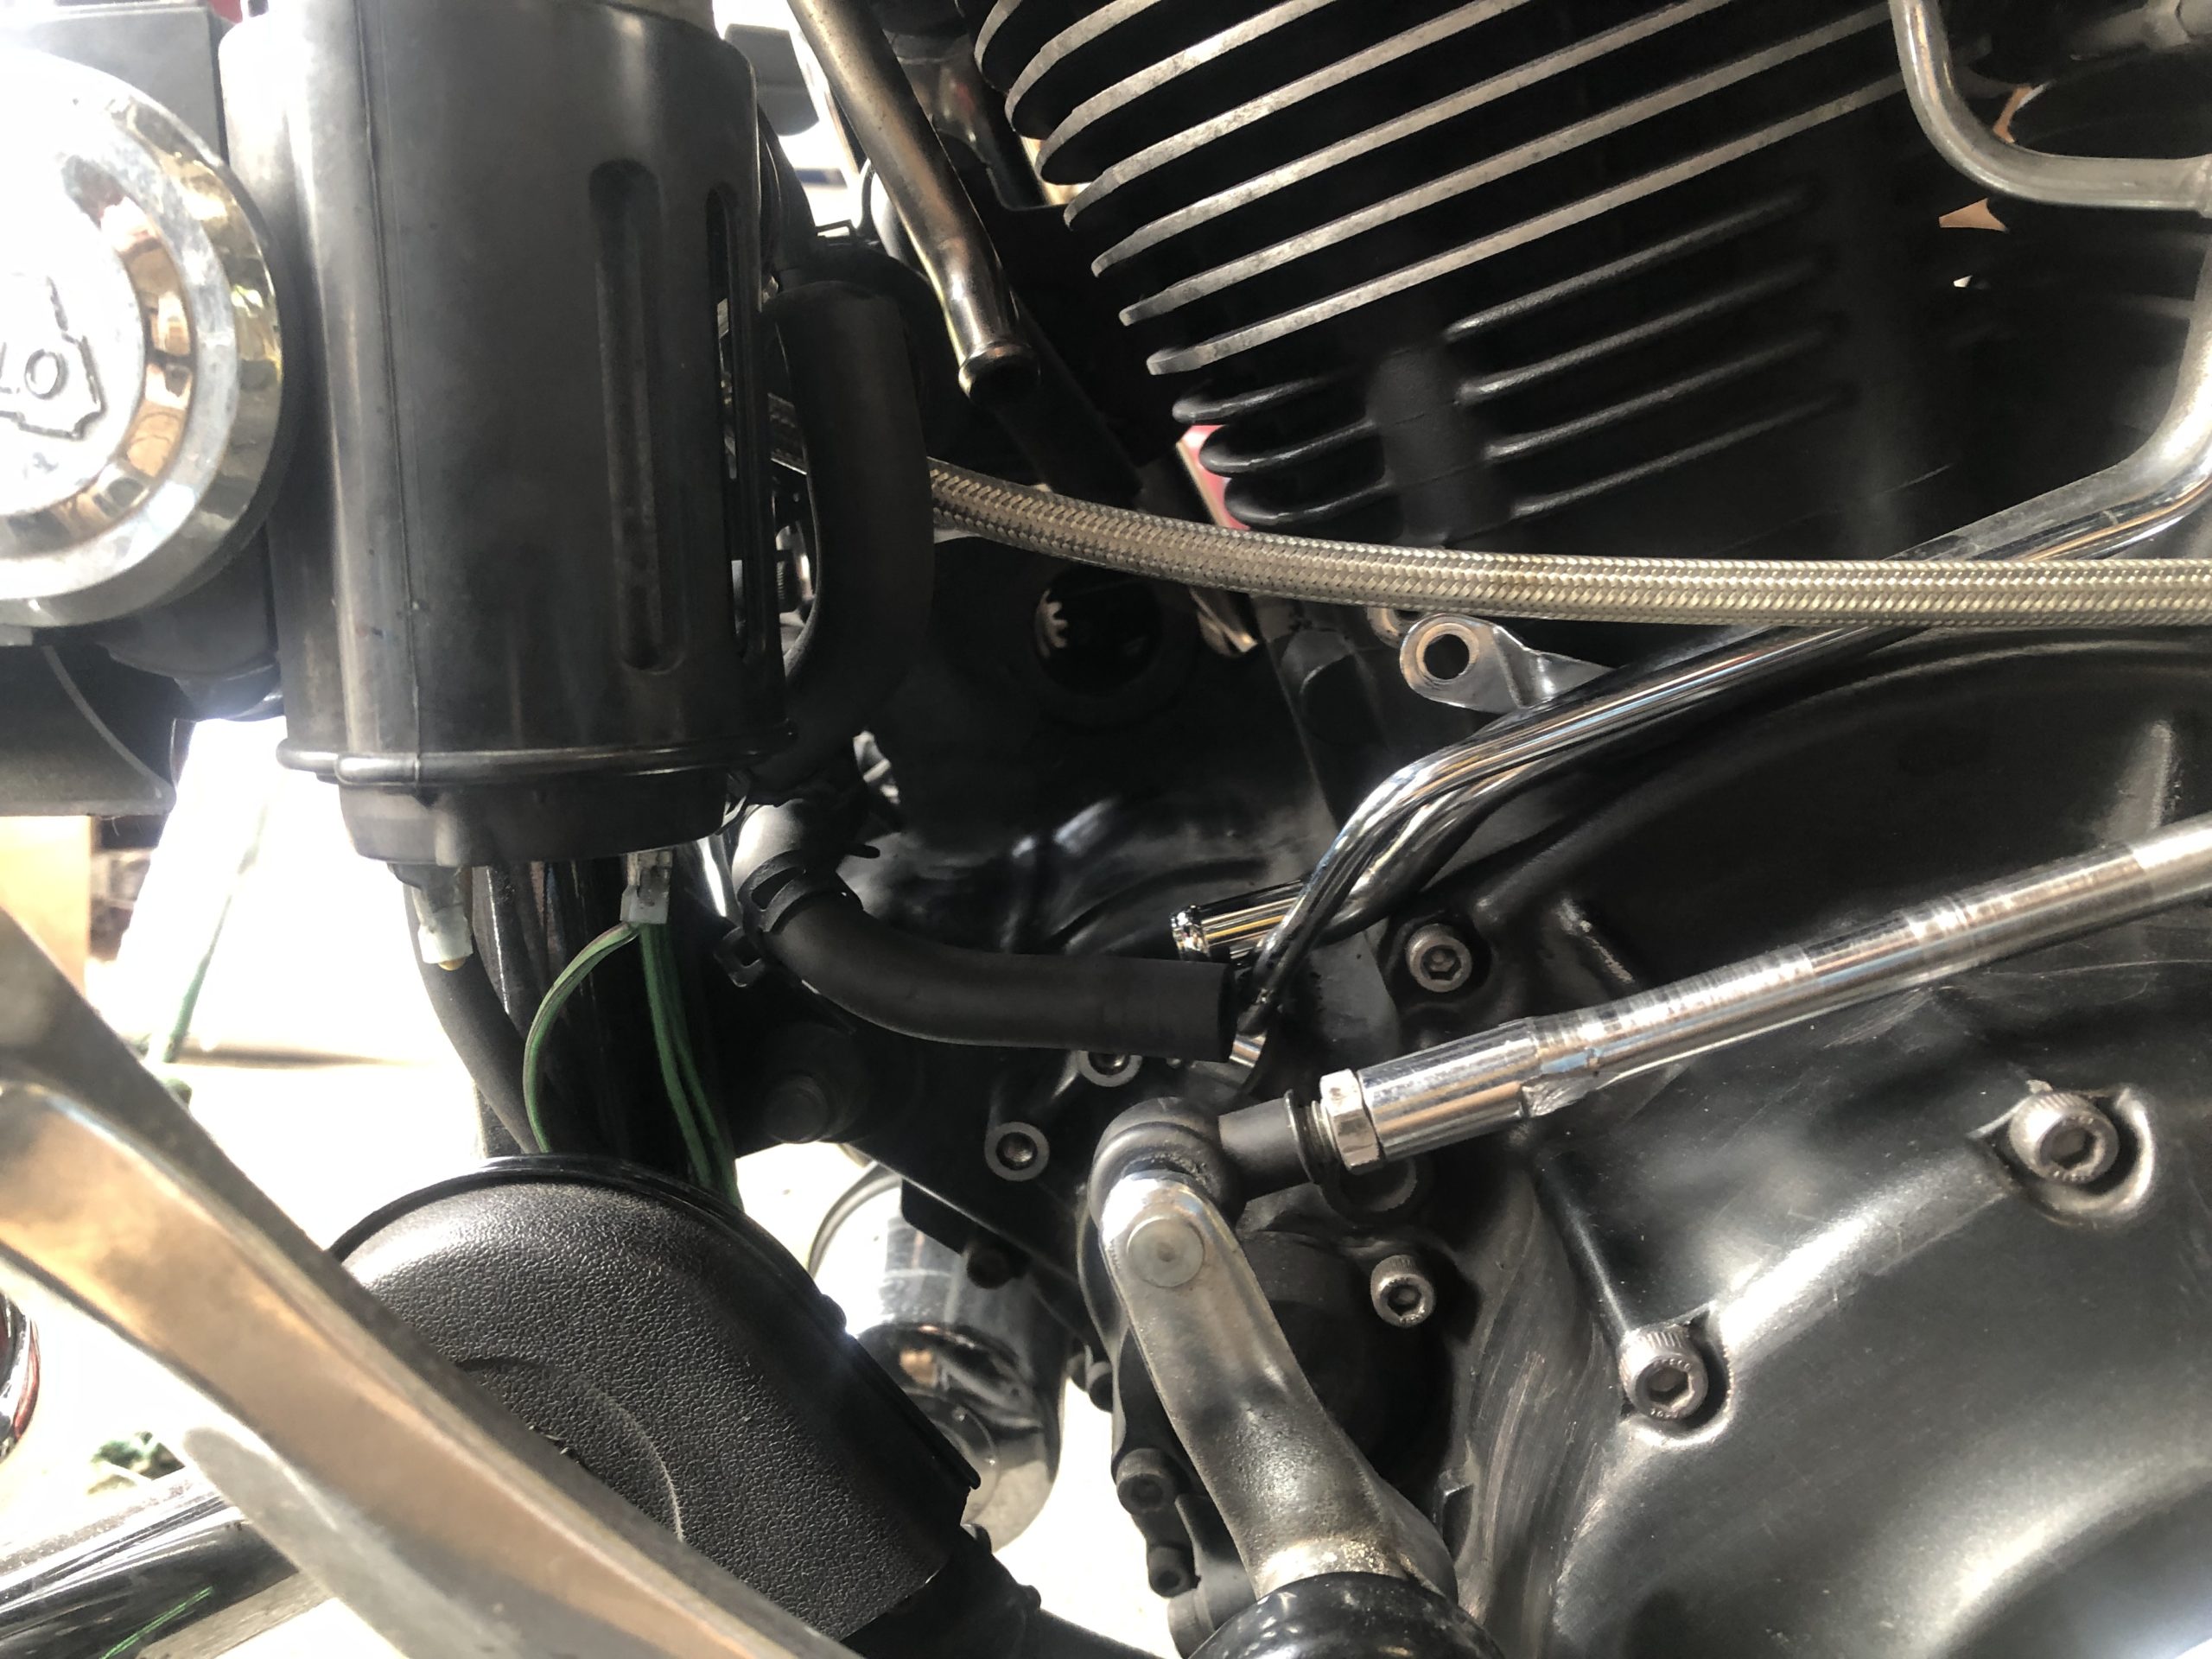
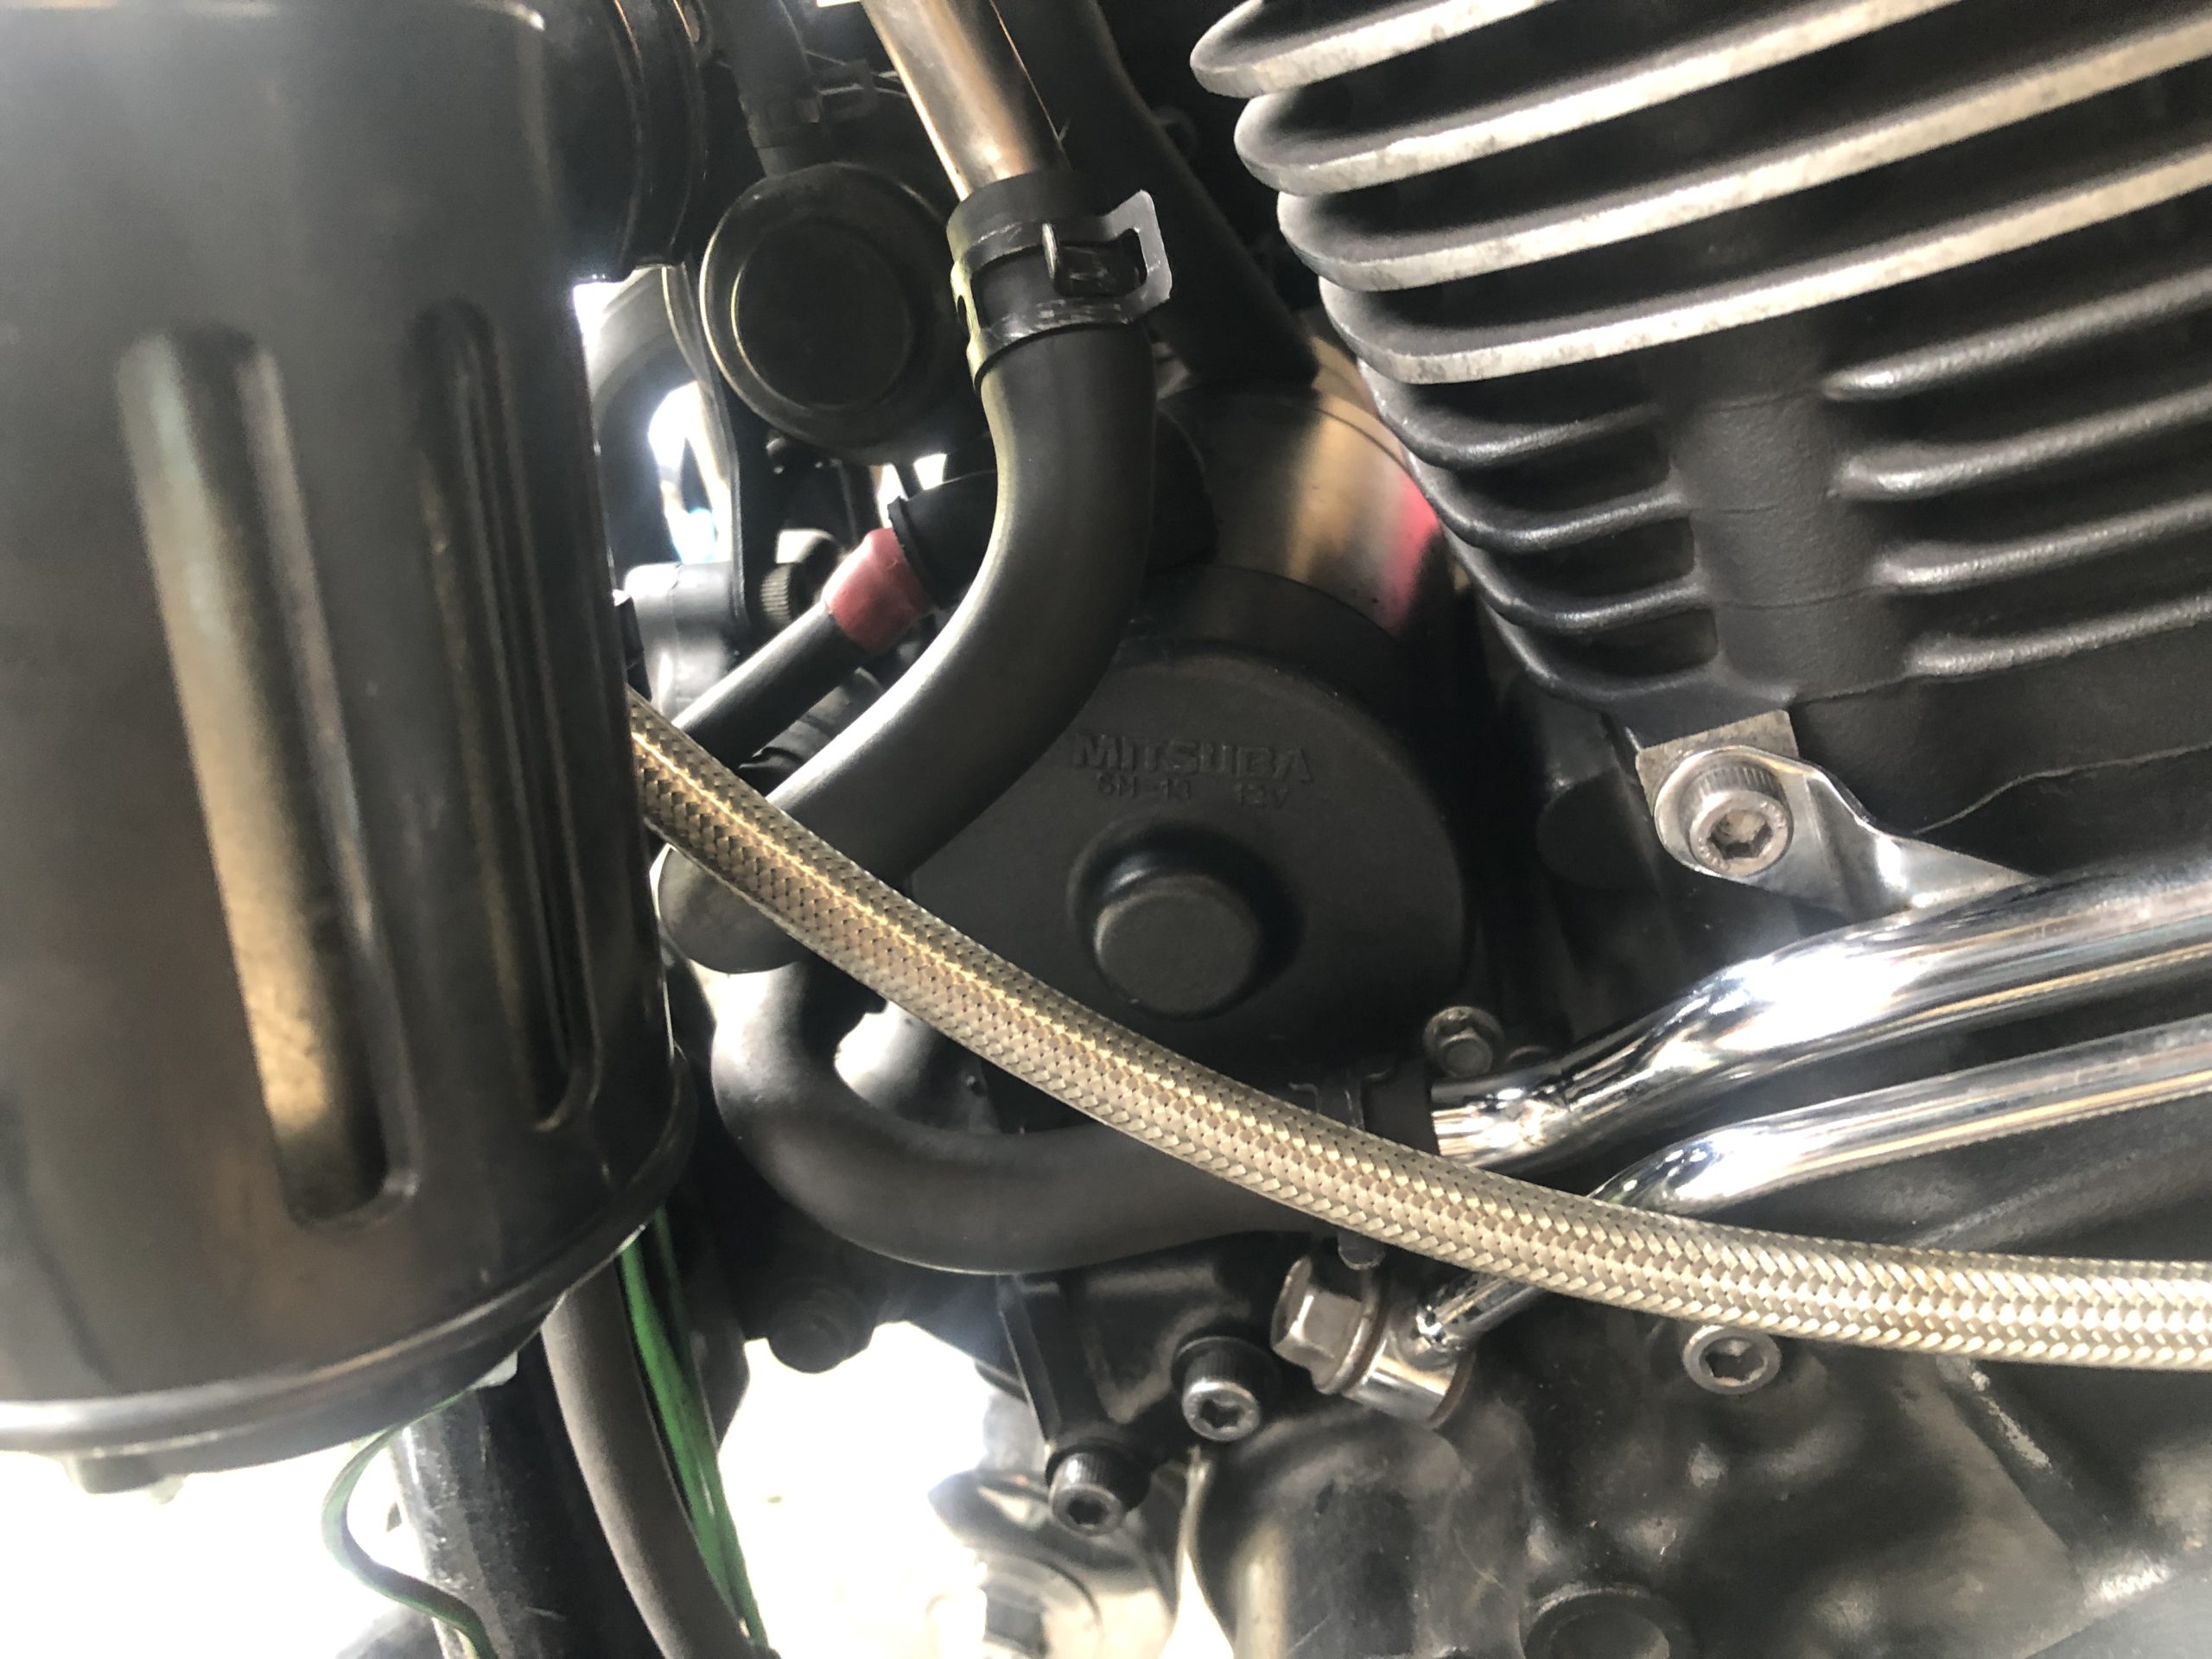
The most difficult part (for me) was getting the starter out. I had to break it loose from the front with a screw driver, using the frame as leverate. Once it is out of the case, you need to twist it a little to get it around the AIS lines. I disconnected both AIS lines. I removed the bolts on the AIS line towards the rear which made it much easier to get it out and back in.
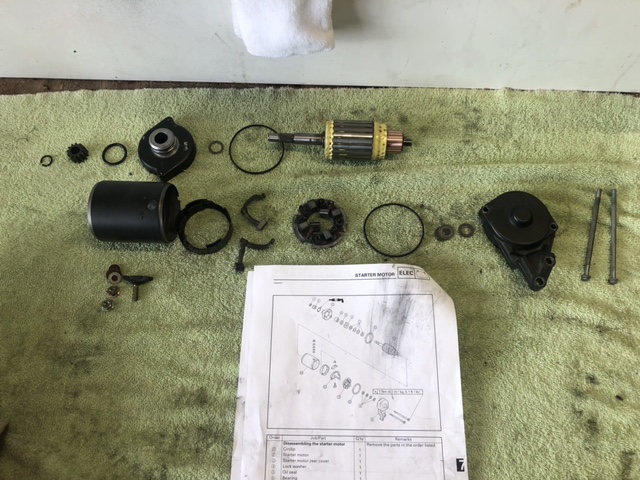
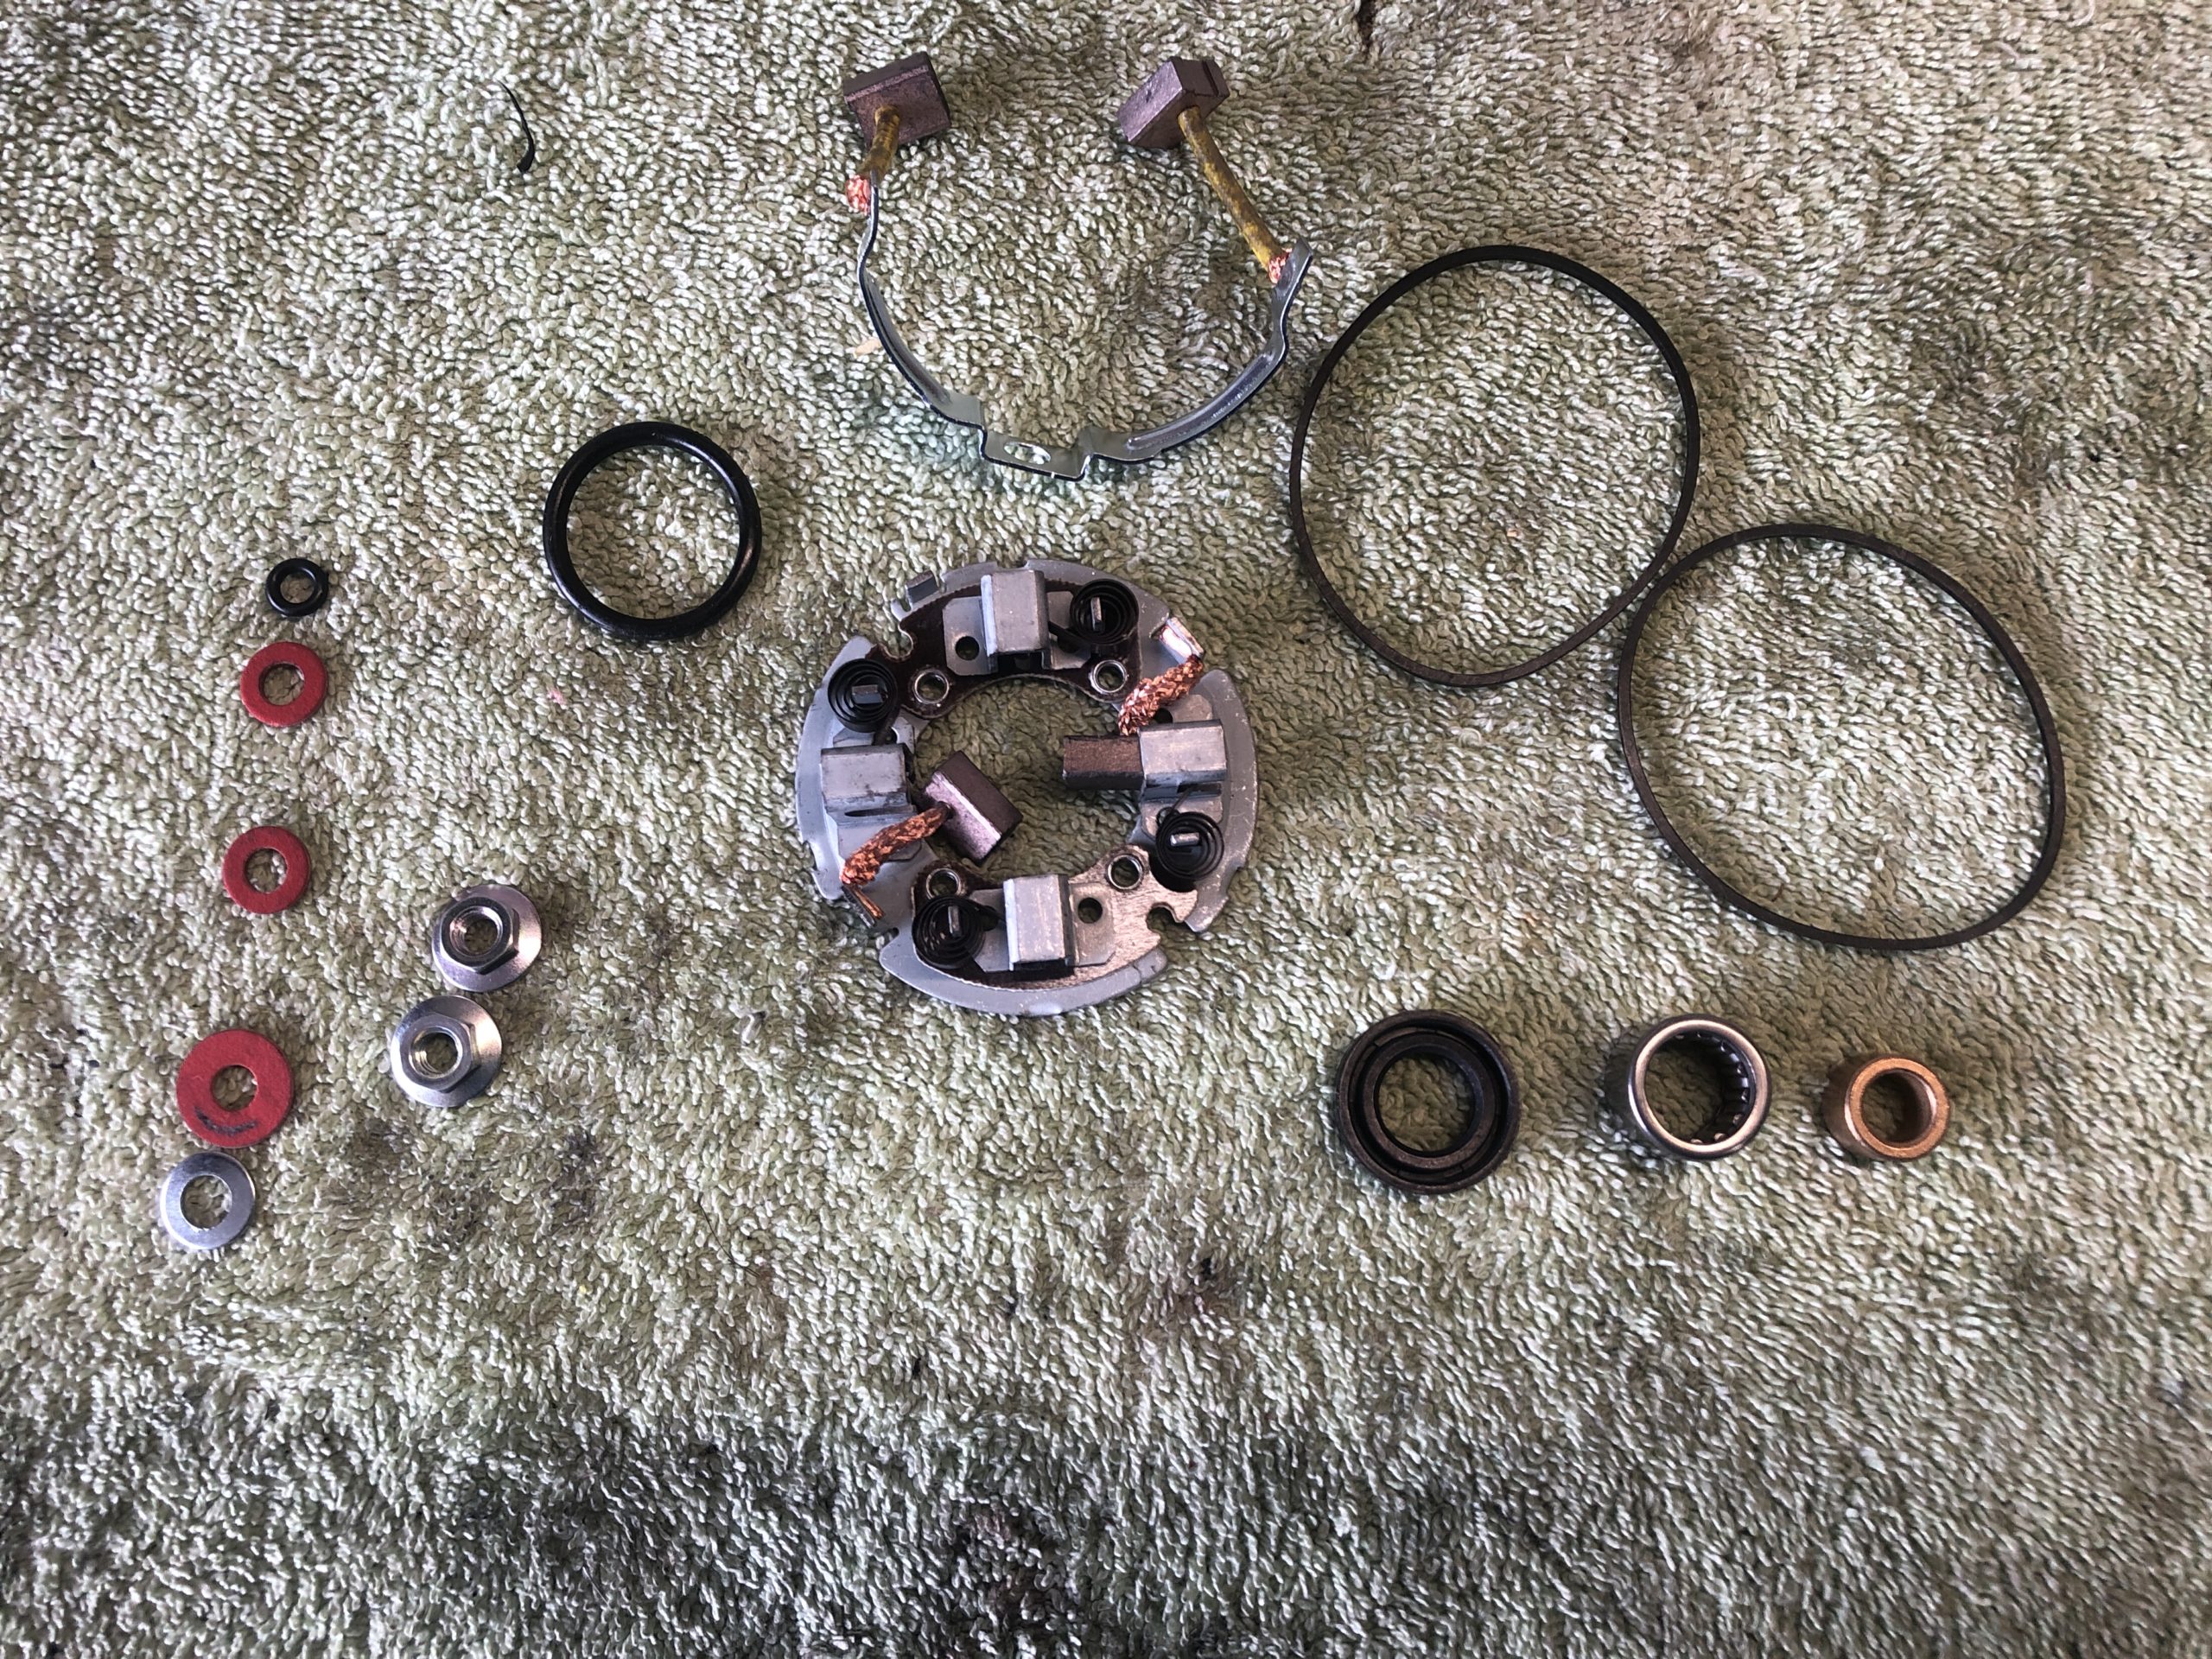
It is always a good idea to pay attention when you take it apart. There are small washers and spacers on the commutator and armature sides. The washers and spacers may stick to the magnets as you disassemble it. Here is a picture of mine disassembled. There were not as many spacers as the manual indicates
I used carburetor & choke cleaner and denatured alcohol to clean the inside and out of the parts that I reused. I didn’t clean the new parts. My starter was a little dusty but otherwise pretty clean. Some guys like to paint their starter while it is off. My paint was in great condition so I left it.
You will want to test the commutator and armature for continuity and make sure it is not shorted. The part 2 video below will show you how to test it.
I bought a rebuild kit from a company named Rare Electrical. They have a website but it was very easy to purchase it on eBay. They also offer it on Amazon but it was cheaper on eBay. I did not use the oil seal or bearing. My oil seal was intact and the bearing worked without issue. The bearing included with the kit was different than OEM and not as good, IMHO. I didn’t swap out the bushing in the front cover either (pictured below, bottom right – brass). Mine was clean and not worn. I didn’t like the nuts that they provided with the kit so I used my old ones. The washers turned on the new ones which make it hard to feed it on the starter after install.
The brushes are spring loaded. I used tooth picks to hold the springs back so that I could push the commutator in place. Others suggest using zip ties. I found it very easy to use the tooth picks but to each his own.

Zip Tie Method
I used a little grease on the two large o-rings as well as the o-ring on the rear cover (that feeds into the case).
I had to navigate past the AIS system lines as well as the my Bad Boy WOLO air horn. It wasn’t that hard.
I can tell you that my starter fired up the fastest I have ever heard it and the bike started right up. My battery is at least four (4 ) years old but still tests good (by two different shops). I recently upgraded my wiring to the wiring kit that David Jenkins sells (highly recommended). I know my stater works as it should. I will likely upgrade my battery this riding season. If not then it will be an upgrade I make next Spring. A battery that has been recommended to me is by Wicked Start. It is a 500 CCA battery and fits our bikes without issue. It is more expensive but considering our starters need the power it is a great option for our bikes.
Videos
This is a 3-part series on removal, disassembly, cleaning, rebuilding and reinstall of a starter. –
Part 1
Part 2
Part 3
Reach out if you have any questions.