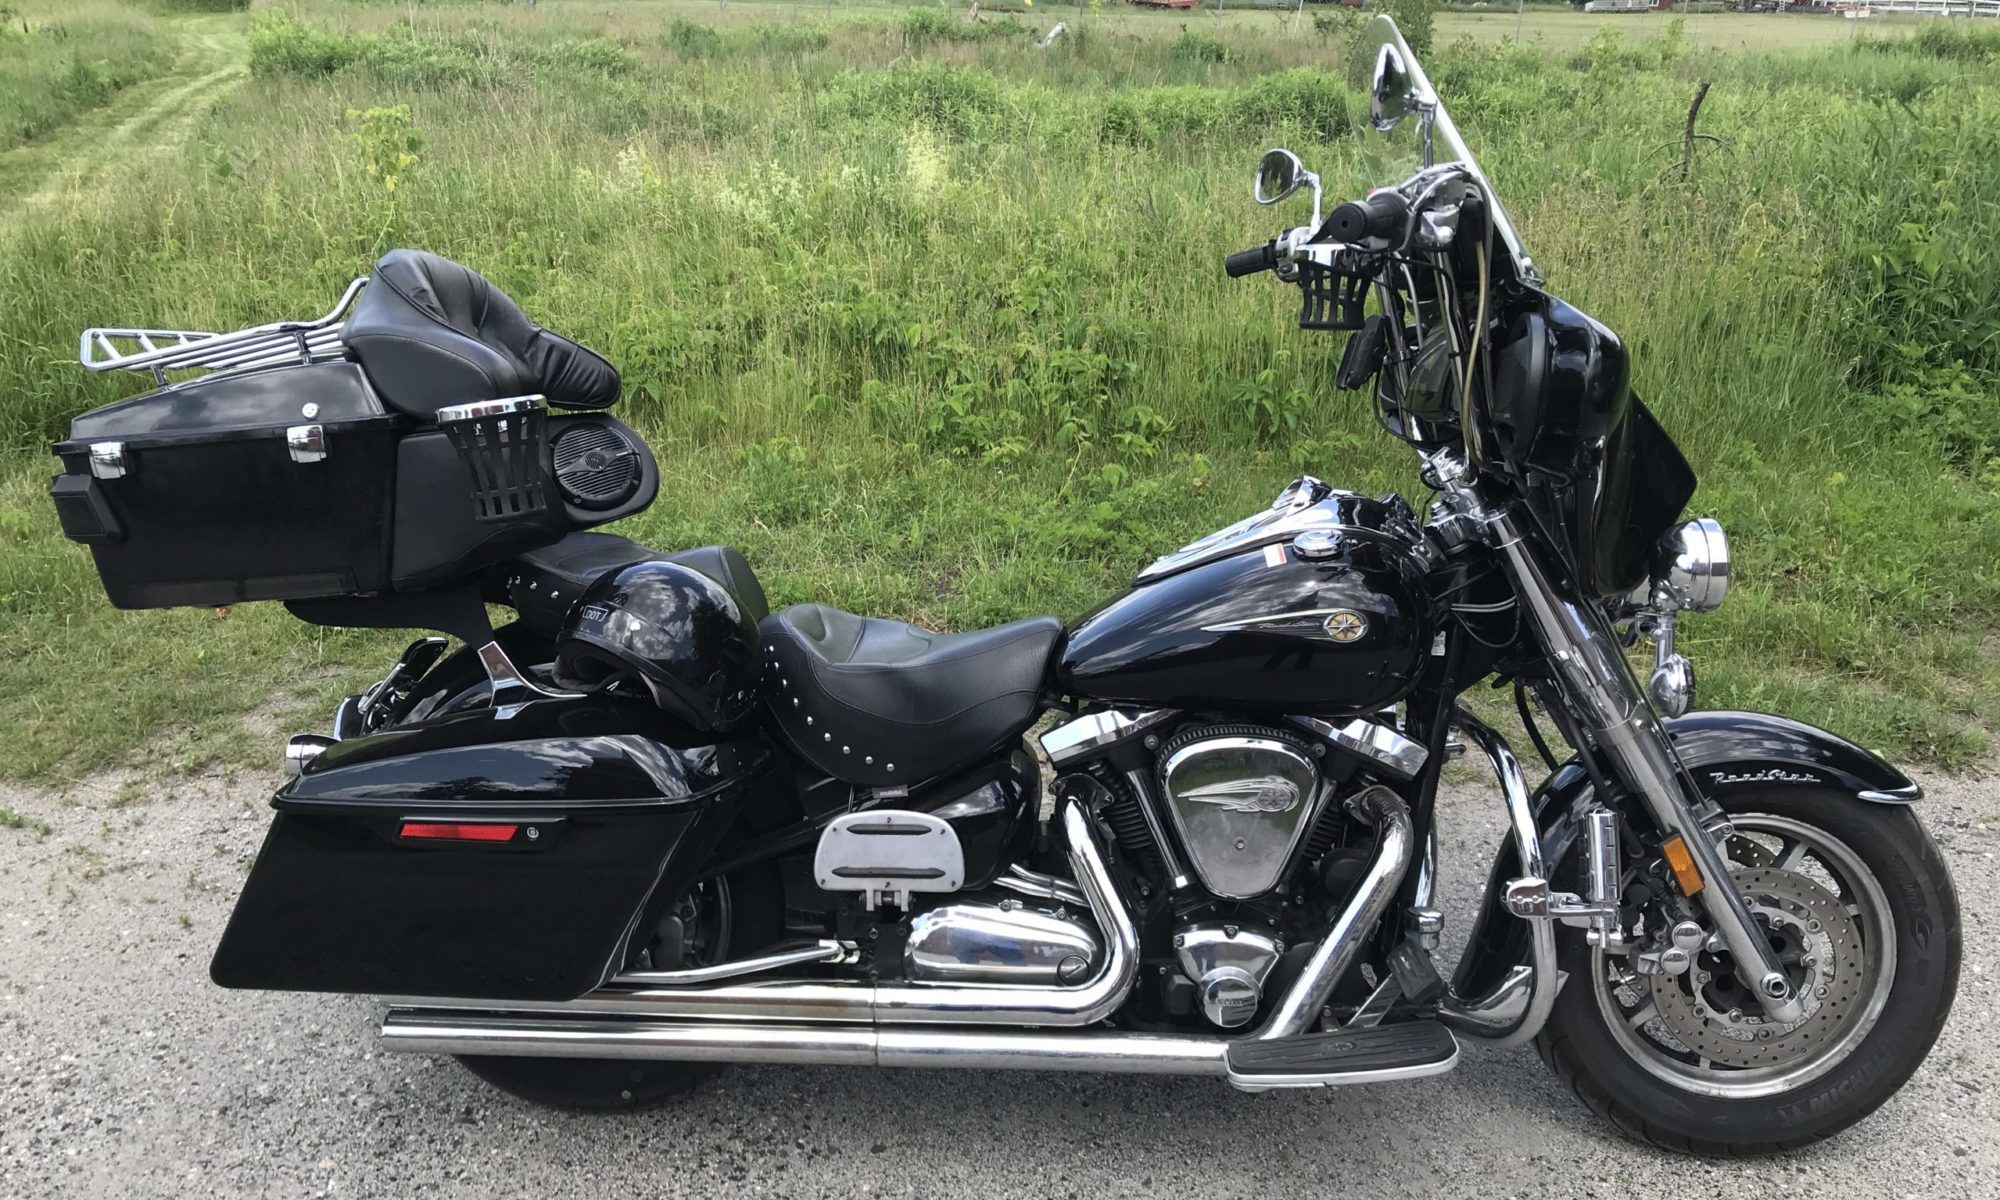
Installing Ape Hangers & Wiring your Handlebars
I installed 16″ apes on my Road Star and this video was very helpful. I will post the video and below that I will share my experience and my sources.
ATTENTION: If you are going to run the wires in the handlebars then you need to know that the clutch handle mount must be mounted before you run the wires on the left. You cannot get the clutch on the handlebars after the wires are fed through the bars.
I installed 16″ apes, added inserts in the ends to use the original weighted ends, ran wires in the bars, installed new cables and installed a new upper brake line.
- The bars I purchased are the Ultima 1″ knurled and dimpled bars 50-220. I got them on eBay. There is a link below to get them on eBay. They come in black too. If I had to do it over again, I would go with the 1 1/4 ” bars. It was not easy to feed the wires through. But the bars are inexpensive and great quality. I had to drill the holes for the wires at both ends. I ended up going with a ½” bit. I drilled one hole on each side at the bottom for the wires to come out of since I stayed with the original riser that is one piece. I highly suggest the dimples for our bikes. I was able to go directly into the bars from inside the controls, so the wires are not visible. The only wires you can see are the ones that plug into the clutch and brake levers [and my heated grip wires]. (https://www.ebay.com/itm/333046964225?ssPageName=STRK%3AMEBIDX%3AIT&_trksid=p2060353.m2749.l2649 )
- I added the original weighted ends to the bars. They work great and add a little length to the bars to make them wider. I am 6’6” so every little bit helps. I created directions. Check out the directions here.
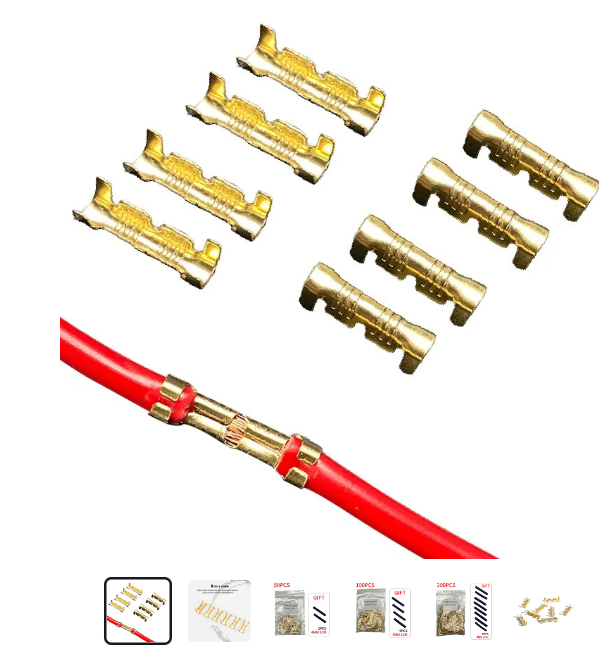
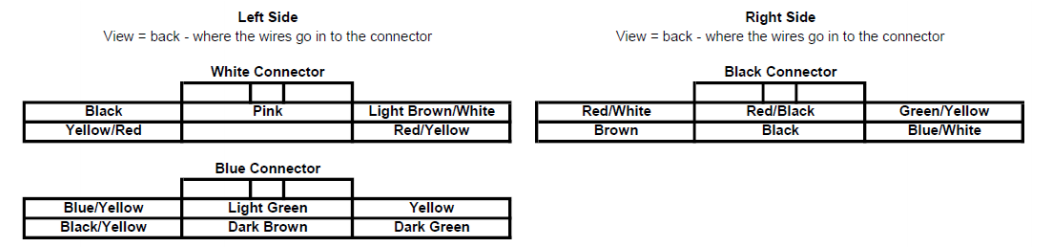
- I picked up the wire extending kit from Nicolas Black. They are color coded and made it easy to do the job right. I staggered the cuts so that the splices would not be in one place and be too thick to pull through the bars. I pulled the pins from the connectors which made it easier to stagger them and pull through the bars. The pin layout is below. I used the original grey wire covers on the bottom where them come out of the bars to cover them to the back of the head light. You have to be careful when cutting the wires so that you end up with a long enough piece to use on each side. The one the left is fatter since it has more wires. Once I got the pins pulled it was easy to pull the cover off.
When I did this, I soldered the wires. I will never solder again. I came across terminal crimp connectors and have started using them instead. They provide a better connection in my opinion. I put heat shrink over them and we are good to go. You will need a open barrel terminal crimp tool. I picked up the terminals at Aliexpress (https://www.aliexpress.us/item/3256804997617701.html).
- I bought Motion Pro cables. I bought the off-the-shelf Armor Coat cables. I ended up getting +11. They work great. I bought the cable lube tool and lubed them before I installed them. If you go to their website you can put in your bike and they will list the cables that fit your bike. I got a better deal on eBay. It took me some time to search eBay but I saved $30.00 on all three cables. (https://www.motionpro.com/)
- I picked up my upper brake line, of the same color from Raymond Chan (Apex). I ordered +8 but find it is too long. I measured by installing the bars and measuring from the end of the current line to the connector. I added 1” but should have left it at +7. It works great but would look better if it were shorter.