Wolo (419) Bad Boy Air Horn
Installation Directions for a Road Star
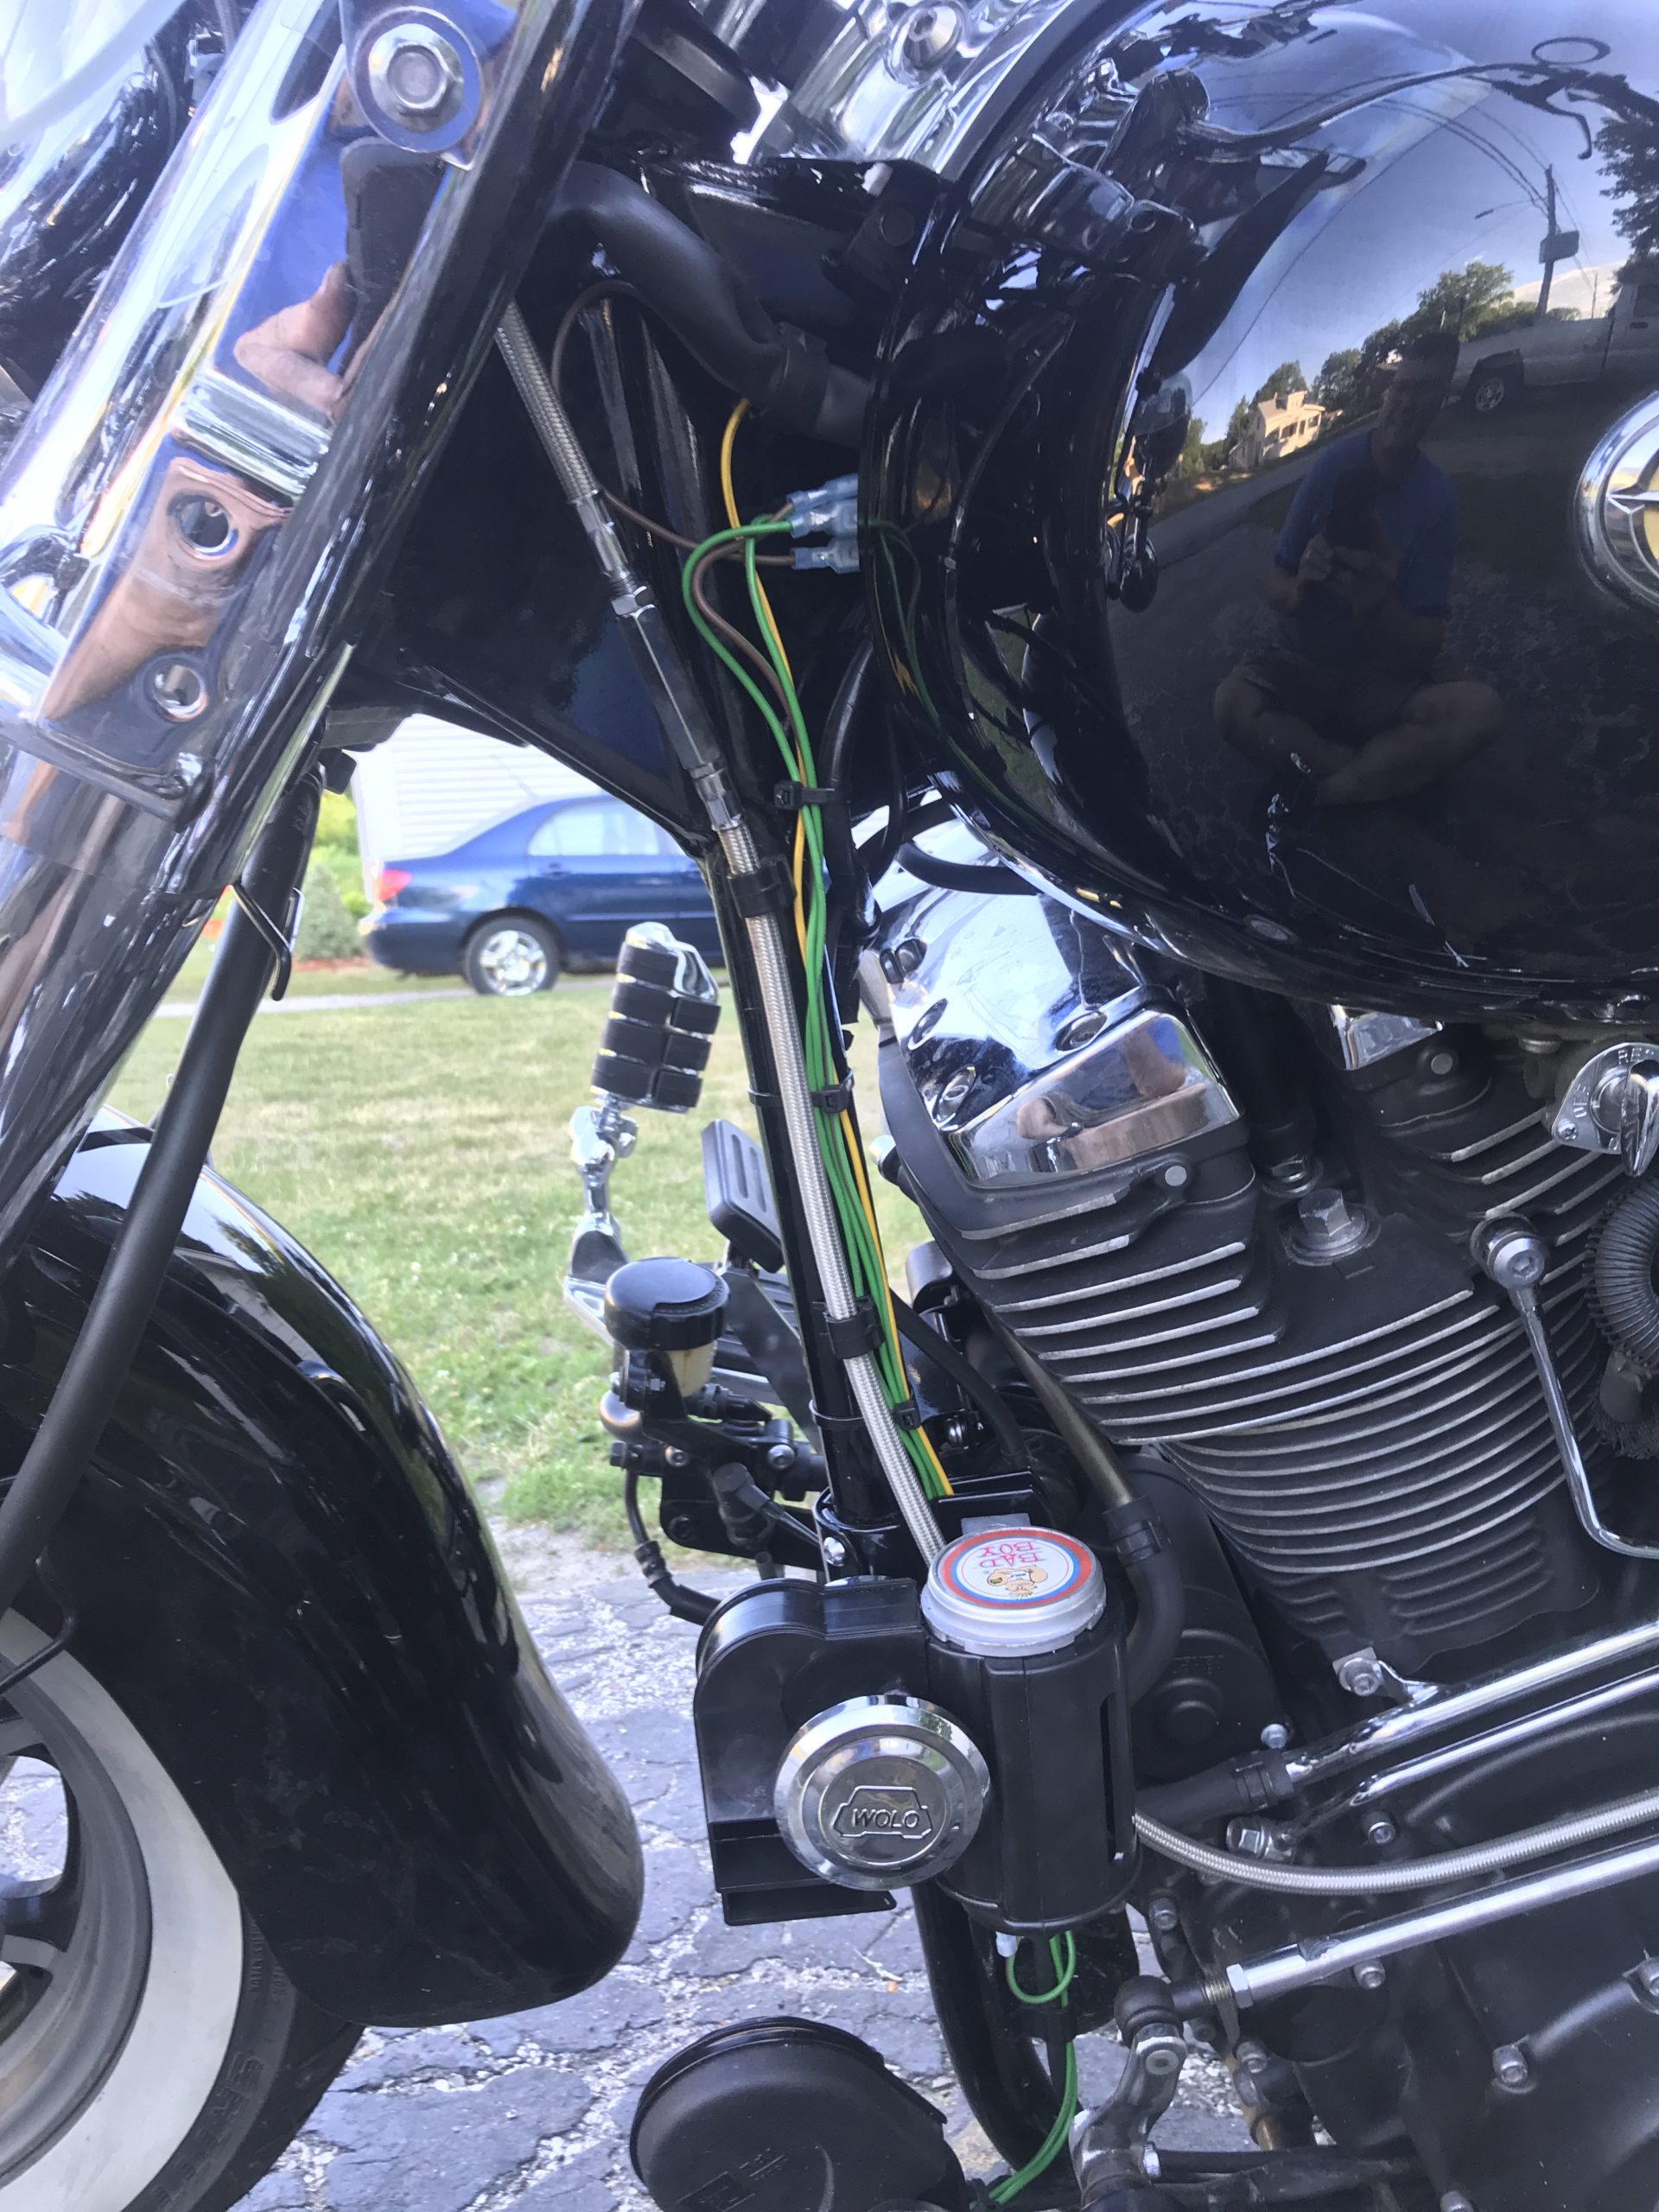
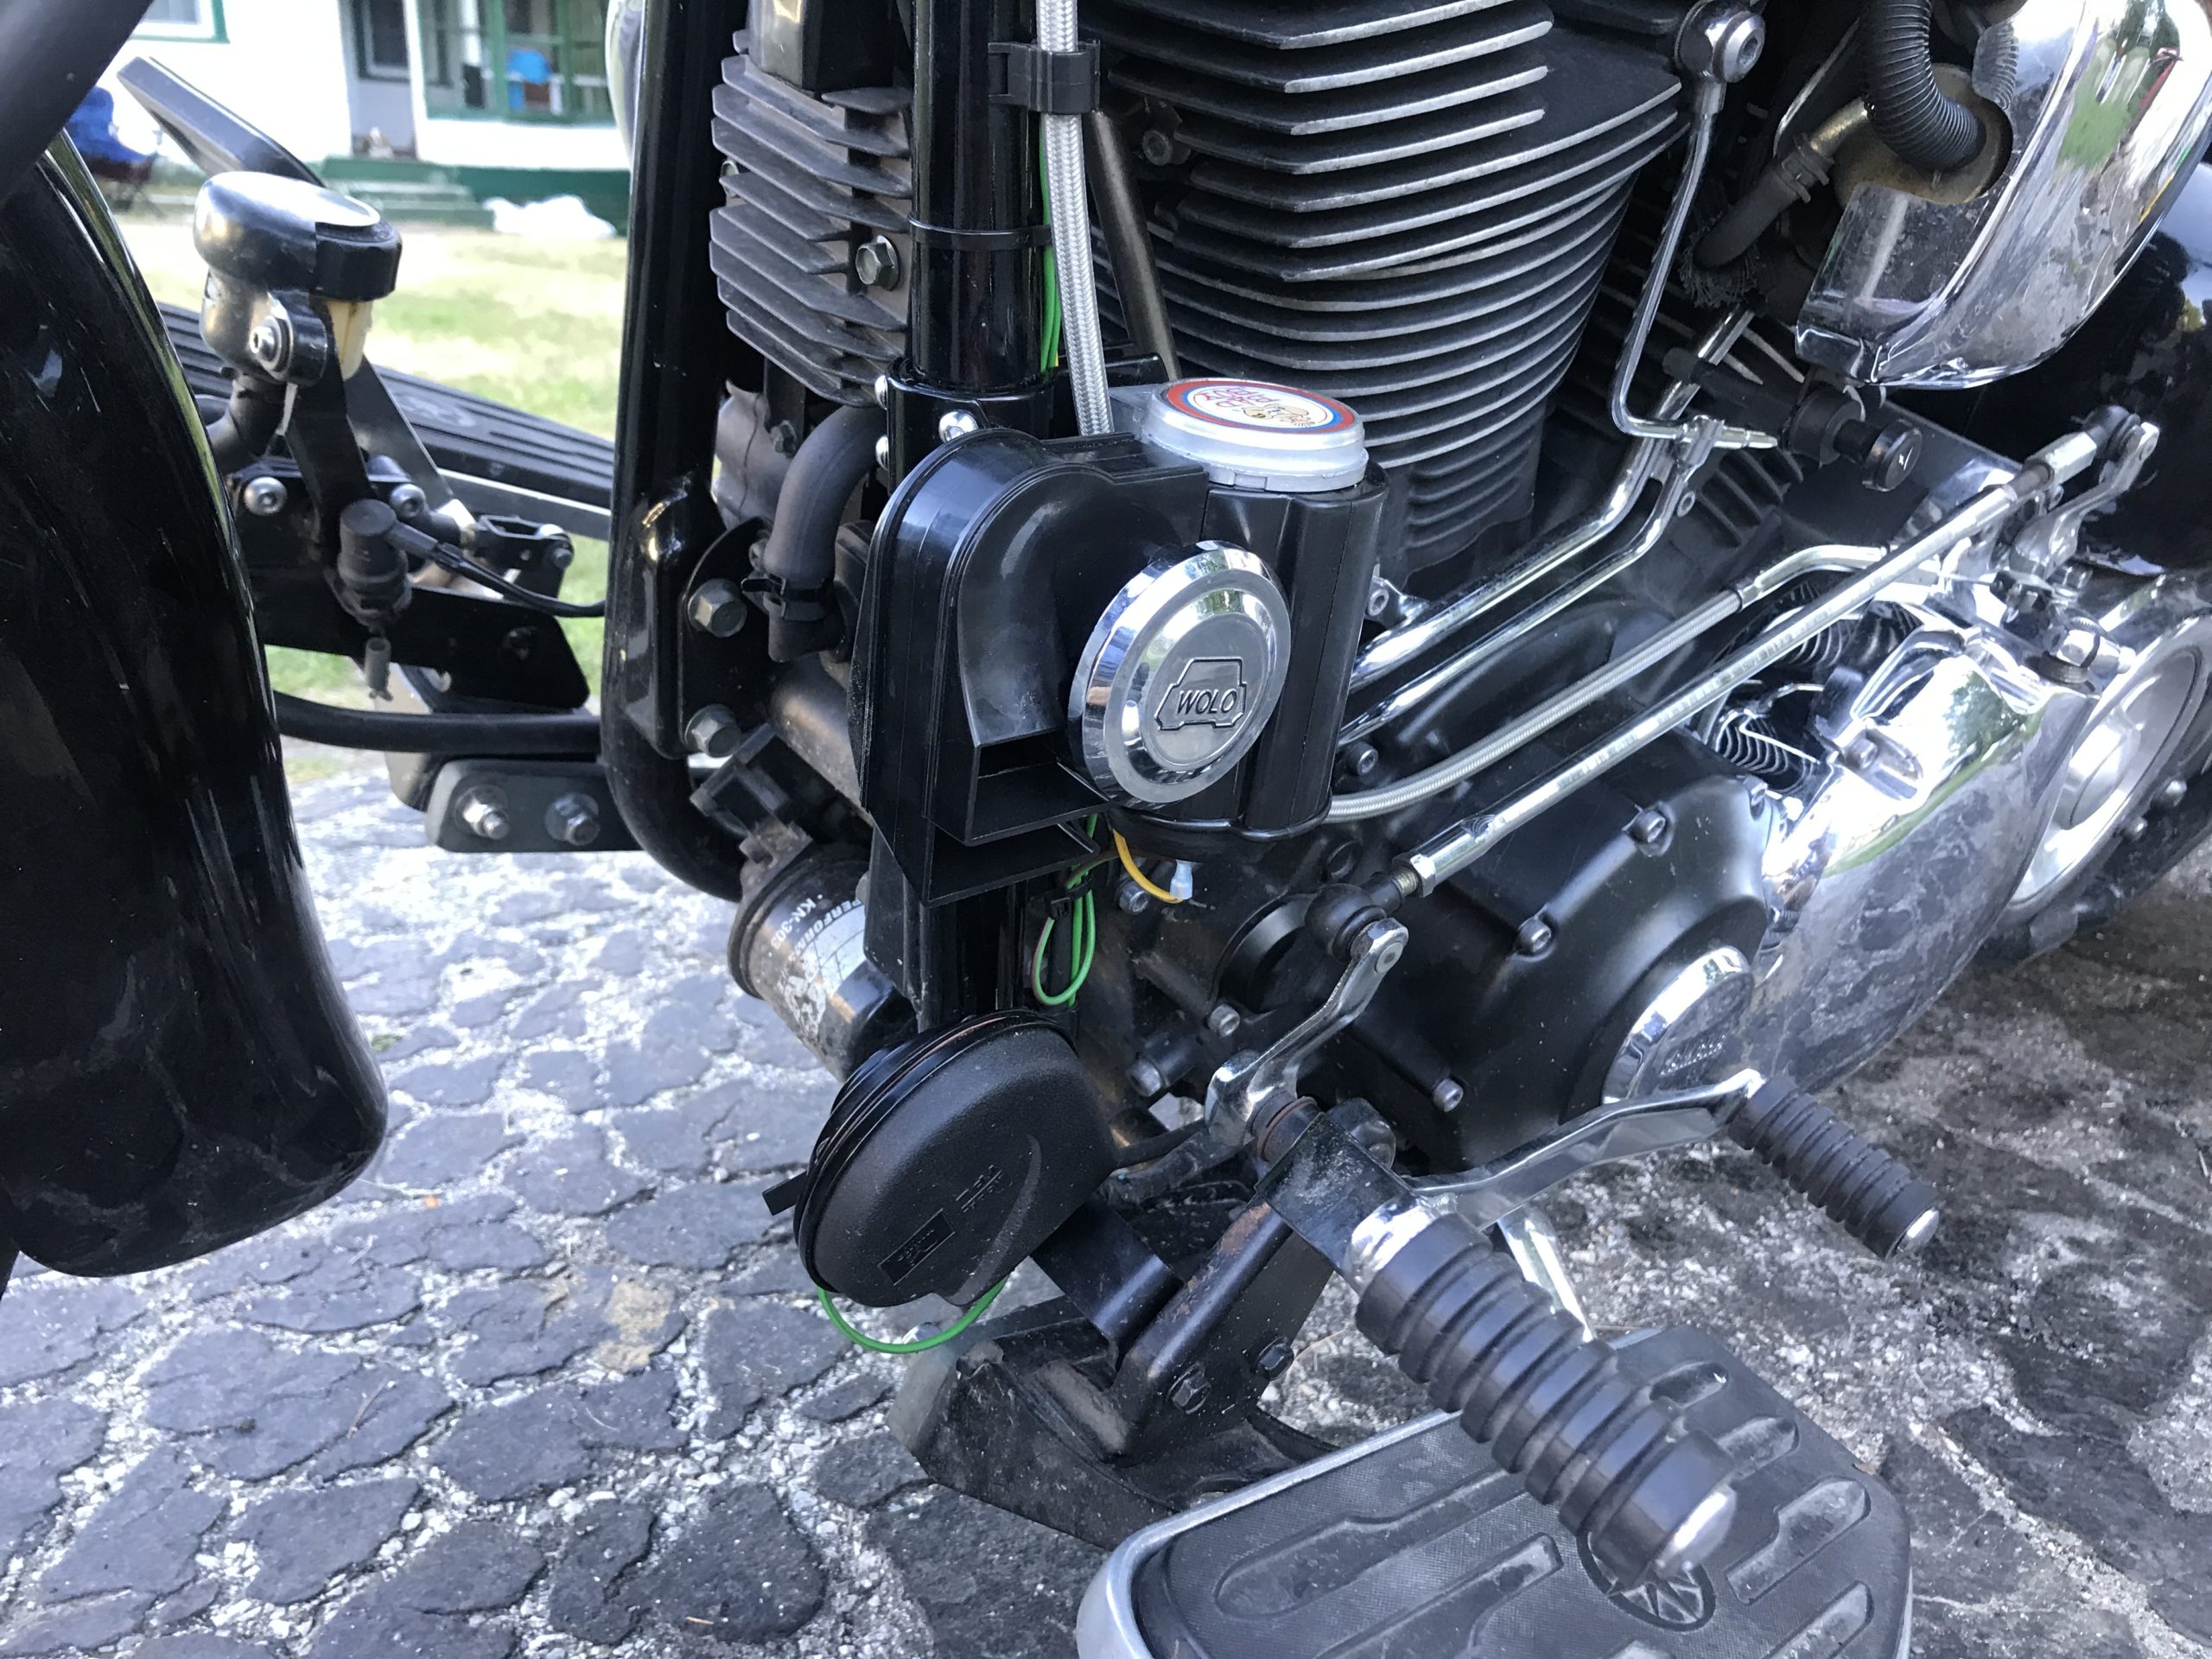
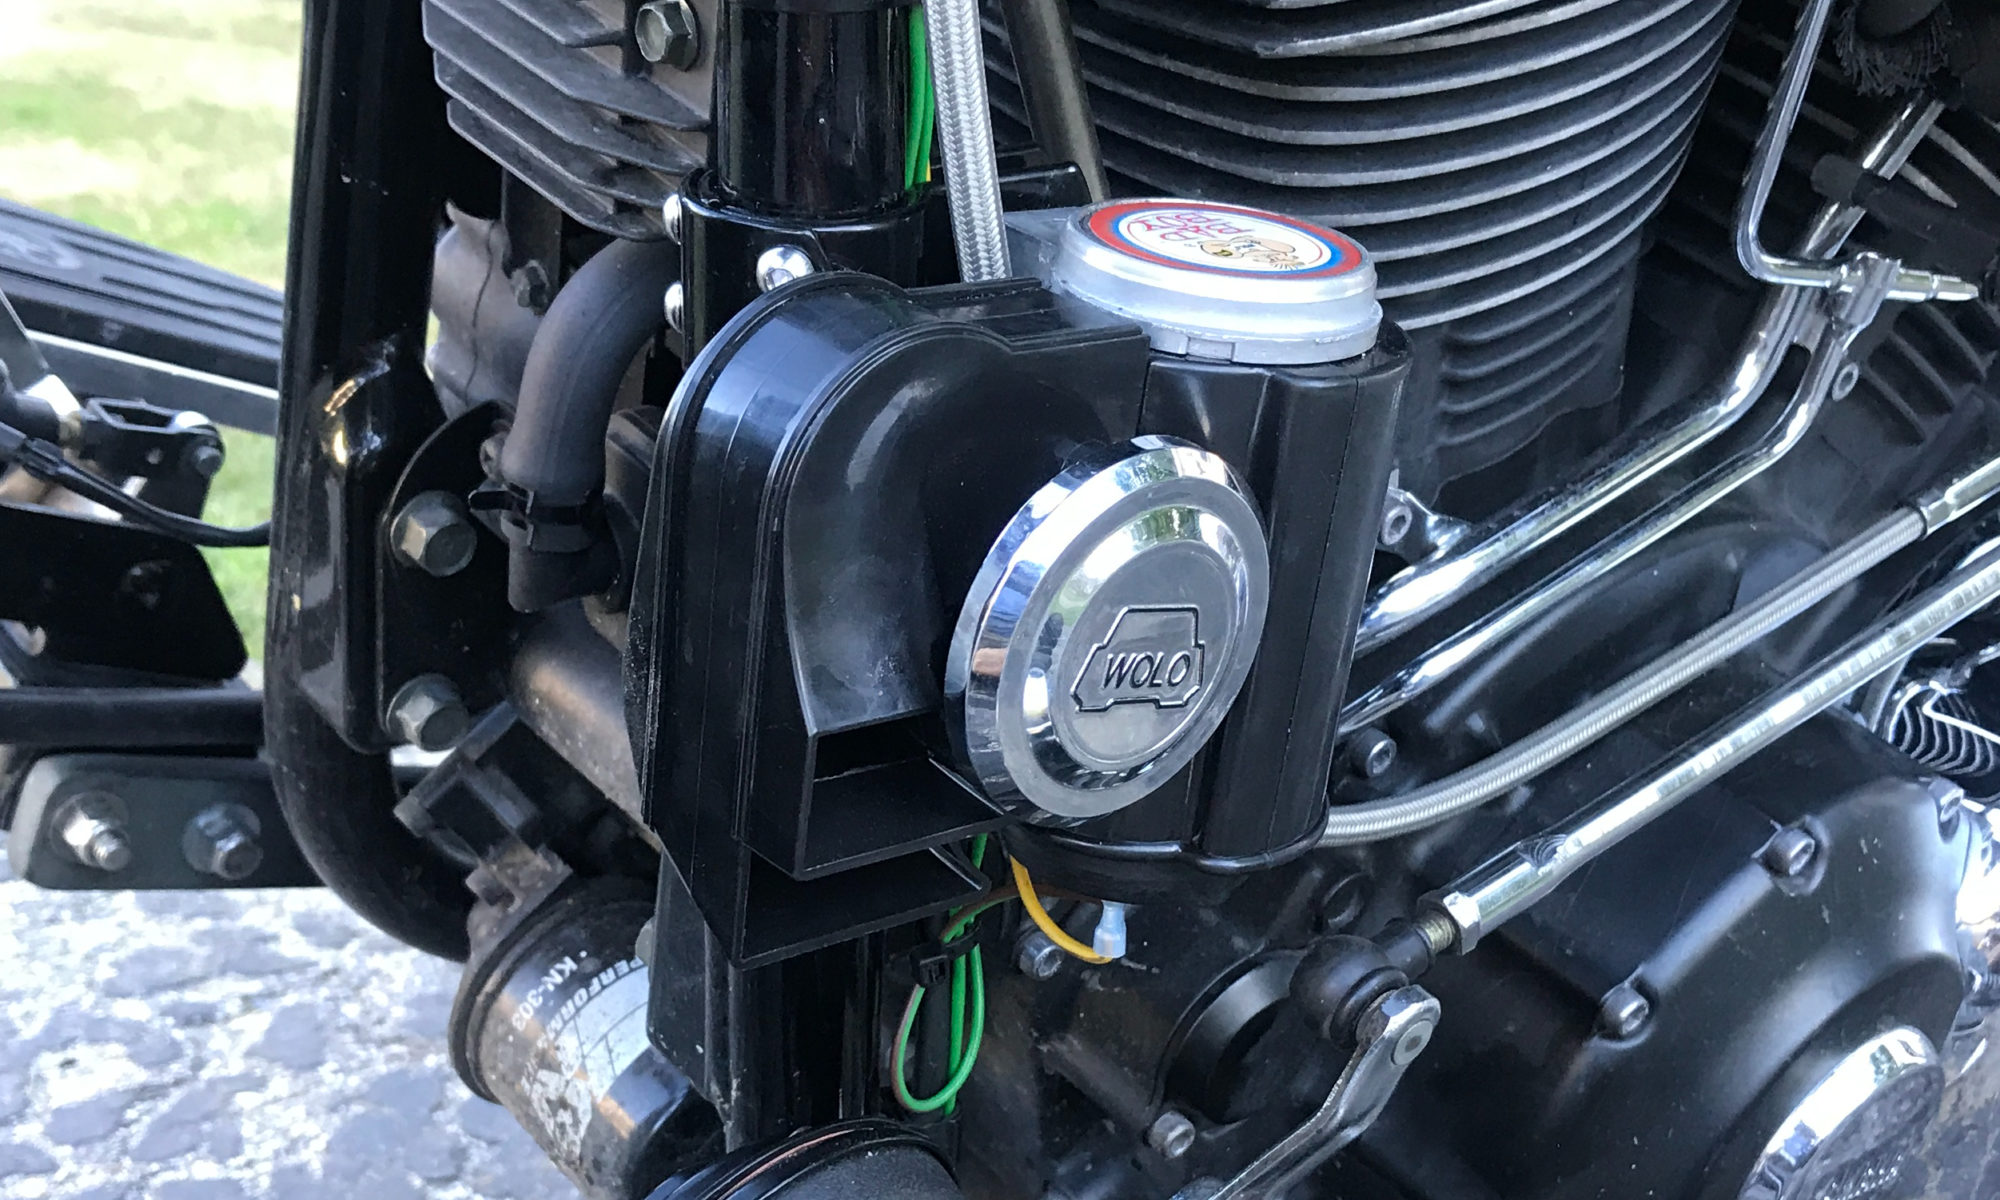
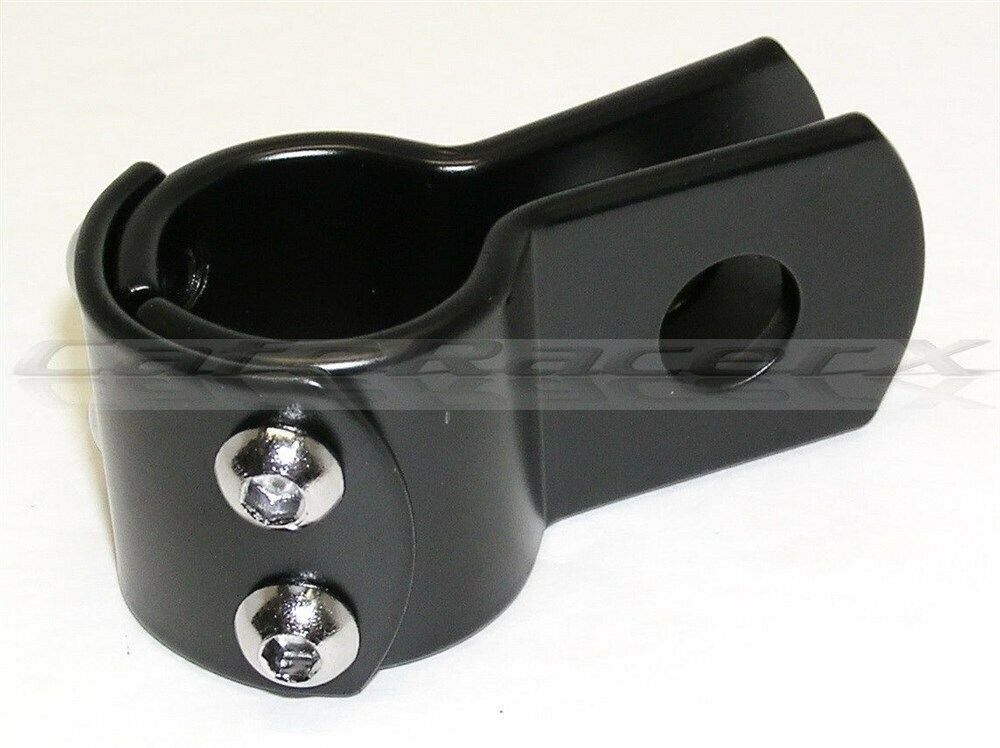
In order to mount it I had to purchase a 1 ¼” frame mount.
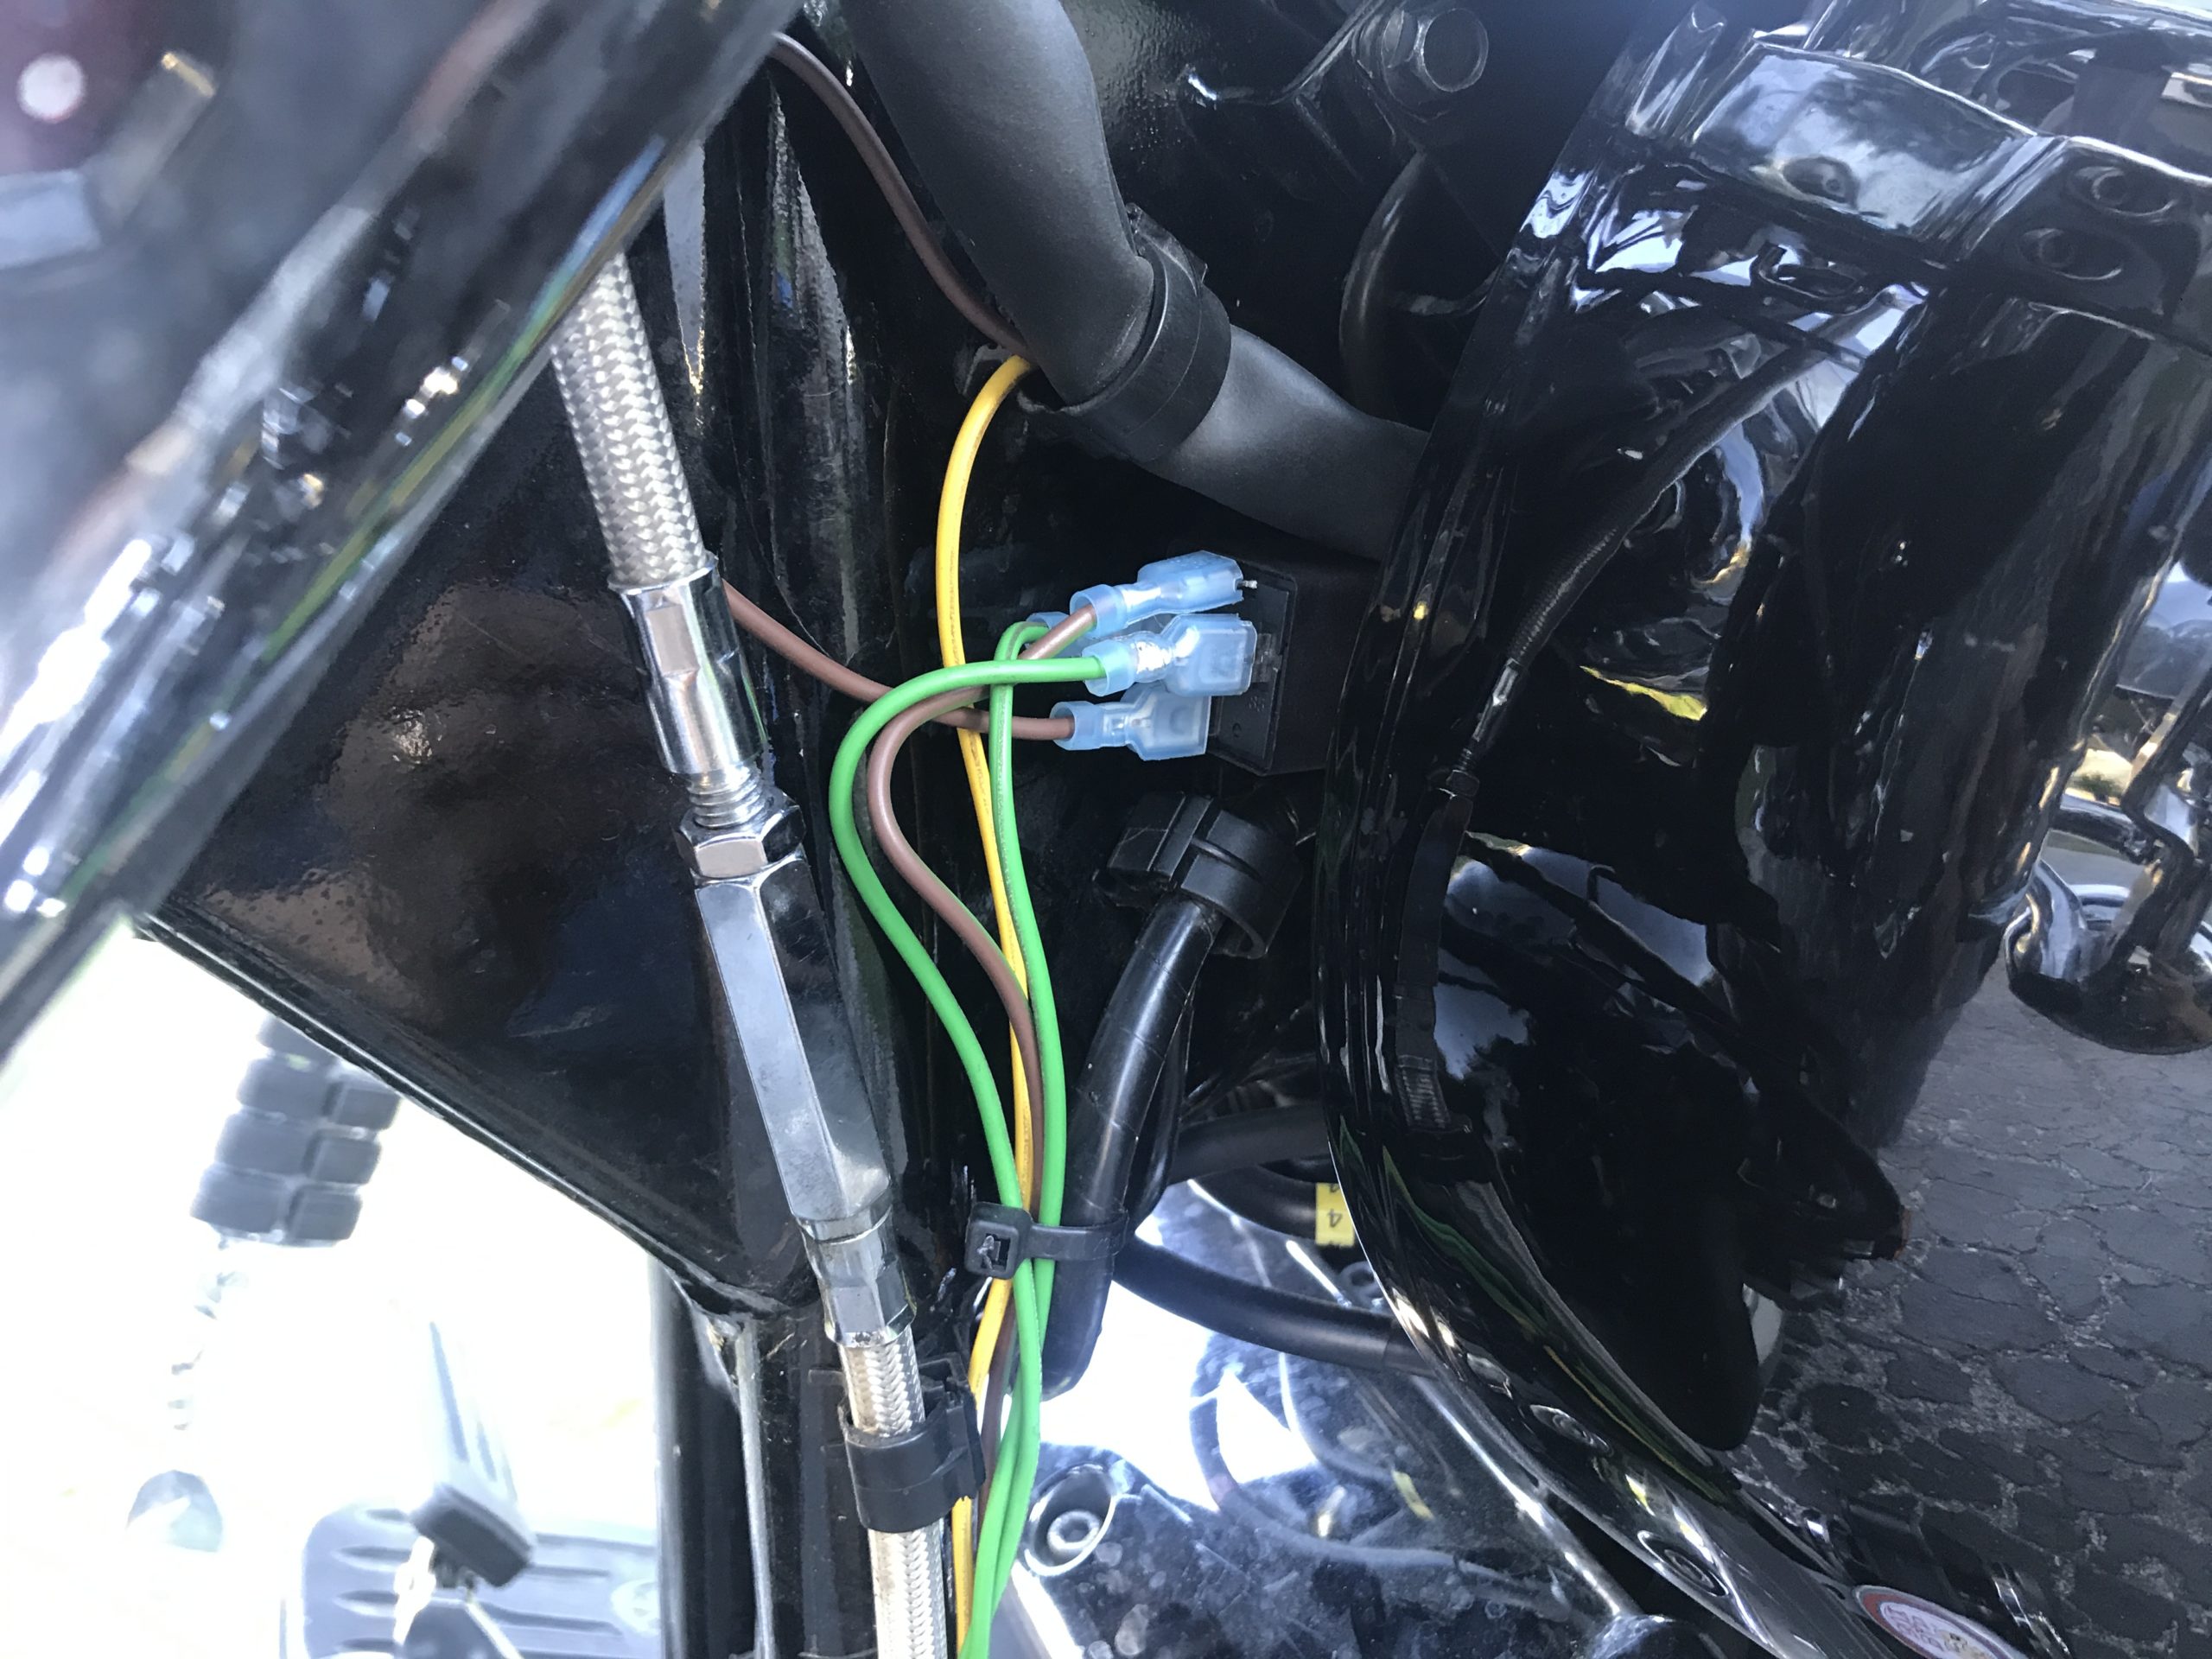
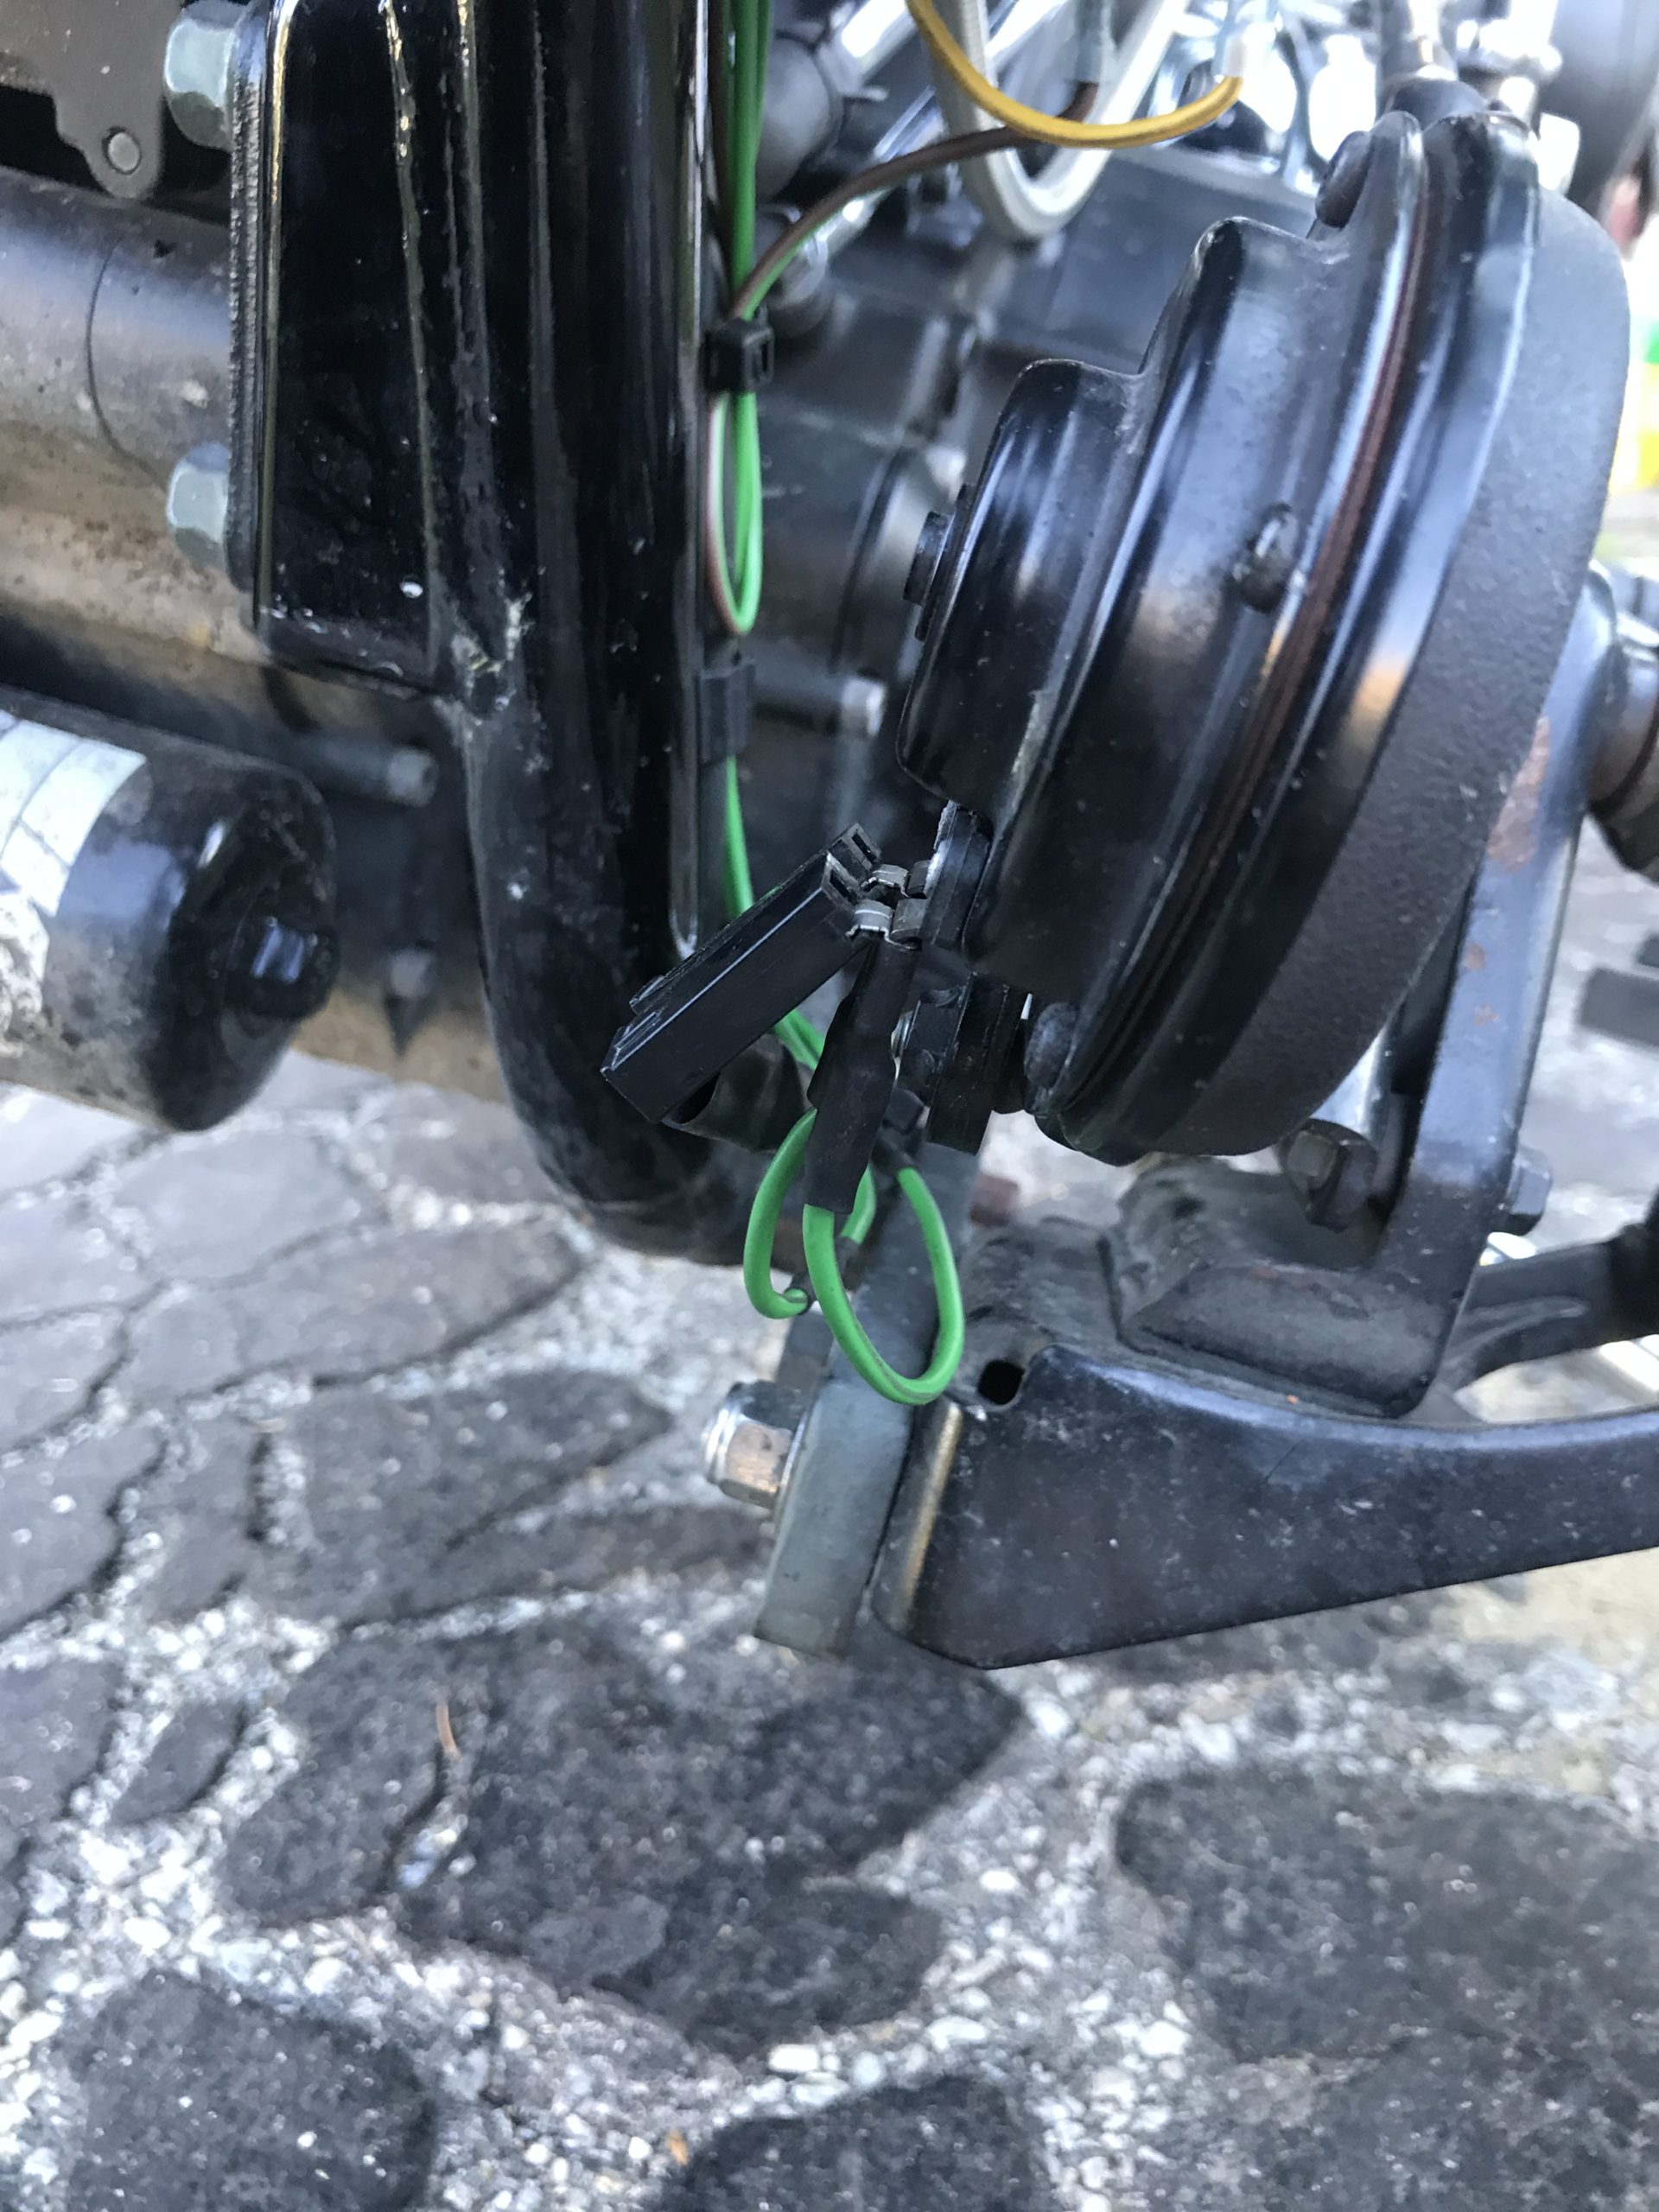
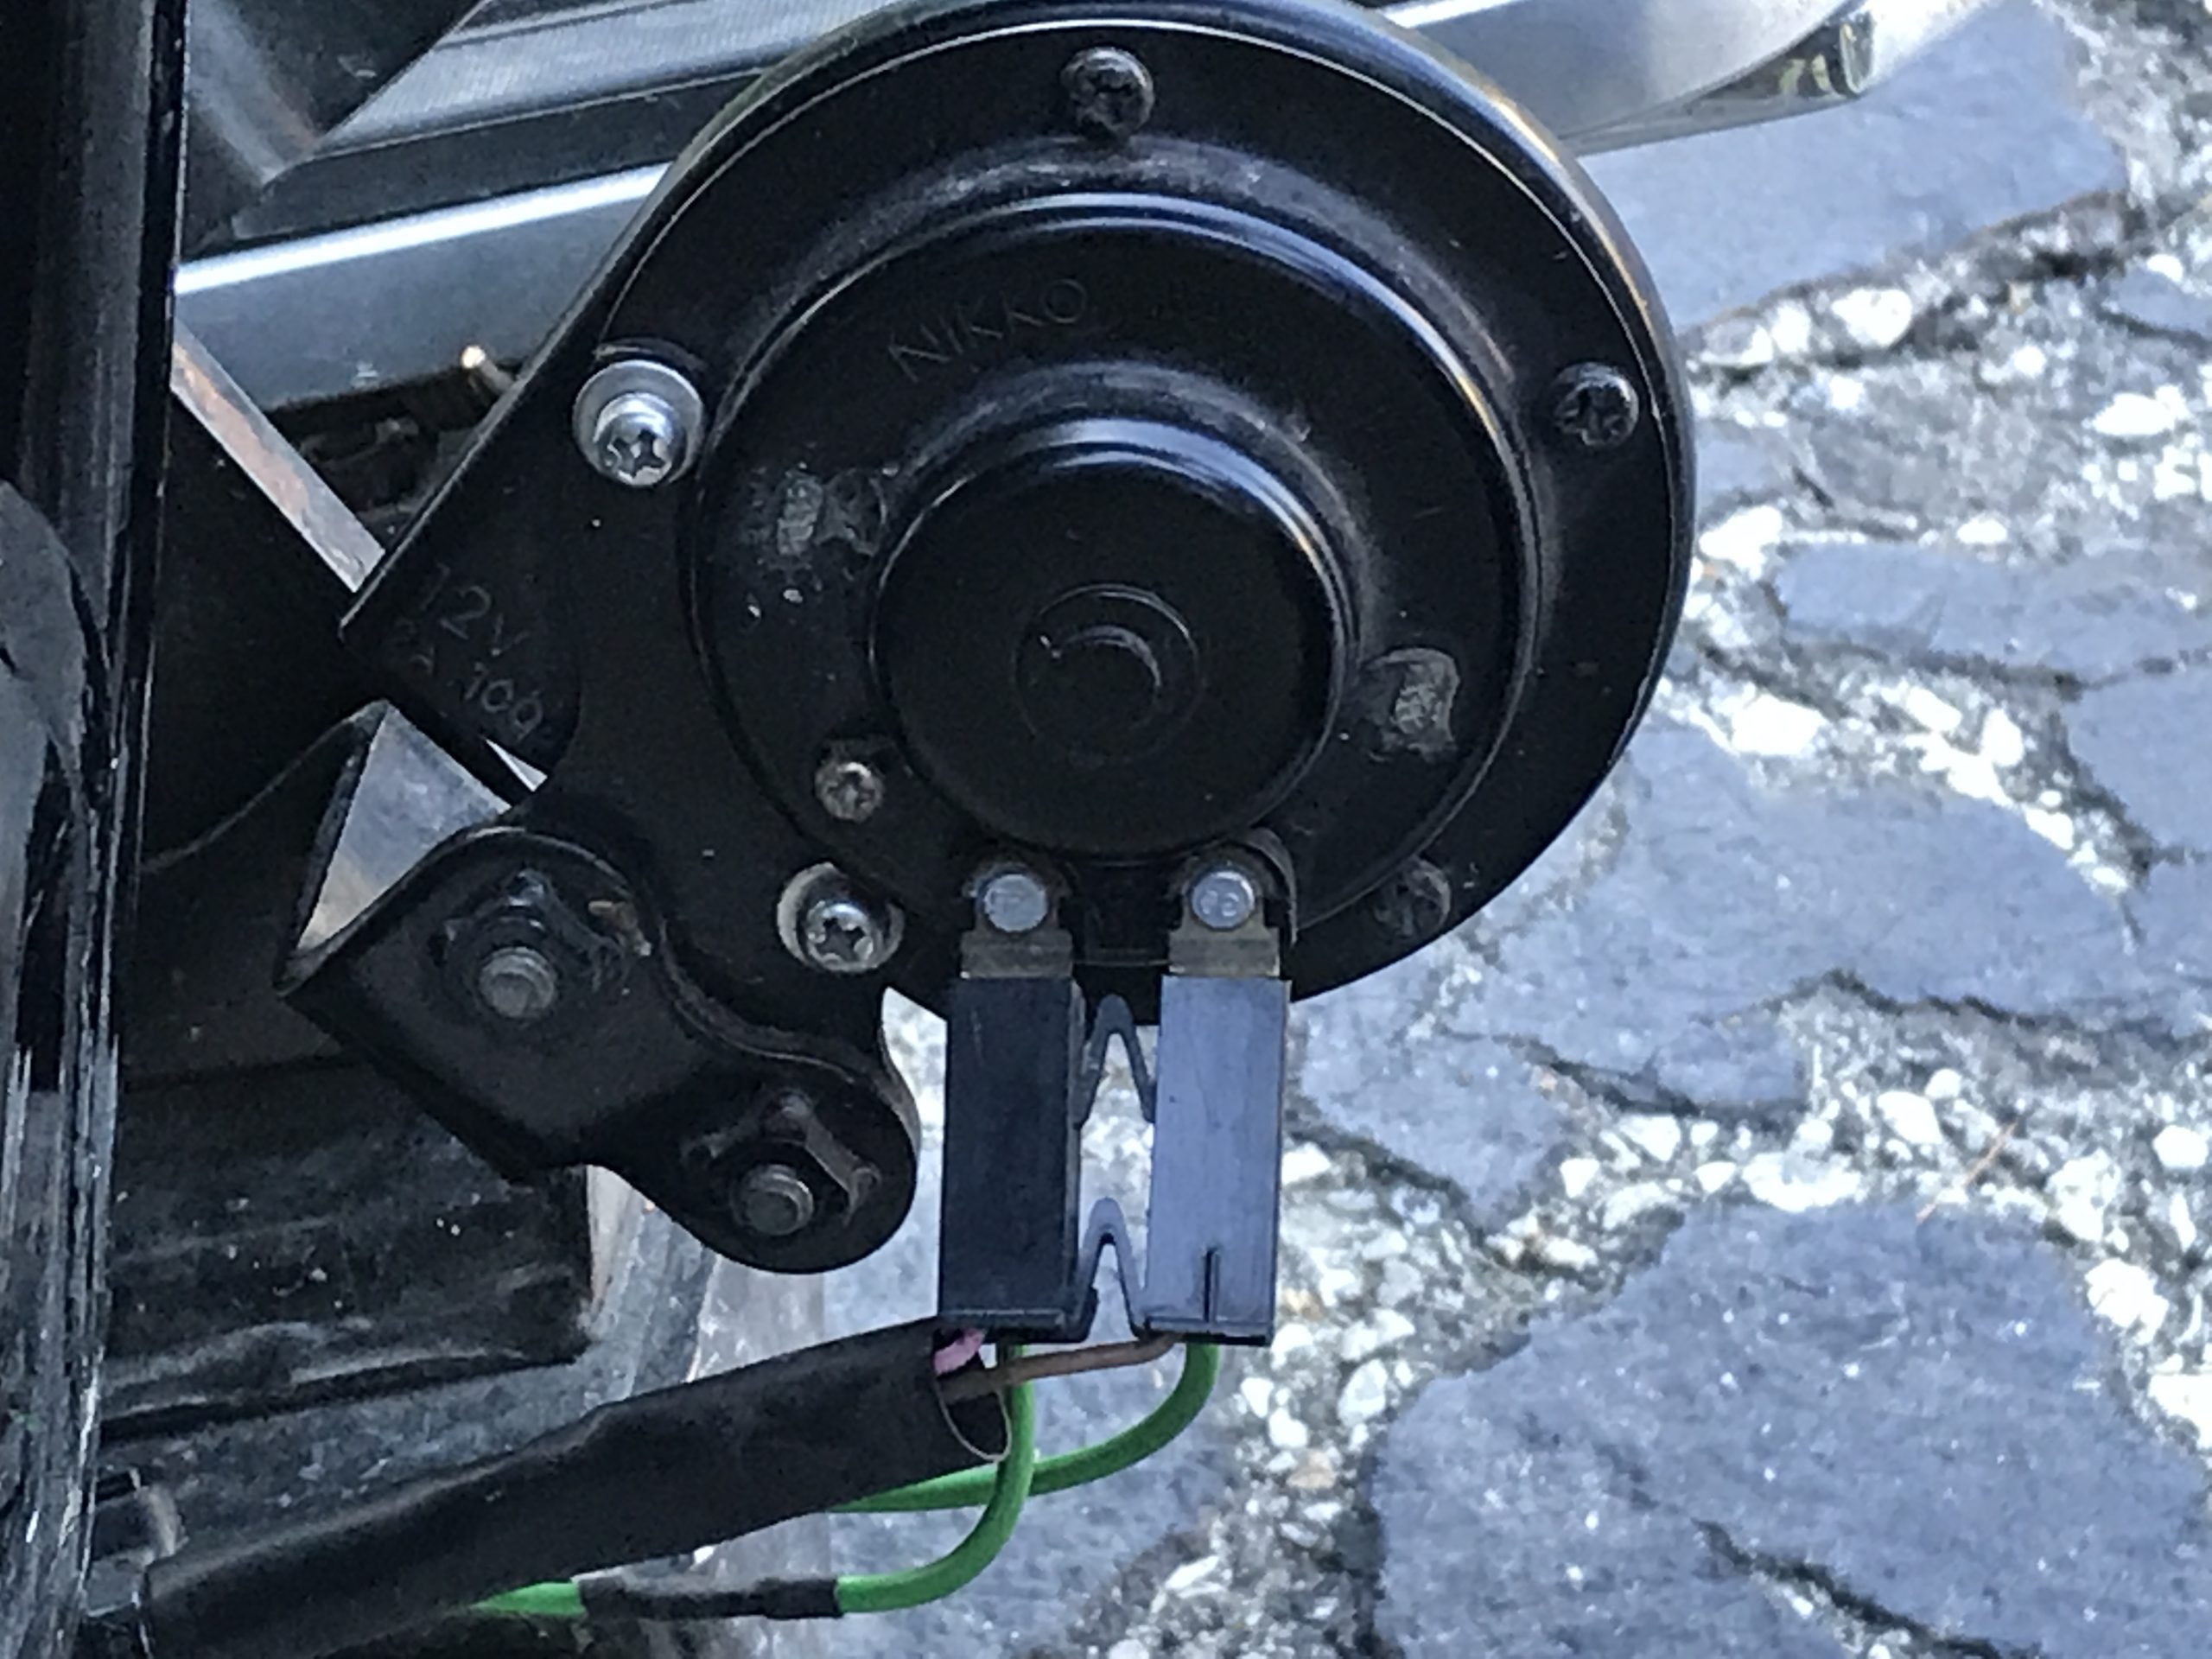
I also purchased a longer bolt and a second nut to mount it. I used the first nut to tighten the bolt to the mount on the Wolo and then used the second bolt, a large washer and the lock washer included to mount it to the frame mount I purchased. I mounted it on the front left side on the frame just above the OEM front horn. I left both OEM horns installed and simply added the Wolo. I don’t like to cut or splice the wires on my bike so I used two Stackable 1/4″ Push-On Terminal Adapters to plug into the current front horn, wired to run to the relay for the Wolo. I used heat shrink so you cannot see mine in the pictures but there are connected to the front OEM horn.
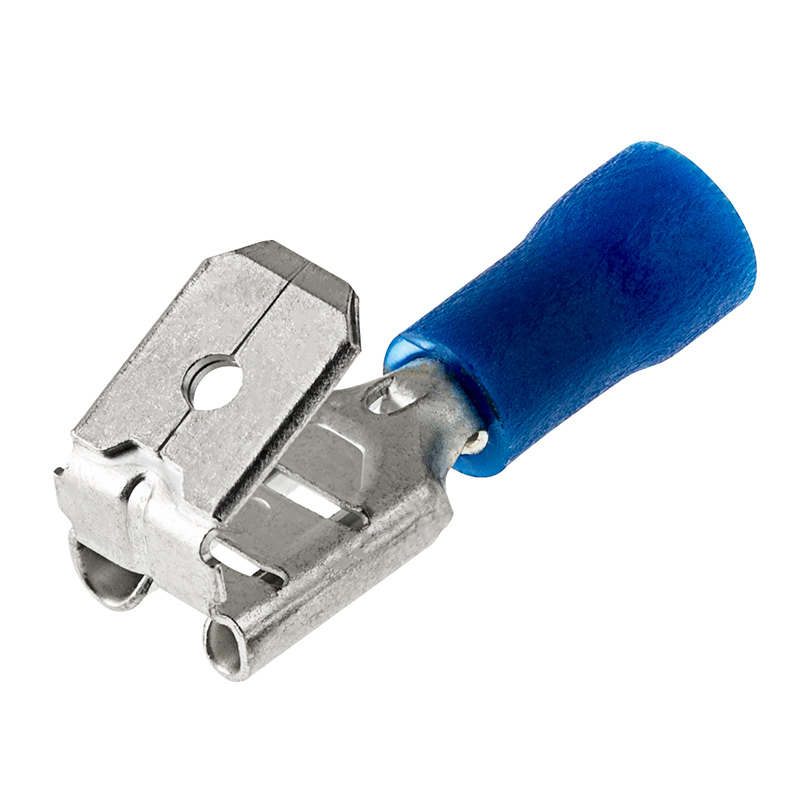
I then plugged the factory plug into the Stackable 1/4″ Push-On Terminal Adapter. This was a great solution to keep the existing horns. I ran the positive wire from the relay directly to the battery and the negative side of the Wolo directly to the battery as well. Since the horn only operates and calls for power when the horn button is pushed it will not draw from the battery. I had to pick up some insulated female connectors to hook to the horn and relay. I used six. I also used some wire and battery connectors that I had laying around. Wire colors didn’t matter much to me. I used zip ties to fasten the wires to the frame and to one another. I soldered and used heat shrink on all my connections. It looks great mounted and sounds great. Here are some pictures. One thing to note is that I have 4” Forward Control extensions installed (I made them myself).I had to pull the tank to install it and locate the relay.
- Here is a link to the instructions included with the Wolo Bad Boy. You will use Fig. D to install it on the Road Star.