
RoadWing Shock Installation Instructions
on a Yamaha Road Star 1600/1700
DOWNLOAD A PDF OF THESE INSTRUCTIONS
These instructions are a compilation of details, information, images and videos made available by Chris Jones (aka Gonzodad on the RSC), Dan Shingler (dshingler), James Daniel (jdace750), Jason Woody (smokescreens) and Darrell (Tykes_Place) on the Road Star Clinic and my own experience installing my RoadWing Shock. Credit is also due to Henry Swanson who has built a large number of RoadWings and helped & encouraged me to build my own. In addition, credit is due the Road Star Clinic community and Road Star owners who refuse to settle for the original design by the Yamaha engineers and have utilized this upgrade.
YOU ASSUME ALL RISK BY FOLLOWING THESE DIRECTIONS – BE CAREFUL!
I BELIEVE I COVERED EVERYTHING BUT IF YOU FIND ANY OMISSIONS OR ERRORS IN THESE INSTRUCTIONS OR HAVE SUGGESTIONS PLEASE LET ME KNOW BY CONTACTING ME THROUGH THE FACEBOOK
UPDATE
Jason John Cowart produced an installation video.
Check it out at the end of the post.
Credit links:
- https://www.tykesplace.com/yamaha-roadstar/roadwing/
- https://www.tykesplace.com/yamaha-roadstar/roadwing/roadwing-shock-install/
- https://www.roadstarclinic.com/
- https://www.flippingonzo.com/2020/05/roadwing-electrical-harness-hi-im-gonzo.html
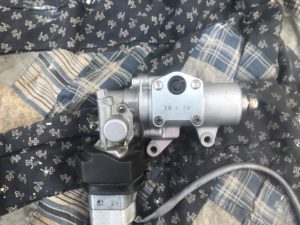
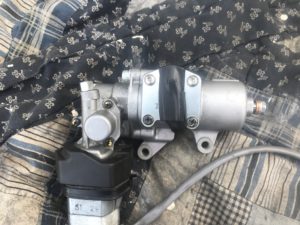
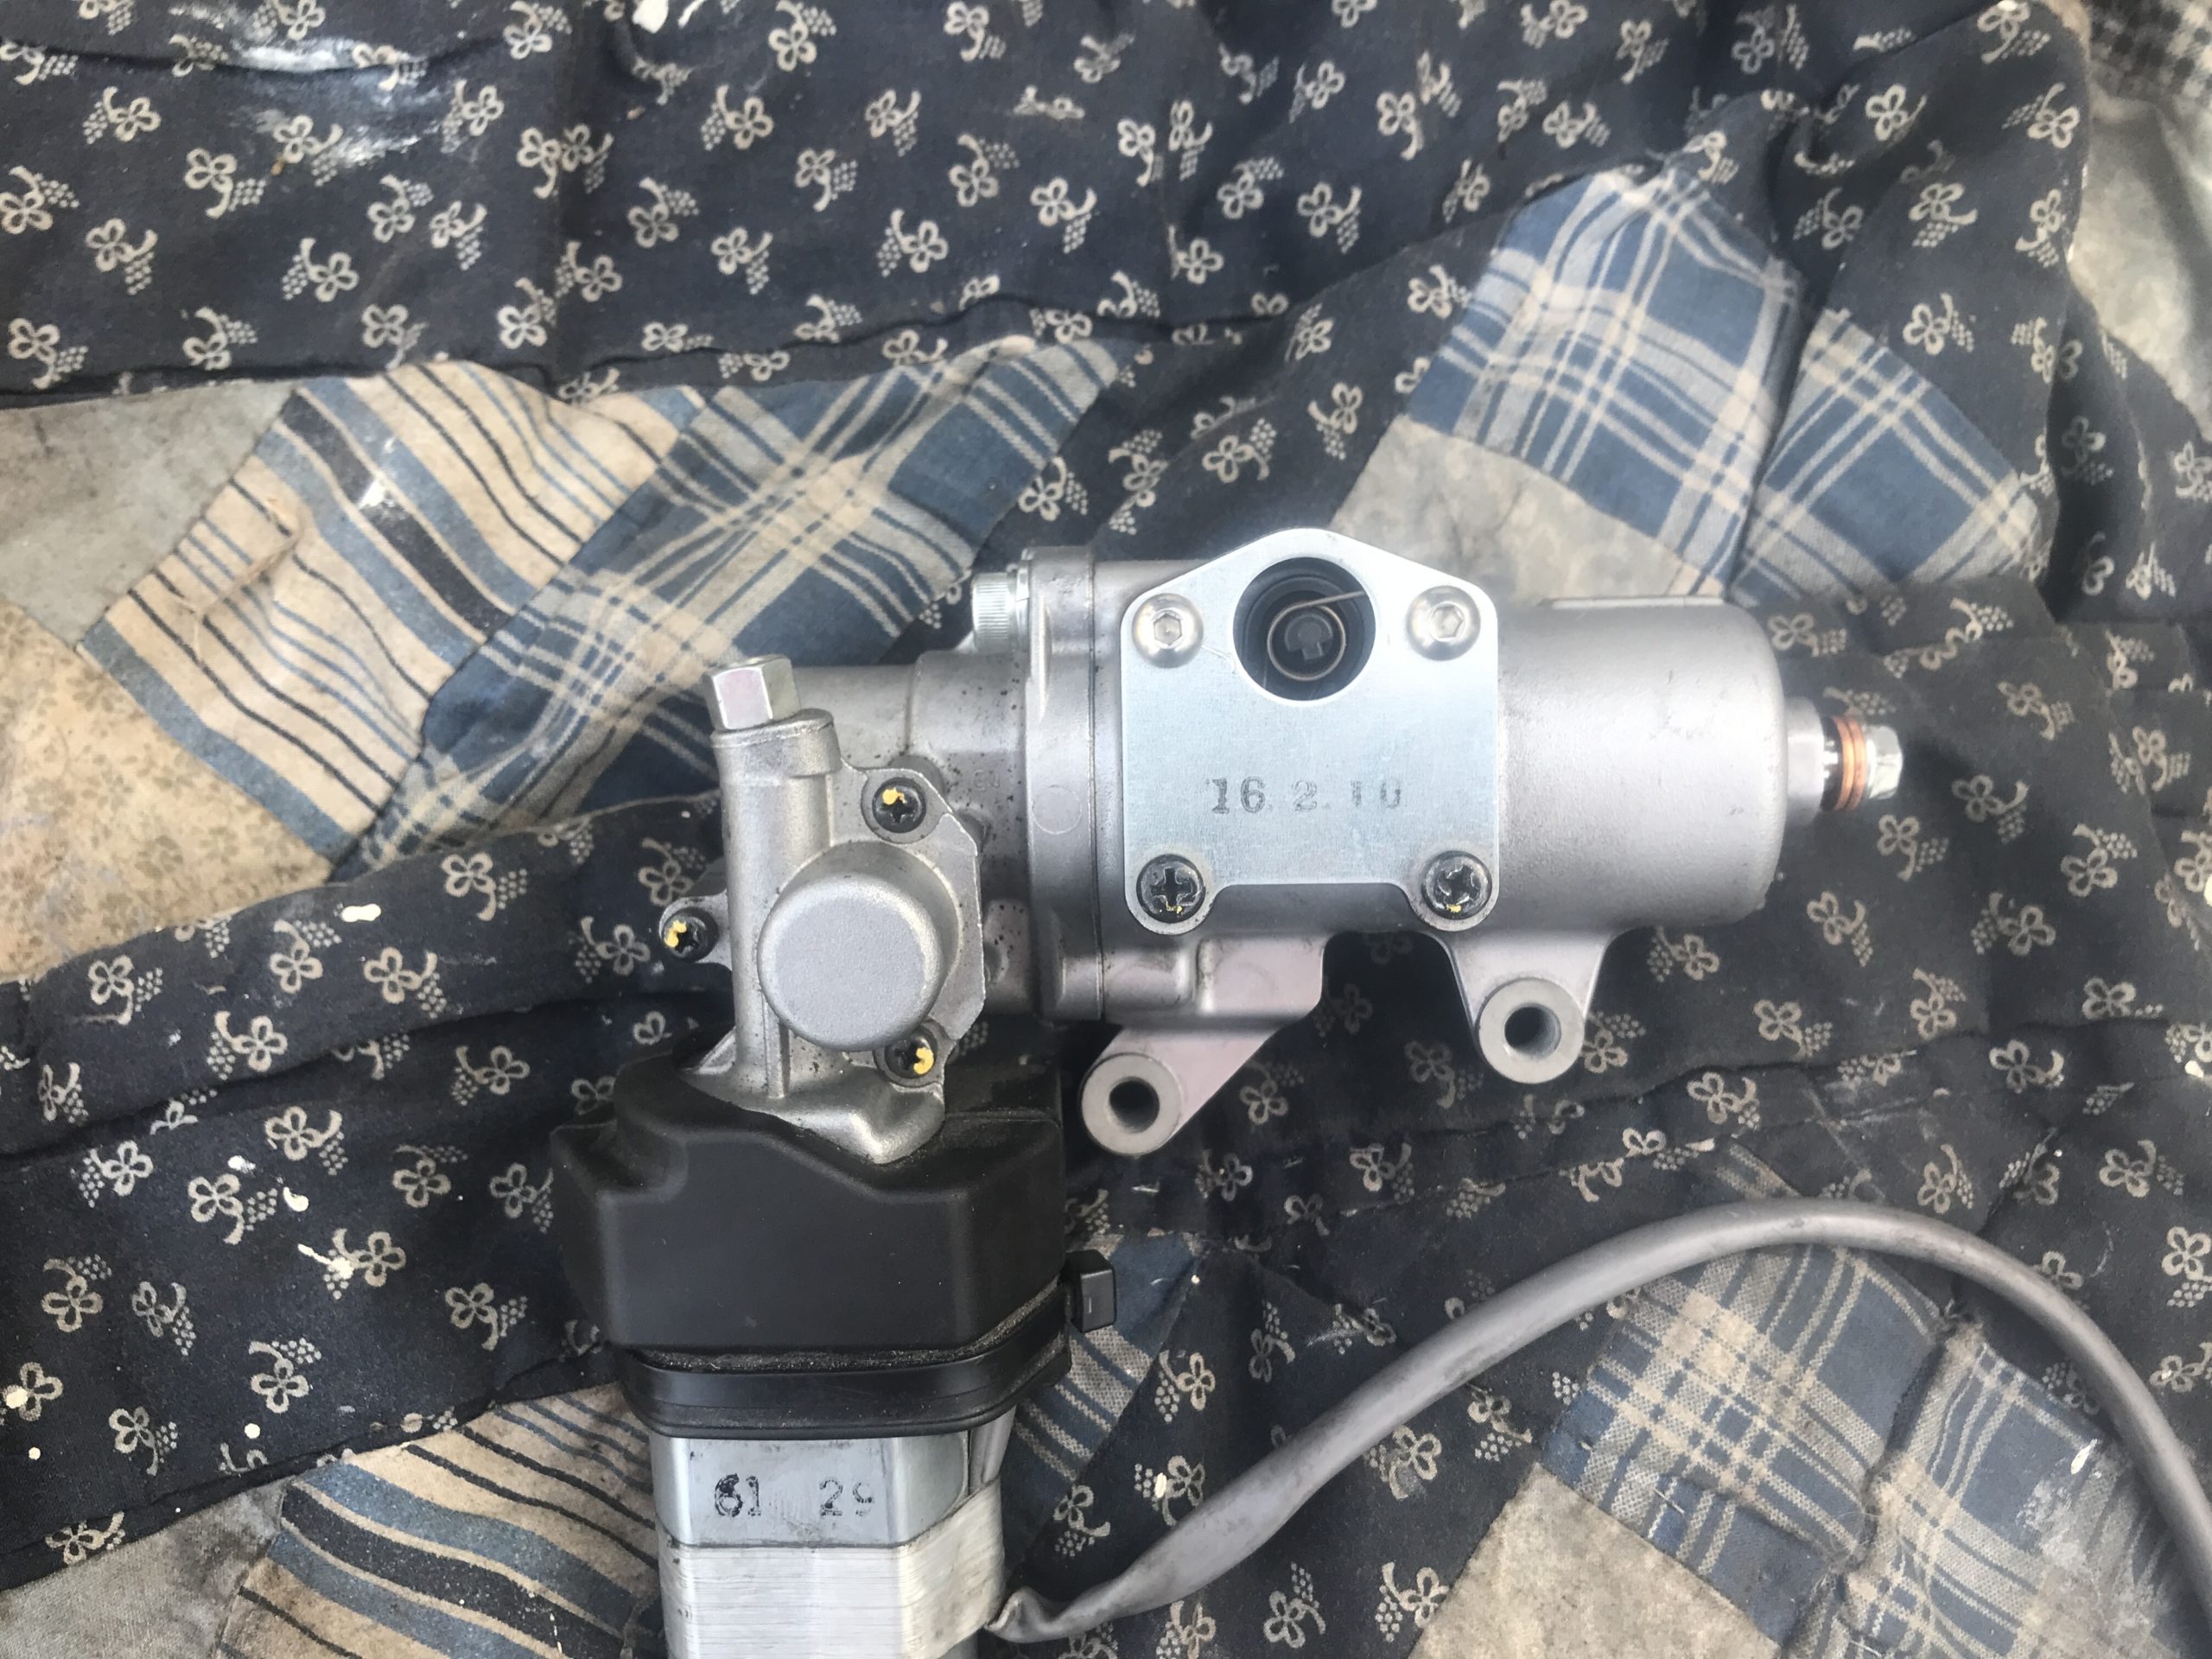
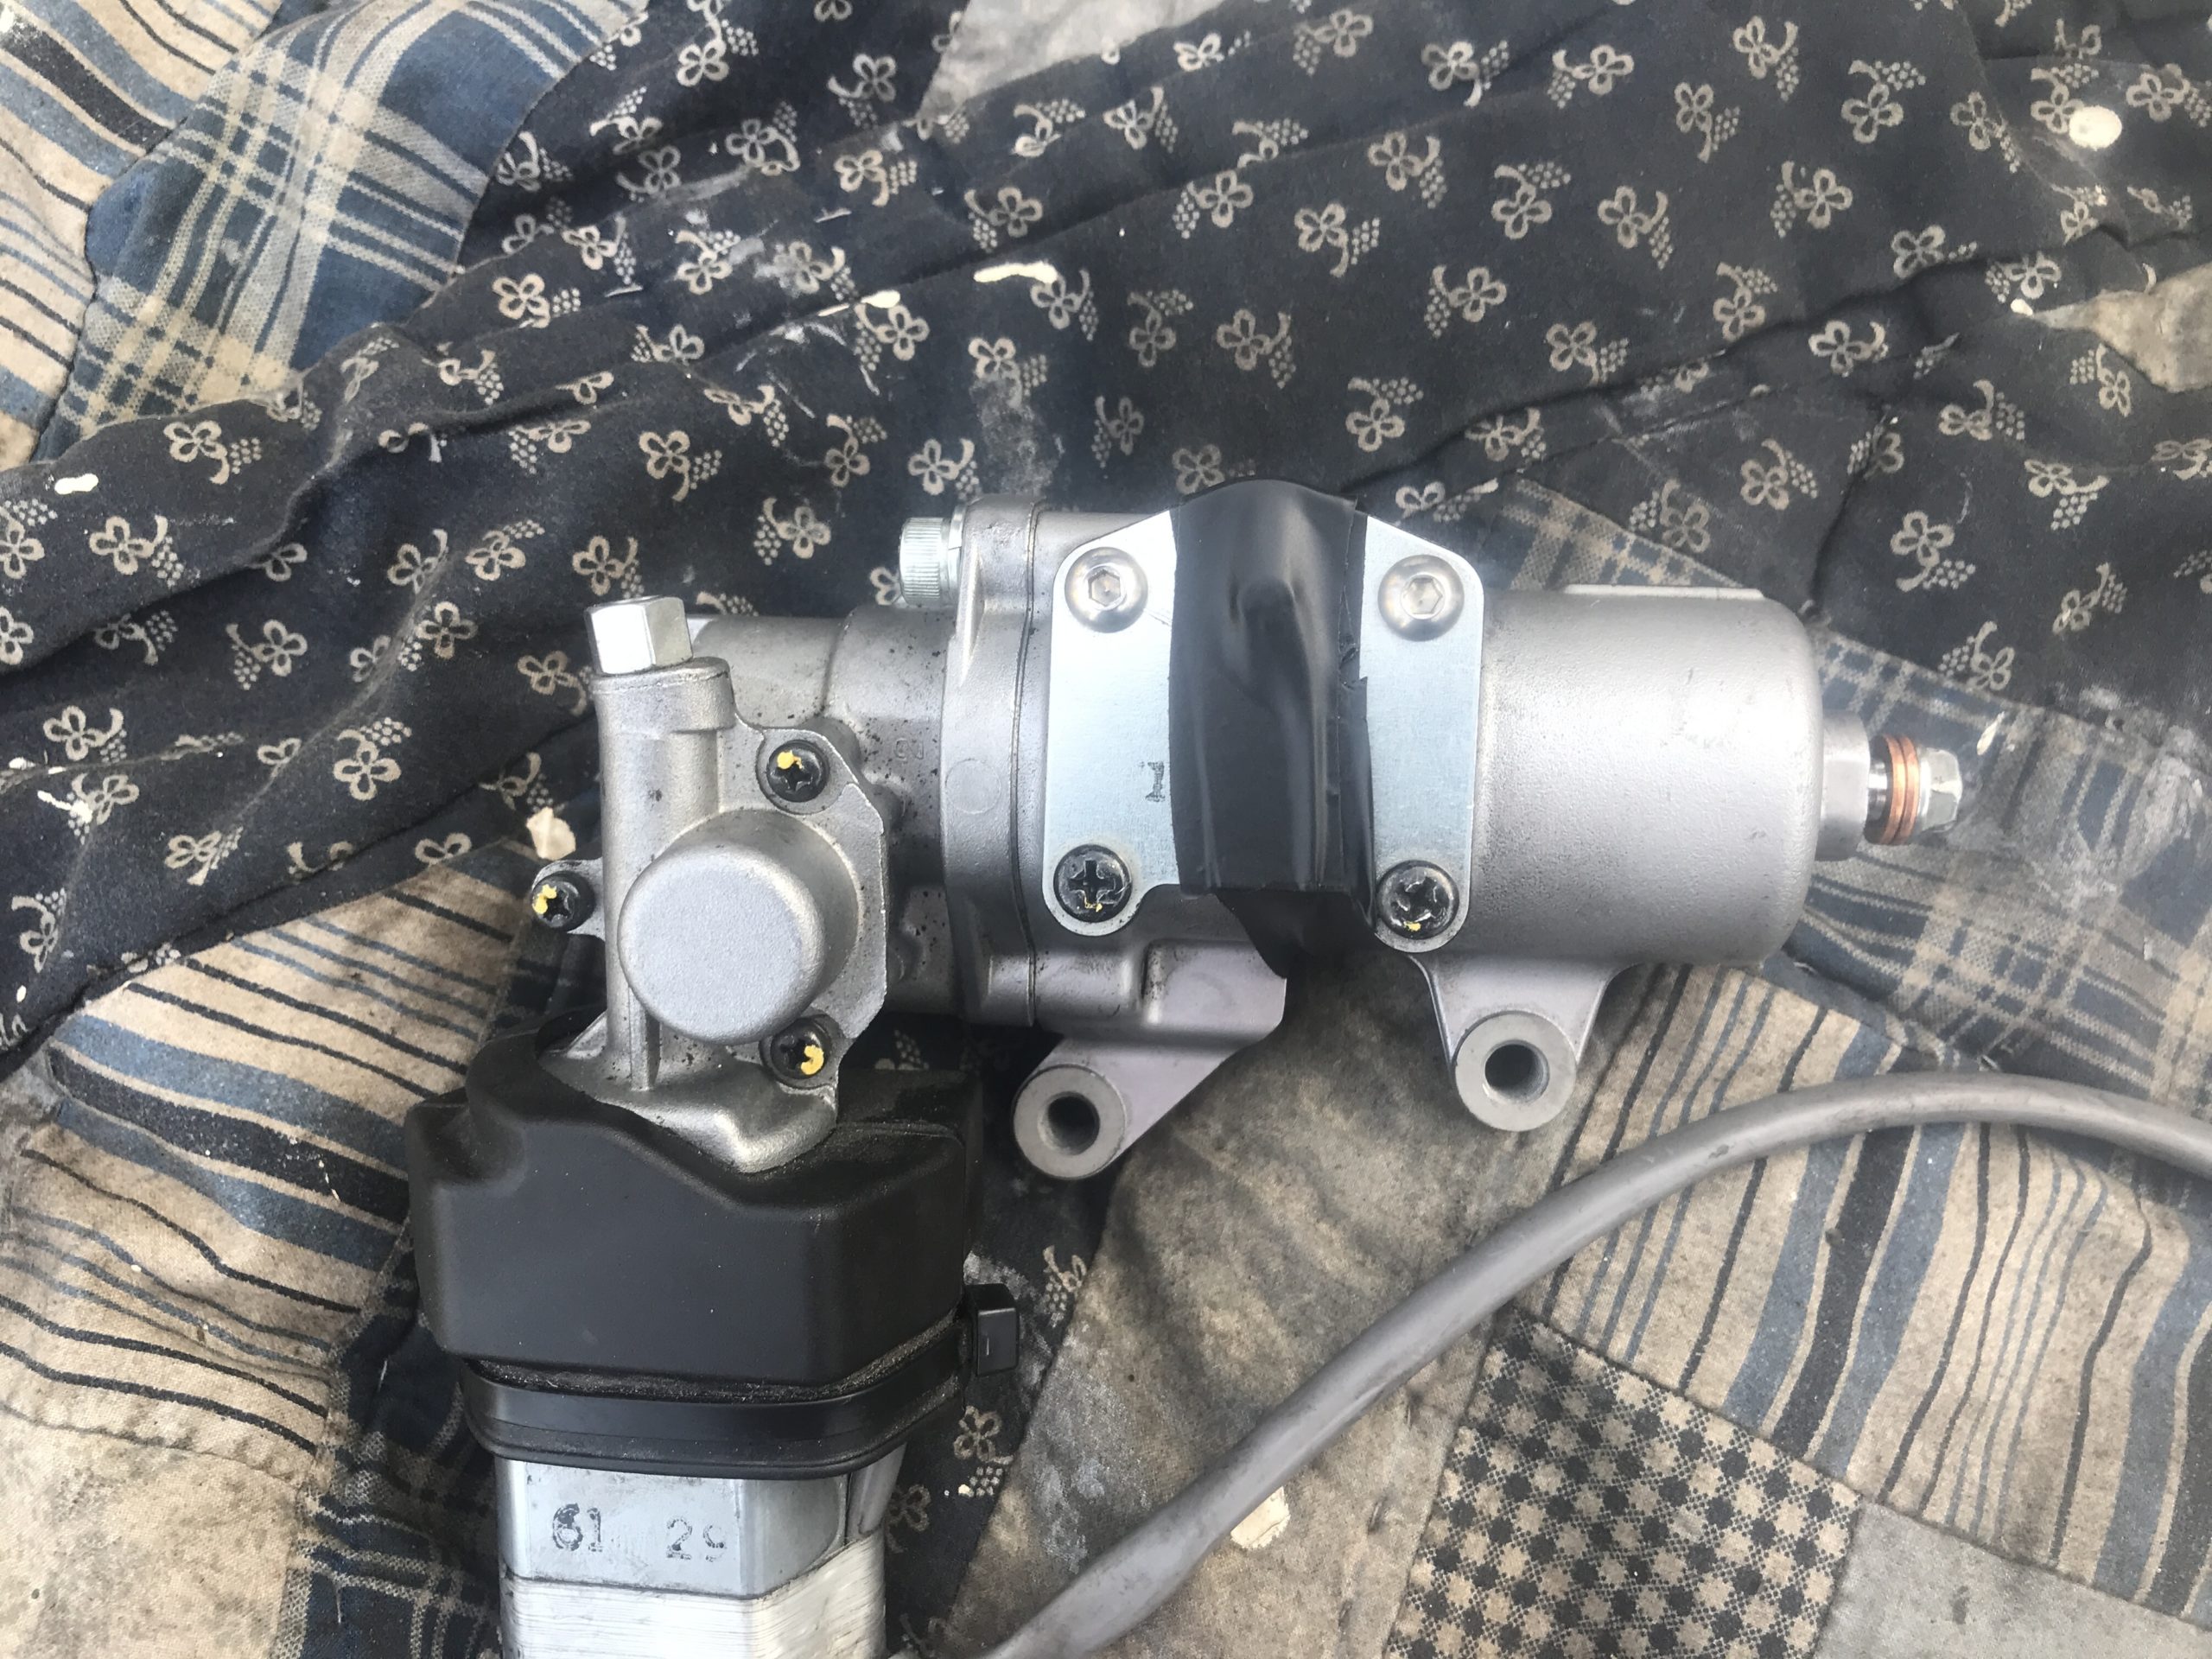
A RoadWing Shock is a Honda Goldwing GL1800 mono shock that has been modified and converted to fit on a Yamaha Road Star. This replacement to the stock shock adds to the weight capacity of the Road Star. In addition, the preload can be adjusted to increase the weight capacity. The shock also provides better stability, especially in the corners.
These directions assume you have a fully converted RoadWing. If you need one you can convert one yourself of reach out to me to have one built. There are links to their user profile on the Road Star Clinic group. You have to be a member to access it.
-
- Bill Kingsley – Facebook
- Bill Kingsley – RoadWing Request Form
It took me about three – four hours to install my shock. I took my time and made a trip to the store at least once. I did not remove the rear wheel. I installed it by myself, but it would have been easier, at times if I had a helper.
It would be a good idea to read through the entire instructions prior to beginning this upgrade so that you are familiar with all that it entails, so you will not be met by any surprises. I actually typed up most of these directions before I even started the replacement. This made it much easier to do the upgrade.
SIDENOTE: If you intend on lowering the bike then you may still bottom out, even with the RoadWing. A few guys who installed a RoadWing on their lowered Road Star have indicated that they still bottom out. Lowering the bike only gives you about 1/2″ of travel on the shock, which results in a prime condition for bottoming out.
Tools and supplies you will need
- Motorcycle Jack
- Vehicle Pump Jack
- Tie down strap
- 17mm deep well socket (1/2”)
- 17mm shallow well socket (3/8”)
- 10mm socket (3/8”) or wrench
- 1/2″ socket ratchet
- 1/2″ socket torque ratchet
- 3/8” socket ratchet
- 3/8” short socket extension
- Pipe to add to the end of the rachet (for leverage).
- 2mm allen wrench
- Penetrating Oil Spray
- Mat or padding to put on the ground to lay on.
- Work bench
- Fork Oil (5w) – I used Lucas Oil 10771 Fork Oil 16 oz.
- Lithium-soap-based grease – I used
- Permatex Anti-Seize Lubricant.
- Mechanics gloves
- Service Manual – Instructions for rear shock removal
- Videos – links can be found amidst the instructions (I have downloaded all of the videos referenced in case they ever get pulled down)
It is possible to perform this upgrade without the removing the rear tire. If you would prefer to remove it you may need to remove your exhaust as well, in order to access the bolts. Consult the repair manual for directions on how to remove it.
You should perform this upgrade on a flat level surface and give yourself plenty of room to work around the bike. Safety is of upmost concern for you and those working on the bike as well as the bike itself.
DIRECTIONS (Clicking on an image will enlarge it – You have to click the arrow in your browser to go back to the directions)
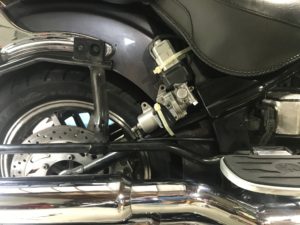
- Remove the rear horn using a 10mm socket or wrench. The horn is on the left side of the bike behind the floorboard.

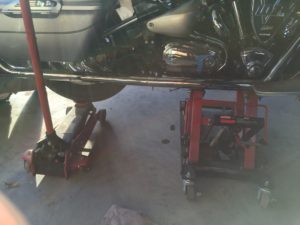
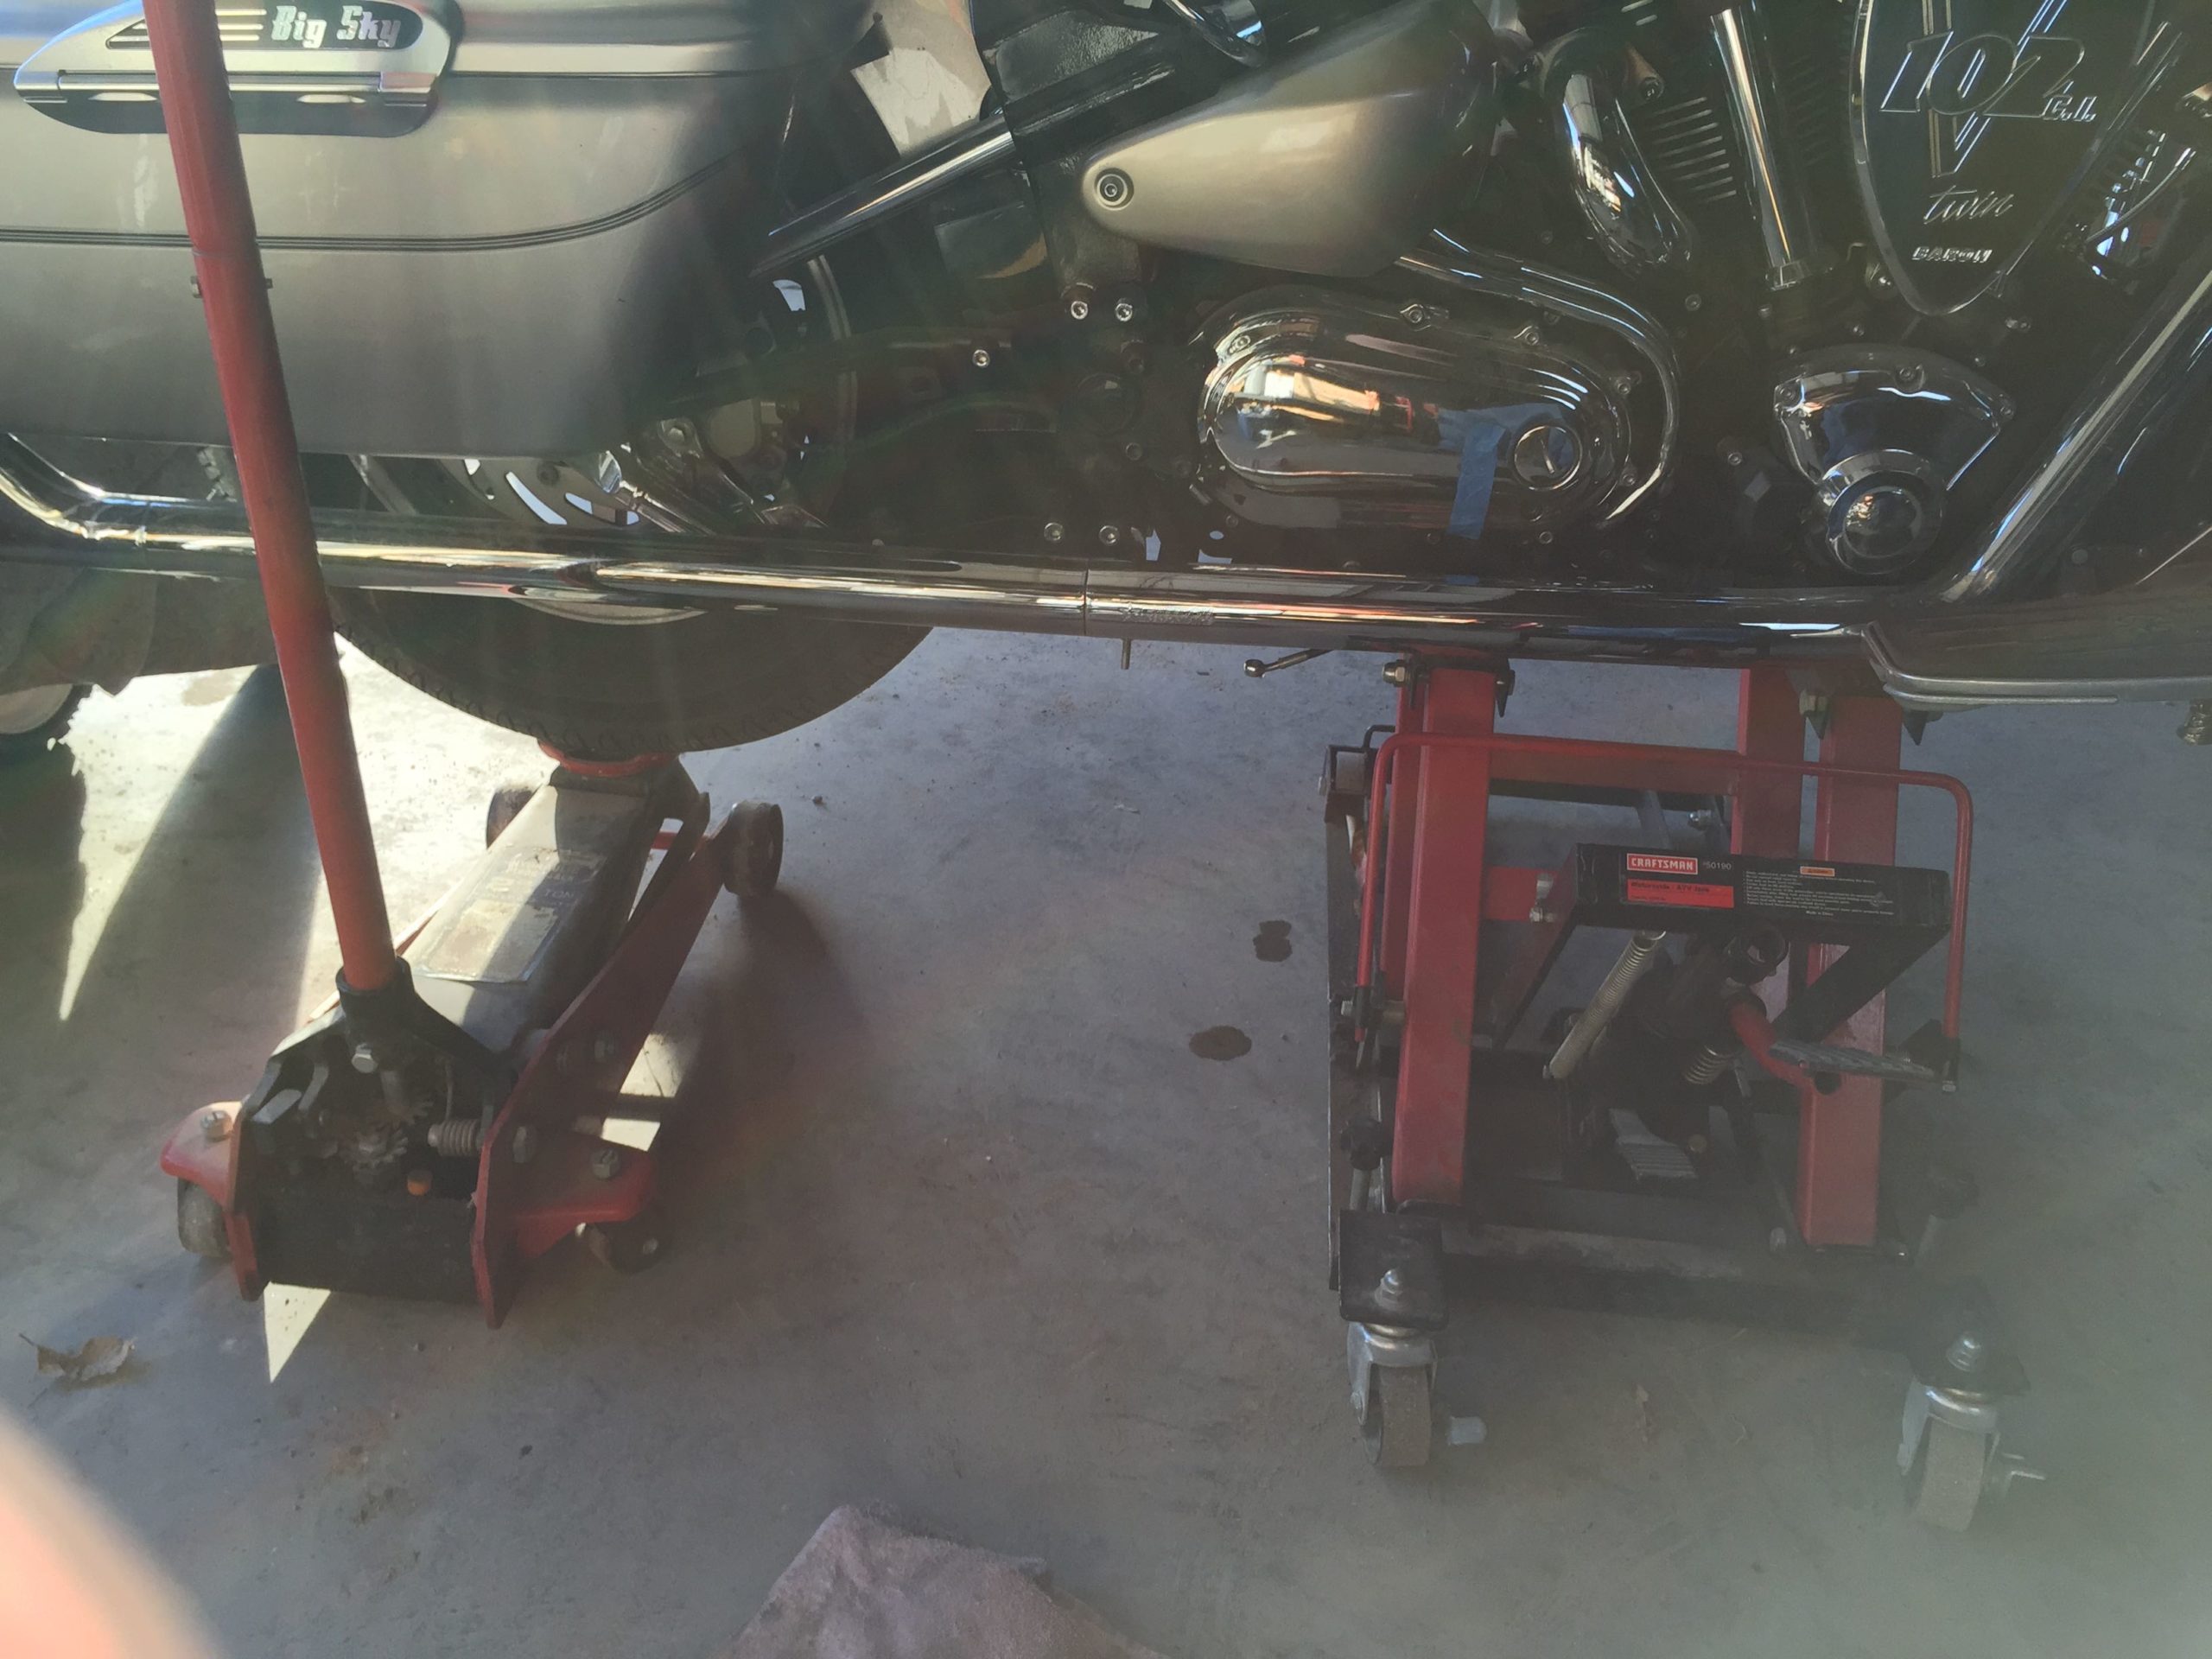
- Lift the bike: position your motorcycle jack as far forward under the bike, on the frame as you can so that the bike will still balance. You want to be able to access the front shock mount so positioning it forward will aid in this endeavor and keep the access point clear. You can use tie down straps to secure the bike so that it does not tip over. Either tie it down to the jack or if you are in a building you can secure it to the structure.
Credit: Tyke’s Place 
I actually ended up raising the bike higher and removing the seat. I strapped it down again and it was solid for the upgrade. - Stabilize the wheels. Support the front wheel as needed. Using your vehicle pump jack or bottle jack, lift and support the rear wheel so that it takes tension off the shock. There is a balance to this so be careful not to jolt the bike when moving through the following steps. I found that I had to raise my bike in order to get the right balance using the rear jack to remove/install the bolts that hold the shock in place.
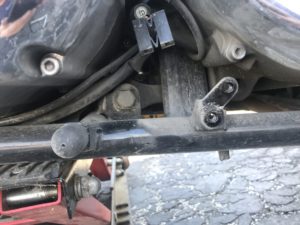
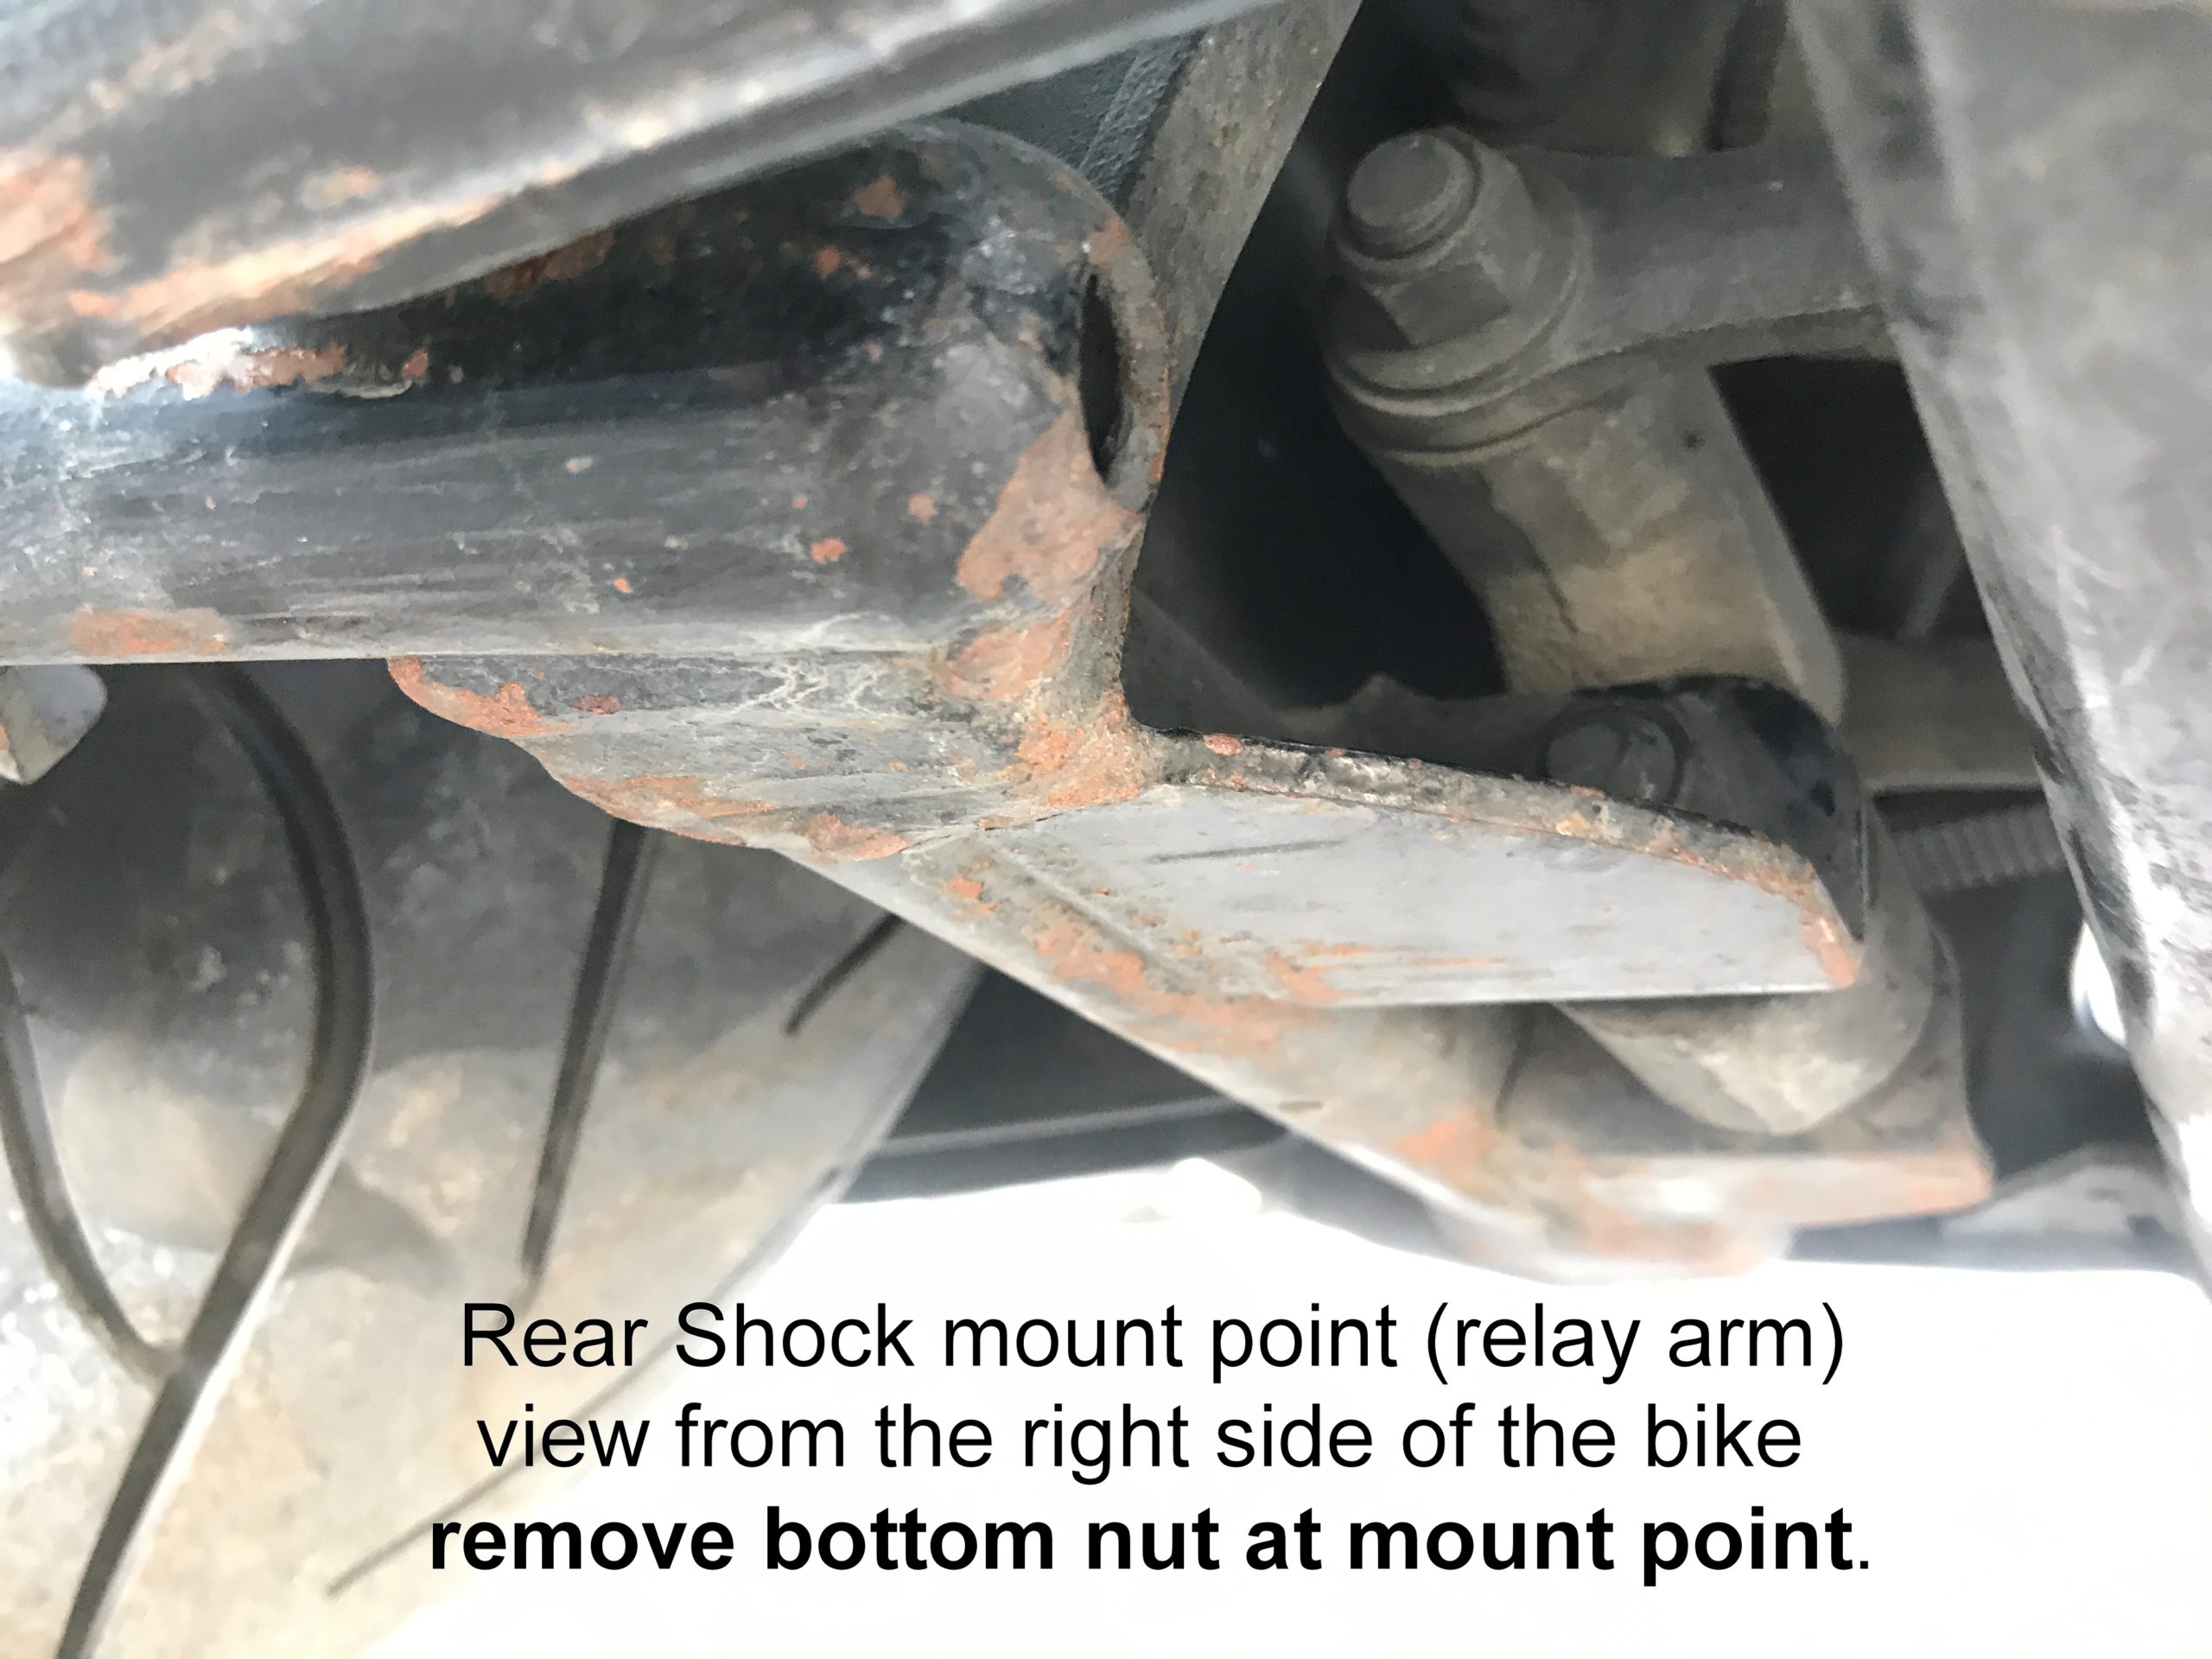
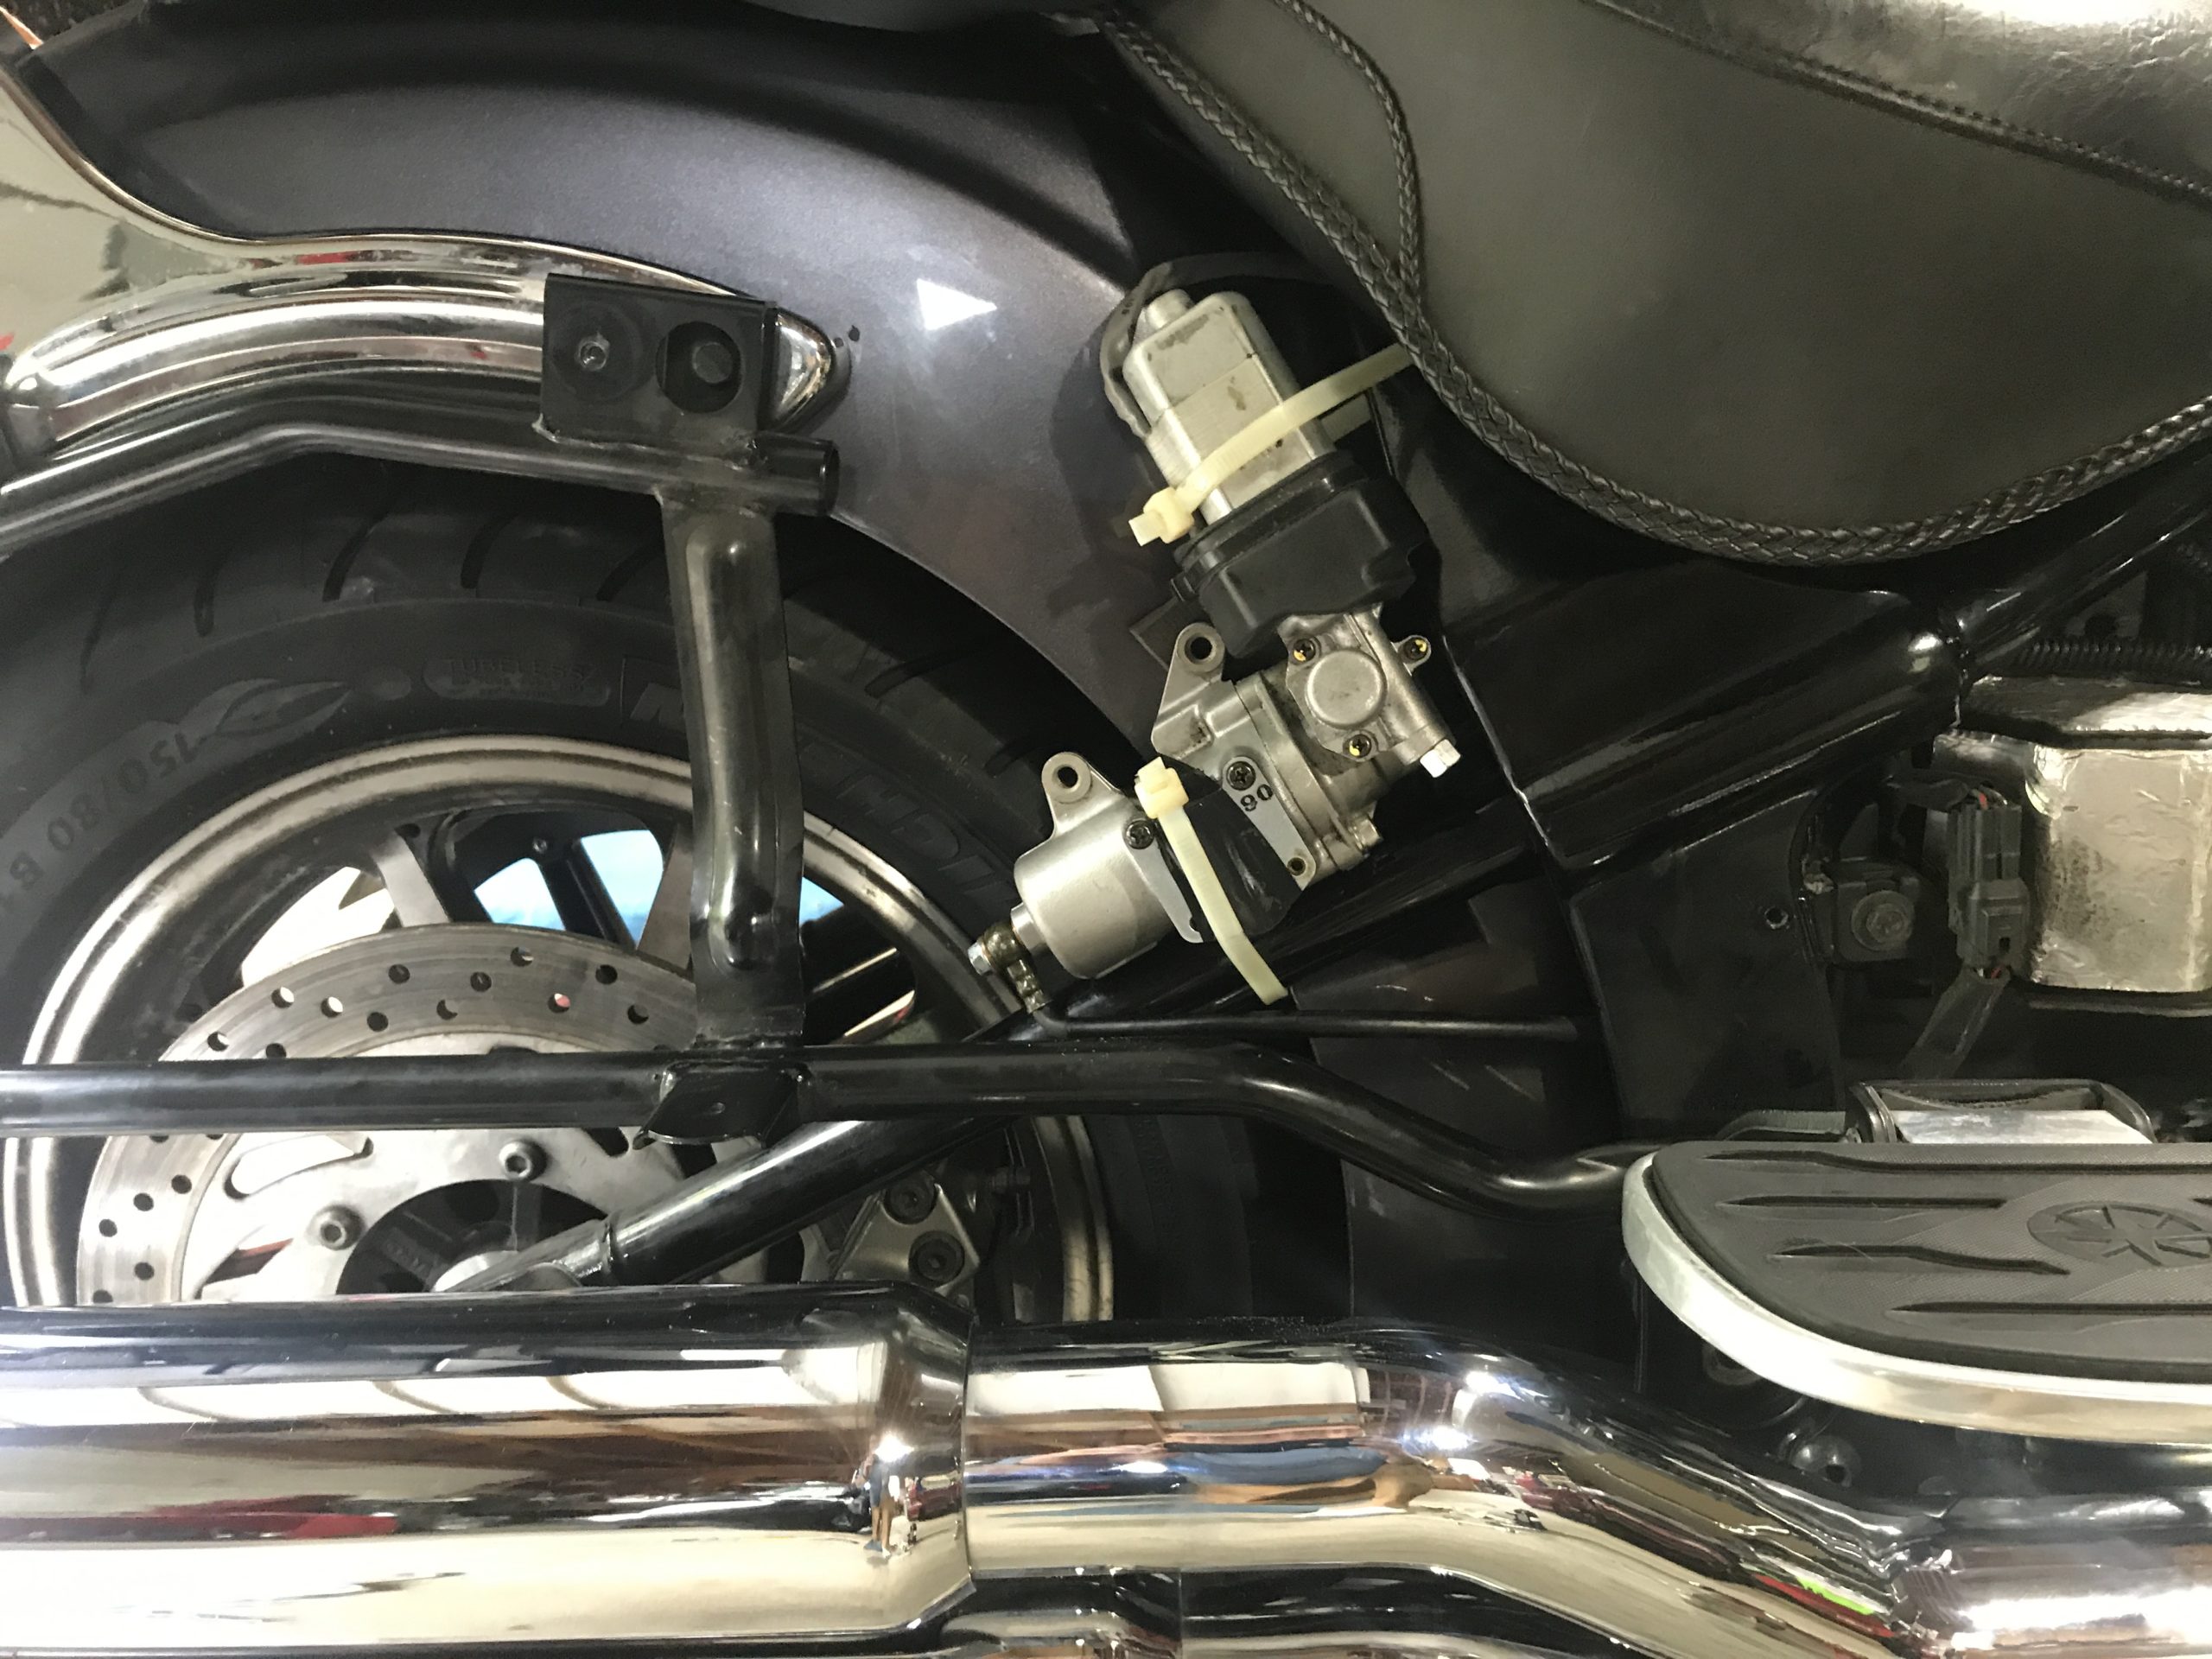
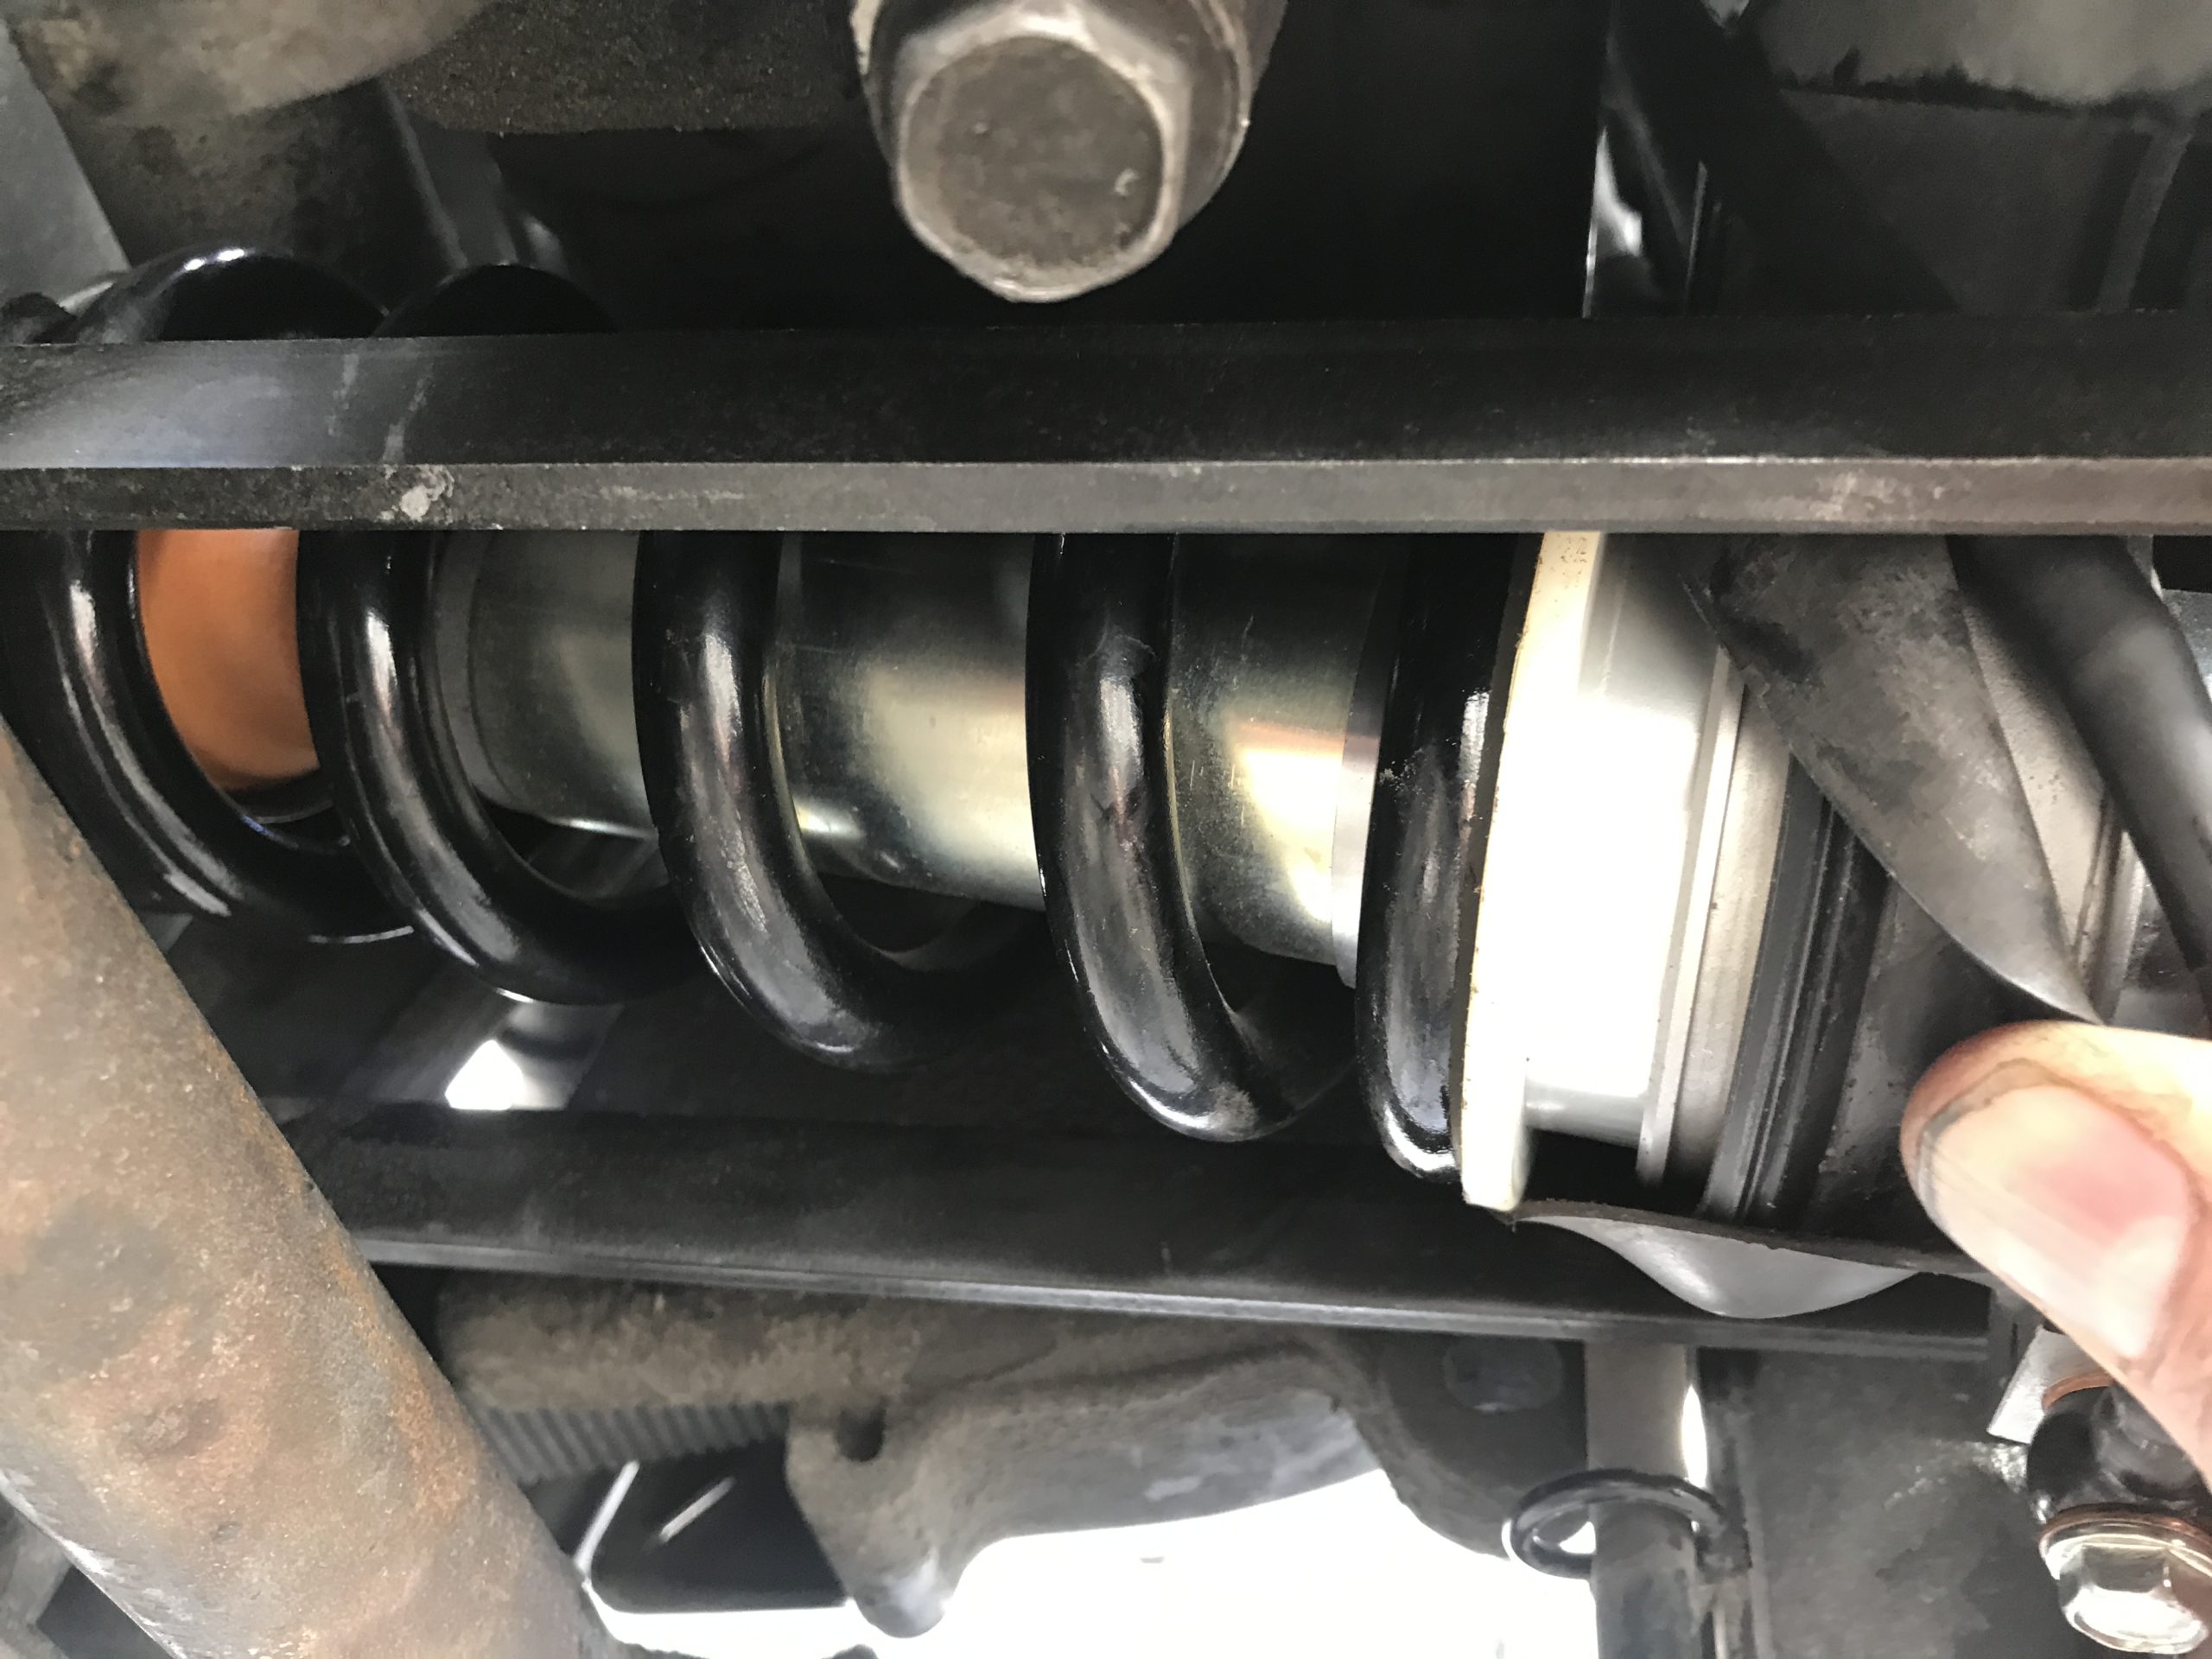
- Locate the rear mount point and the front mount point of the shock assembly. There are 17mm nuts on the right side of the bike. Using the sockets and socket wrenches you can remove the nuts (leaving the bolts in for now). You will have to access them from the side. It is not possible to get a wrench in there. I used the deep well for the front, but the back required that I use a shallow well socket with a short extension. I couldn’t fit the head of my my 1/2″ rachet in their so I had to use a 3/8” rachet. The rear bolt was on pretty tight. Not sure if the previous owner ever had work done to it but that nut was hard to get started. I sprayed some penetrating oil on it and let it sit. Leverage will be key.

Credit: Tyke’s Place - While supporting the shock, remove the rear bolt and then remove the front bolt. You may need a helper to remove some of the pressure on the shock from the jack under the rear tire. Tommy Hampton shot a video with explanation as seen below. I used a long screwdriver and a hammer to lightly tap out the bolts from the right side. The shock should roll forward and fall out. The dog bones should still be secured to the shock collar but keep an eye on them as you pull it out, just in case.
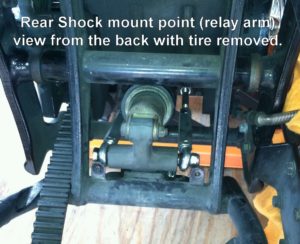
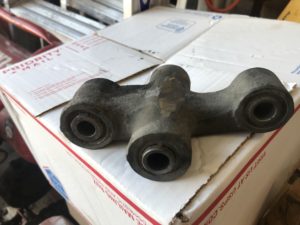
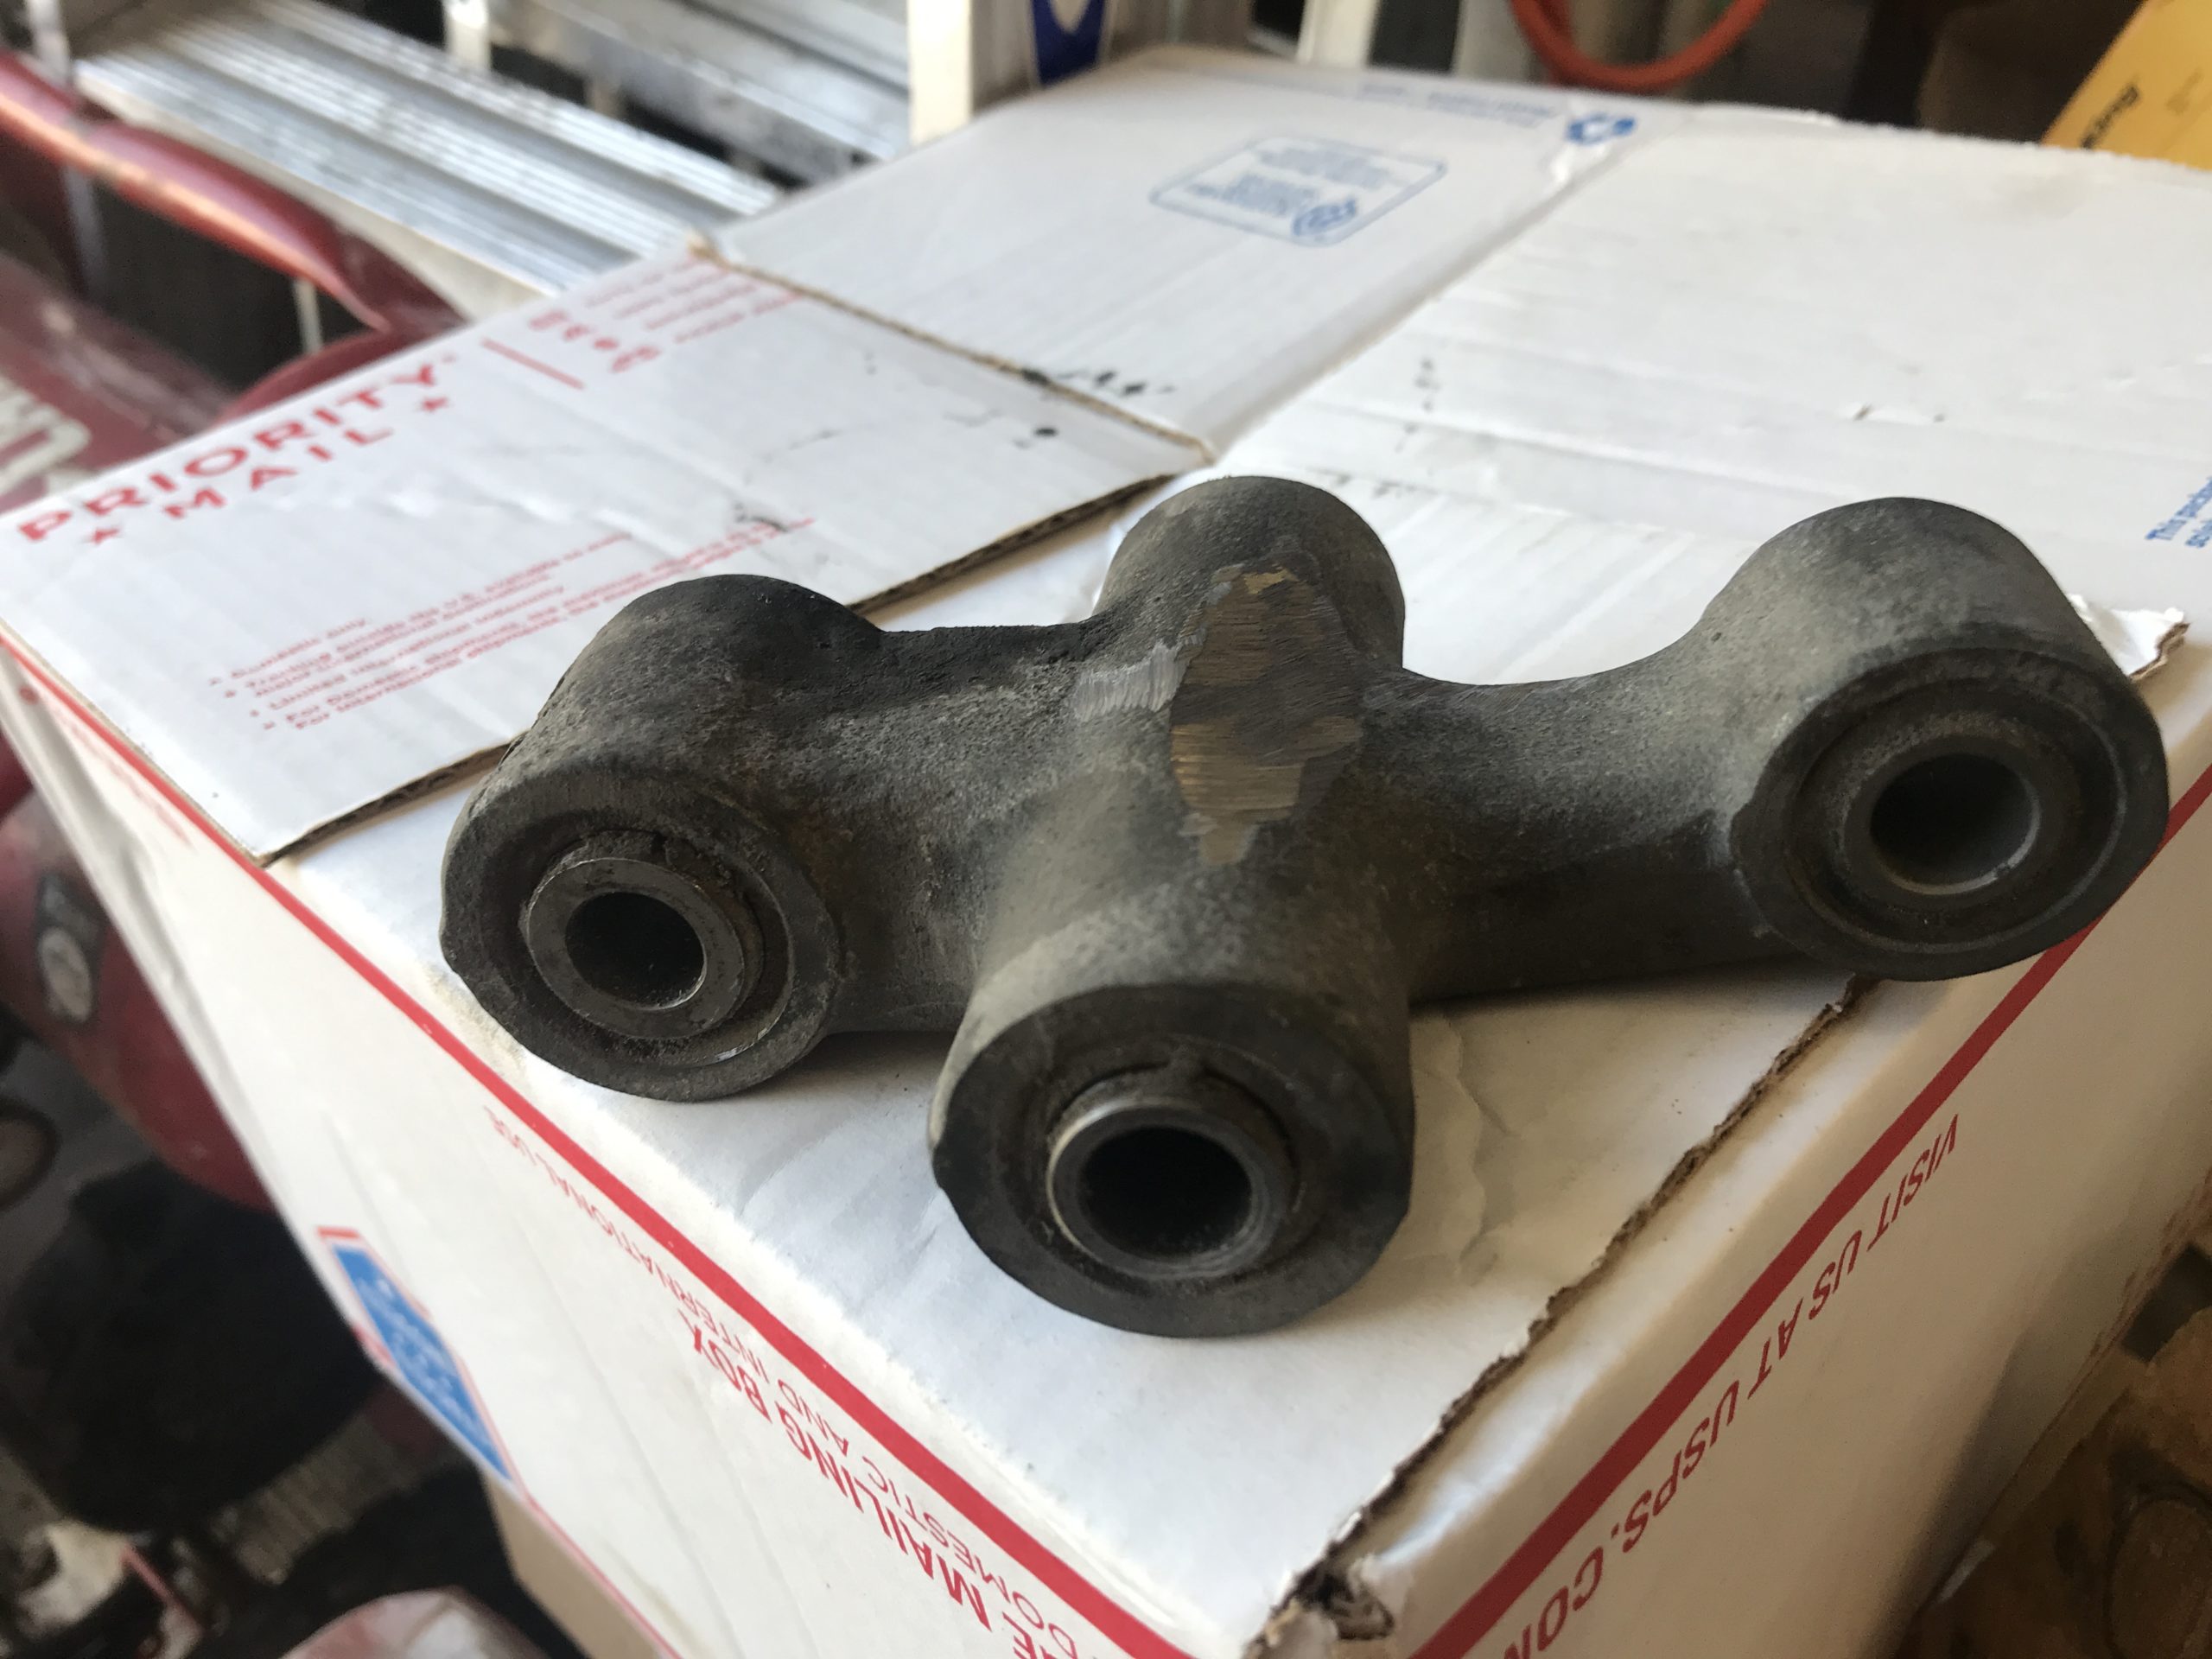
- Once it is out you can remove the nut and bolt that hold the shock to the relay arm. You will need a ratchet for each side this time. Next remove the dog bones from the relay arm and then pull the dog bones off the collar where it connects to the front of the shock.
- Before you put the RoadWing on you may need to modify (grind) your relay arm so that the RoadWing will fit properly. You will want to grand a small area near the top middle of the inside of the relay arm where it intersects on the pivot. These videos should prove helpful to explain the need.
BEFORE GRIND
AFTER GRIND
Credit: Kris Koehler 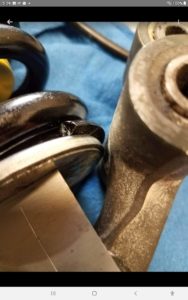
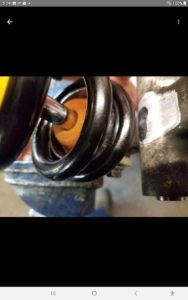
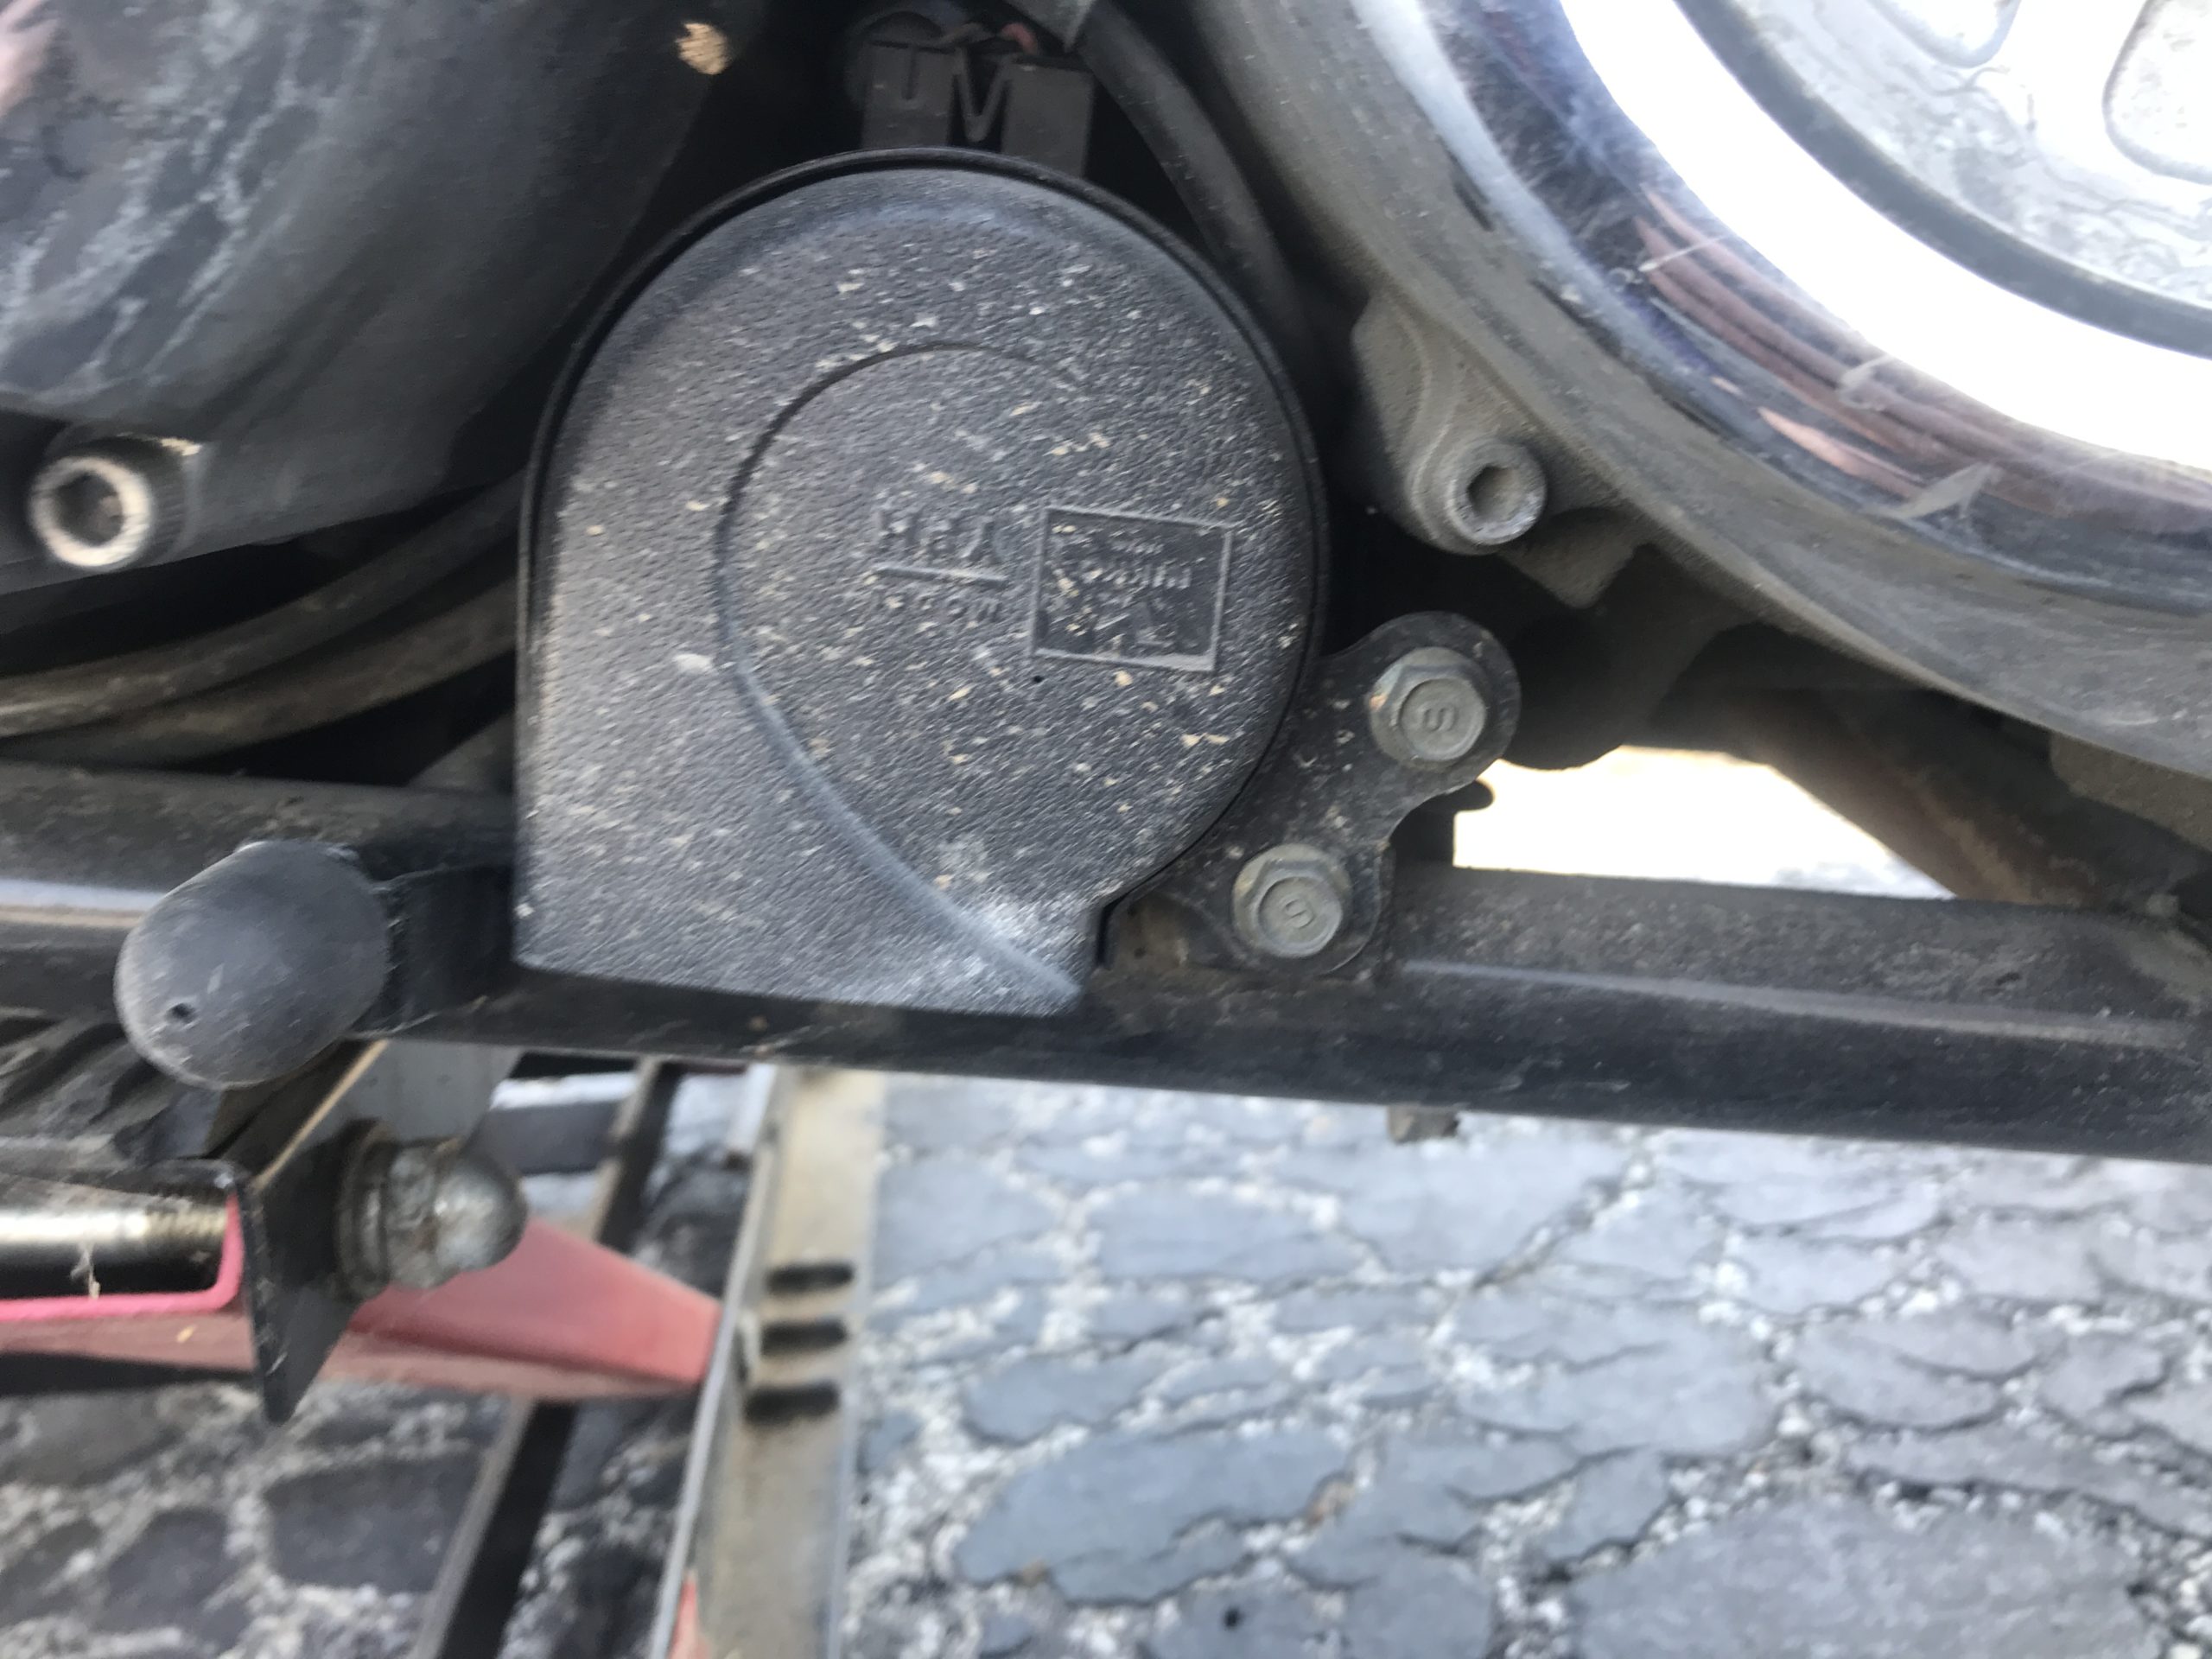
Credit: Kris Koehler - Prior to installing the RoadWing to the relay arm you will want to ensure that the position of the hose connection is where you want it. There is a tiny allen set screw (2mm) that can be loosened so that you can rotate the slave cylinder to position the hose connection. I found it easiest to position it so the hose comes out of the bottom side so that I had access when the shock is installed.
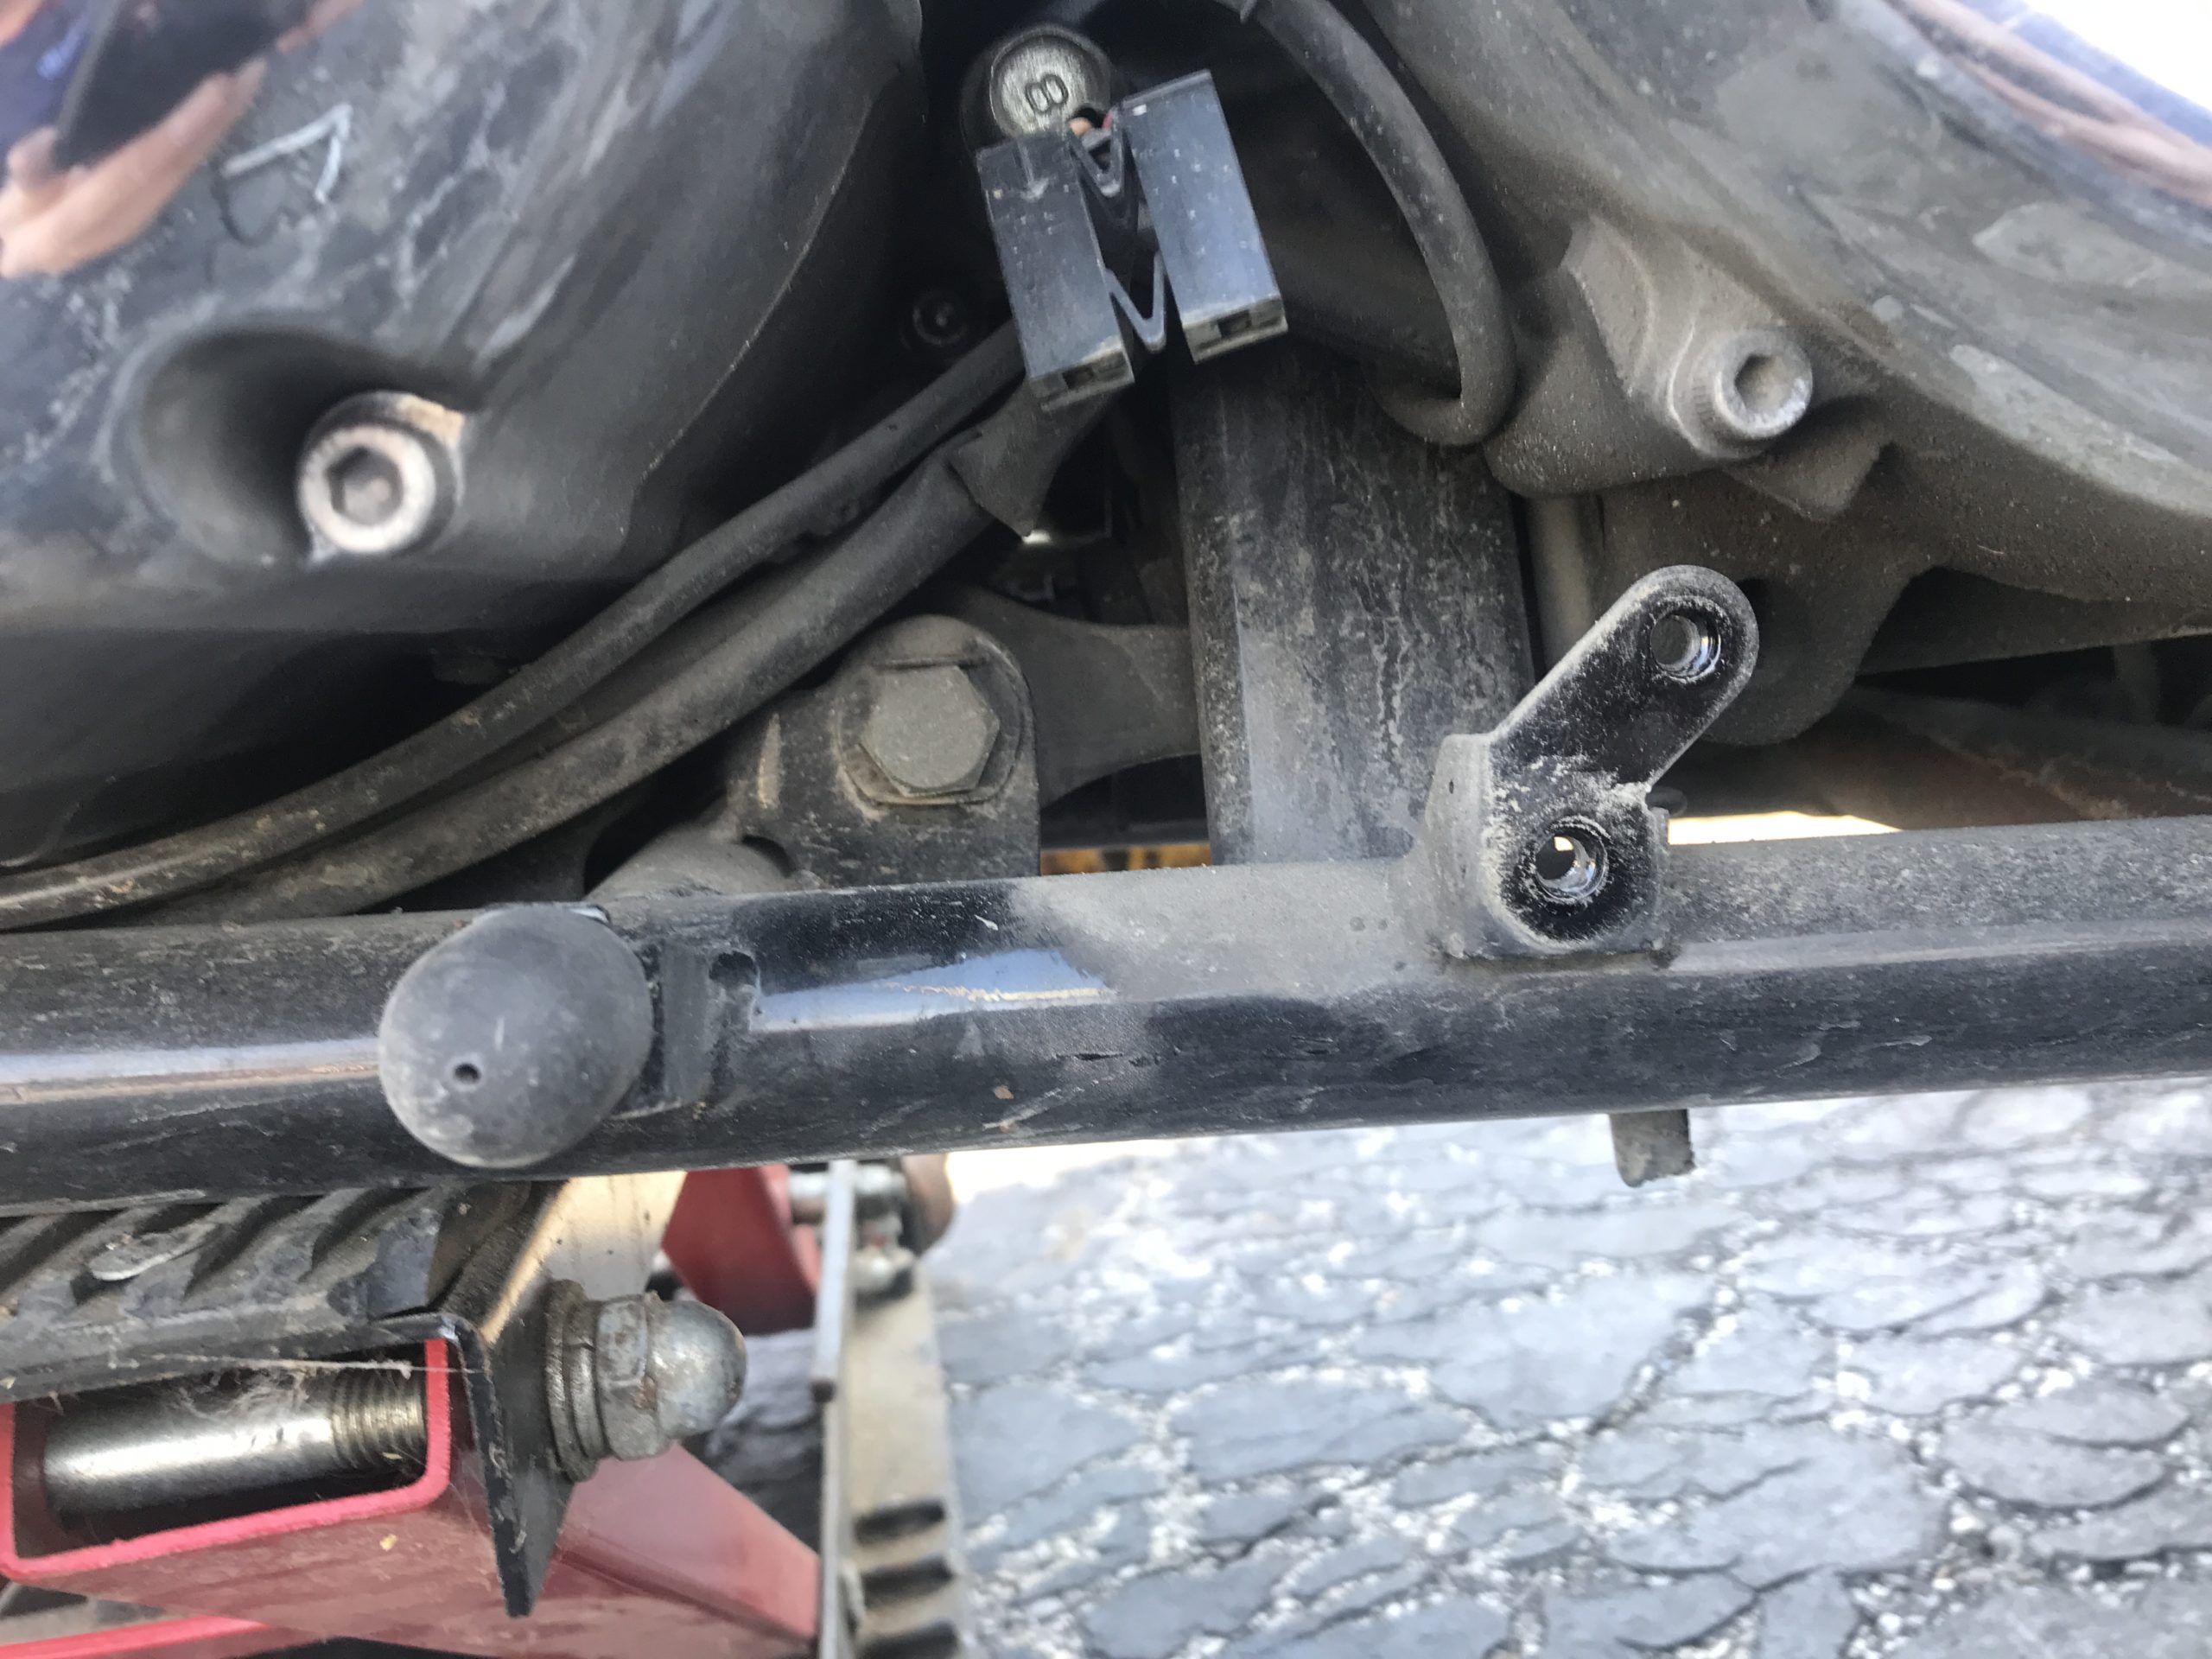
- The shock collar connects to the front side of the dog-bones and the flange connects to the top of the relay arm. I suggest you clean up the bolts and the rod that goes through the shock collar connecting the dog bones and use some Permatex Anti-Seize Lubricant on them. You may have to grind a little off the inside of the bushings on the shock collar in order to slide the rod through (I did)). The bolt that connects the back of the shock to the relay arm should go in from the left side. The manual indicates that the torque specification for the bolt and nut holding the flange to the relay as 29 ft lb. (don’t forget the washer). The bolt that connects the dog bones to the relay arm should go in from the left also. The manual indicates that the torque specification for the bolts and nuts holding the dog bones to the relay arm as 43 ft lb. (don’t forget the washer).
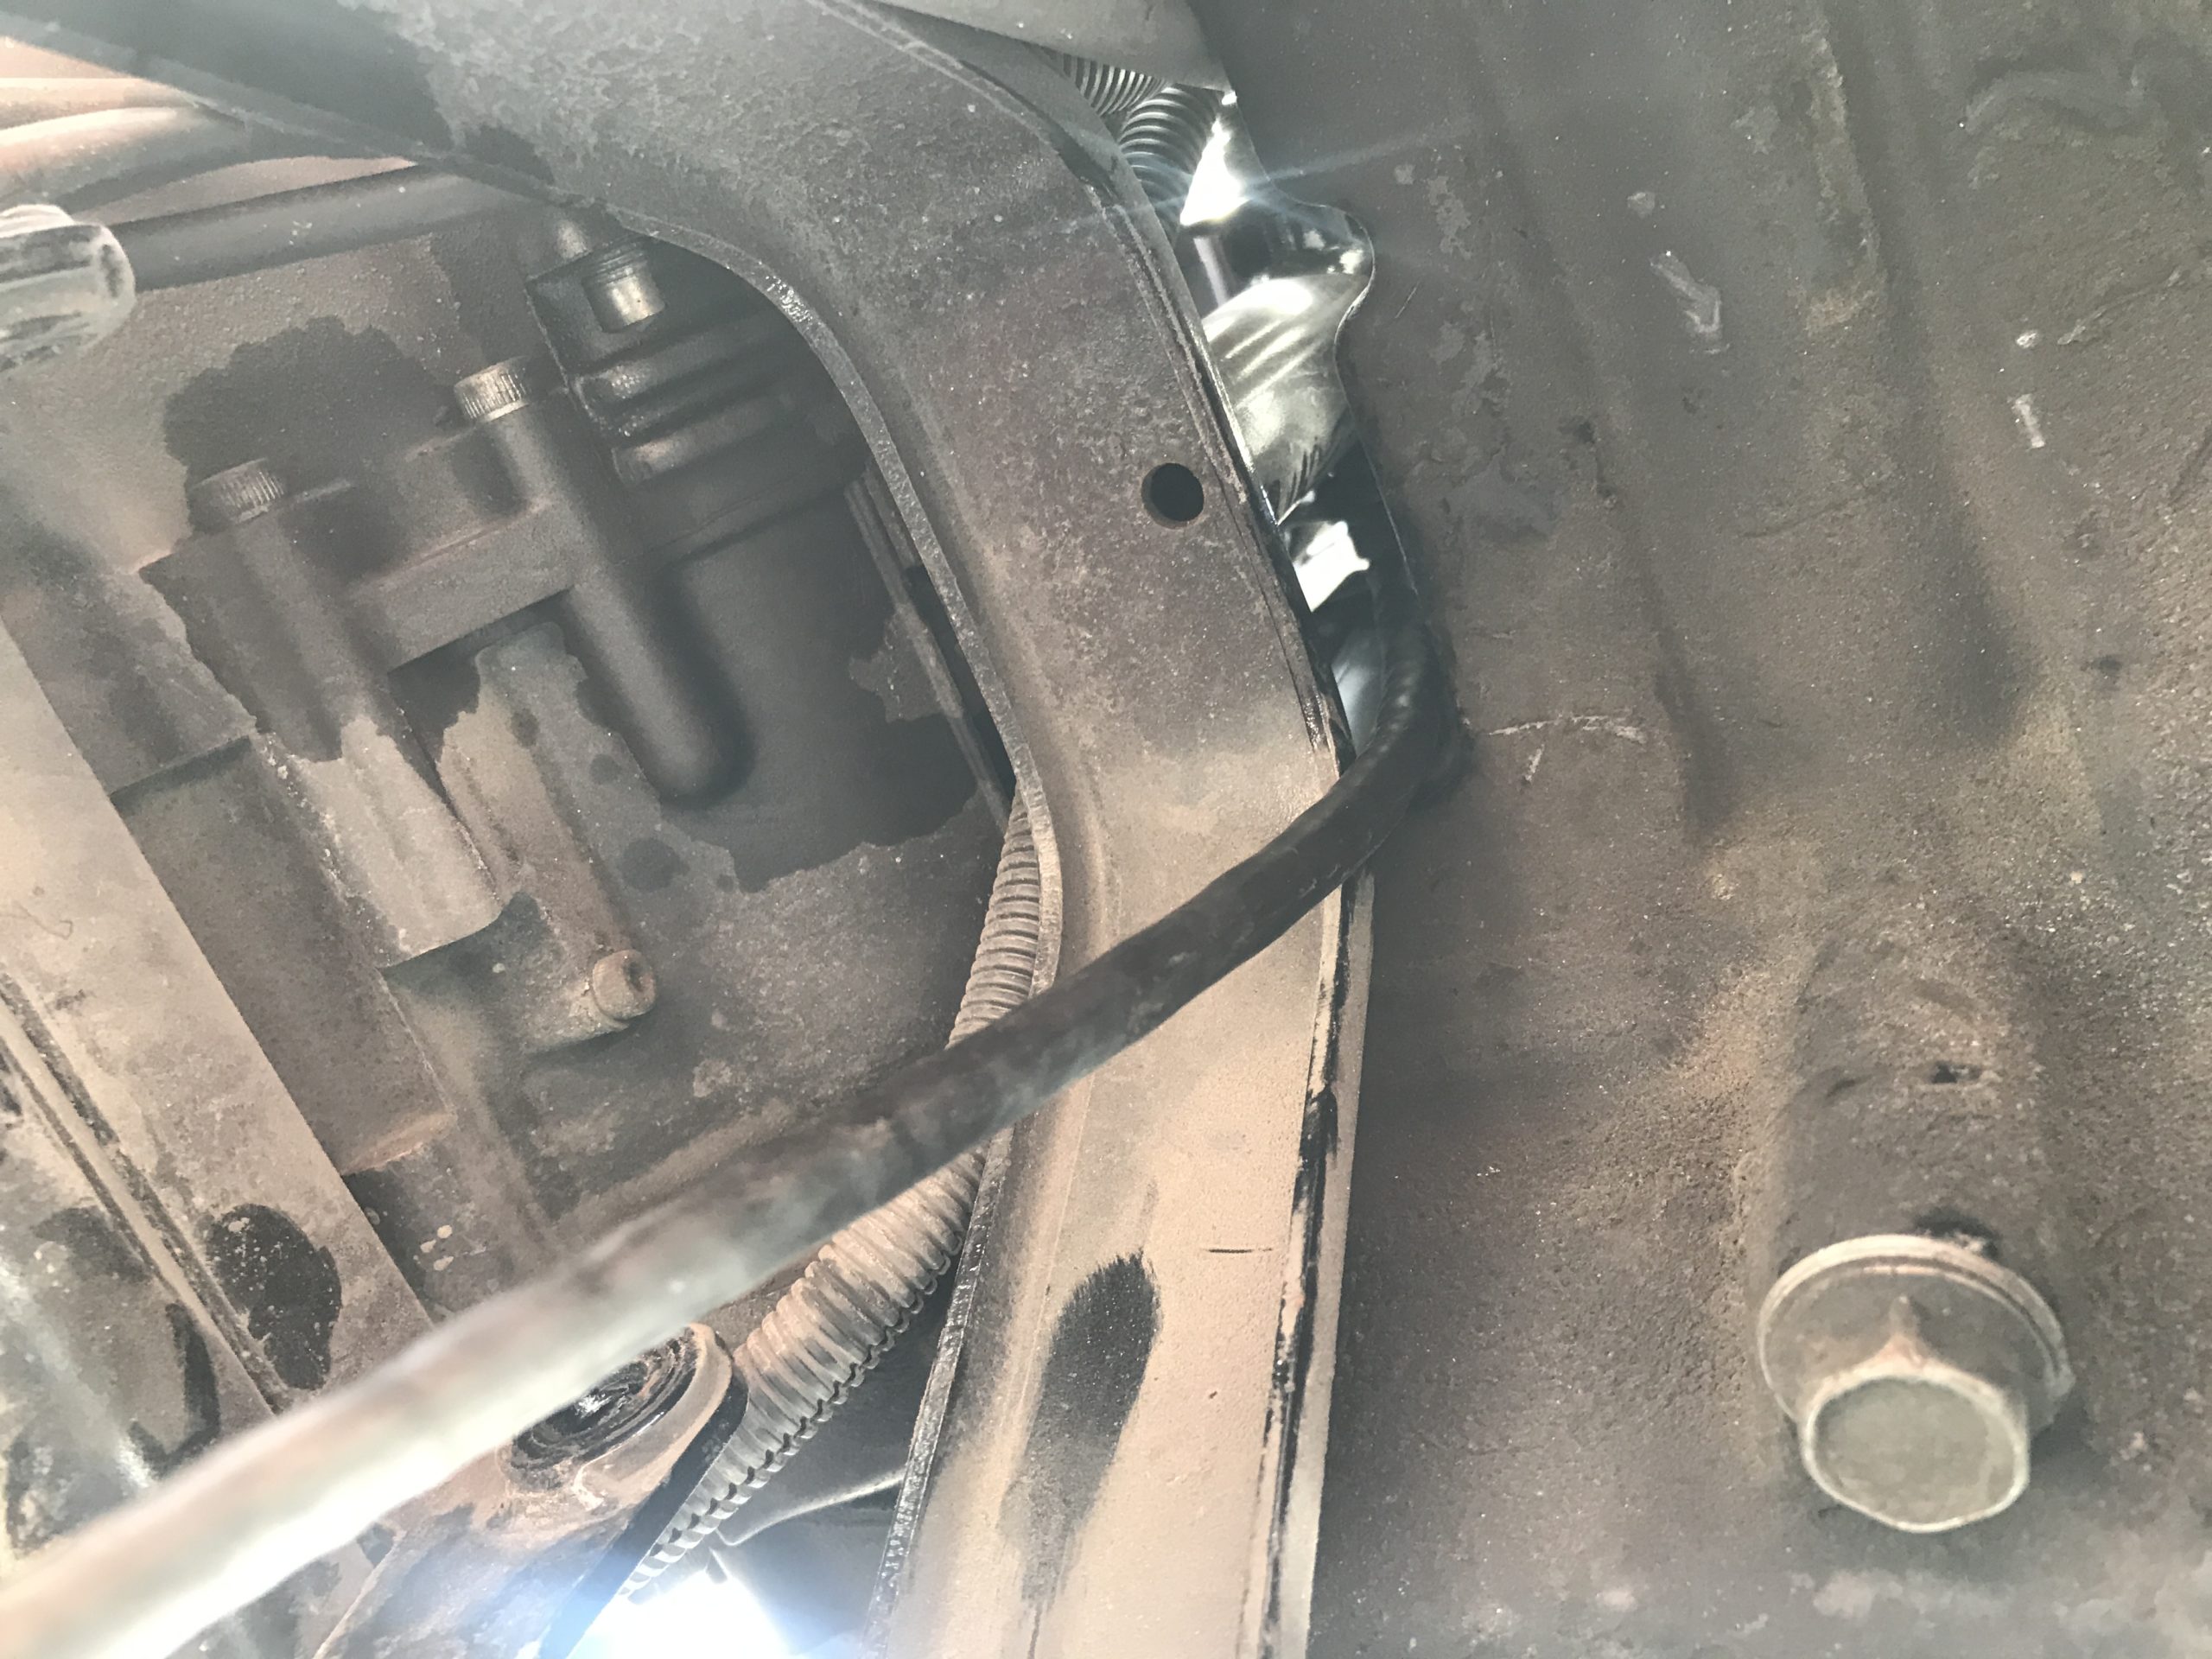
Credit Tyke’s Place - Place the shock assembly under the bike to begin install. In order to install it on the bike you will need to disconnect the hose. I found it best to remove it from the pump or RAP and then fish it up through the frame, etc. to where you will place your pump/RAP. You will want to secure the copper washers. Be sure to keep the hose in a position so you will lose as little fluid as possible. You could use tape to cap it off. I fished the hose up through the opening as seen in the picture below. I used the original Honda pump so it comes out in an area where I will place the pump (see below).
I ran the hose towards the front so it could accommodate placing the electric RAP under the right side-cover. This only works on the 99-07 model. - When mounting the relay arm and the front of the shock, the bolts should be fed in on the left side. I suggest you apply some Permatex Anti-Seize Lubricant on the bolts. The manual indicates that the torque specification for the bolts and nuts holding the relay arm and the front of the shock to the frame as 43 ft lb. (don’t forget the washer in the back only – front nut has a shoulder). You should torque them down after the bike is back on the ground.
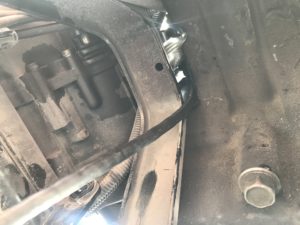
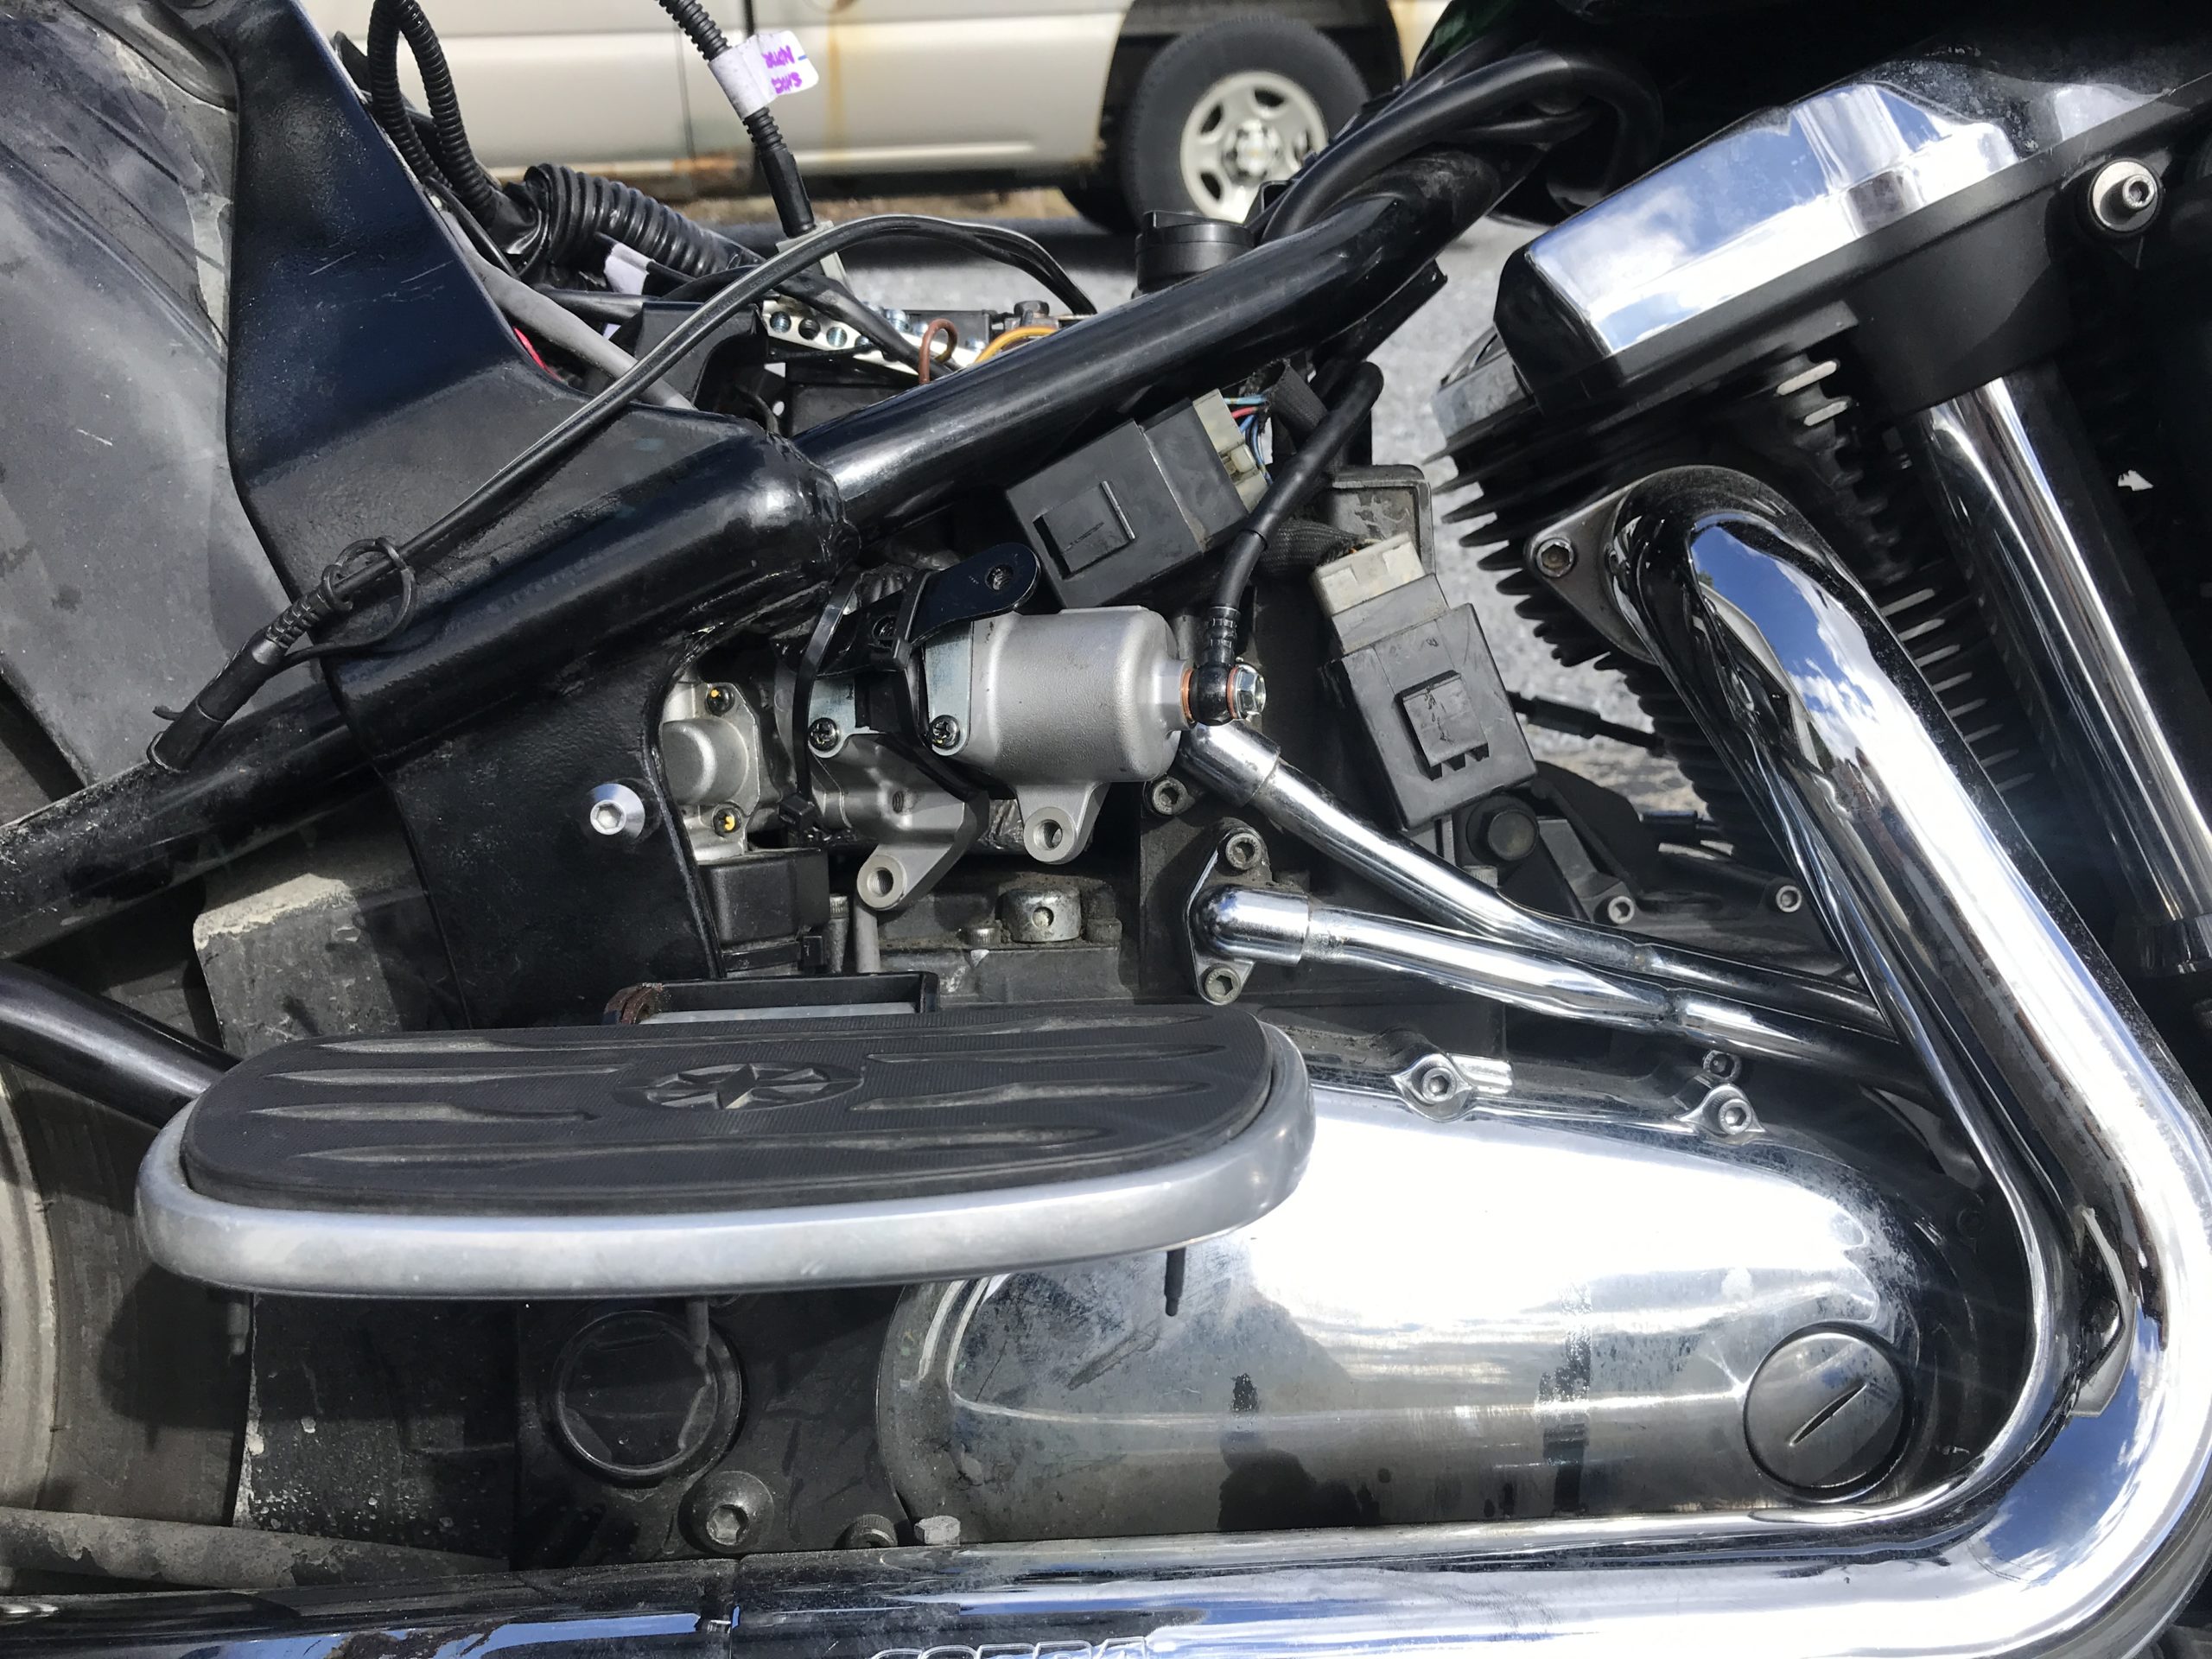
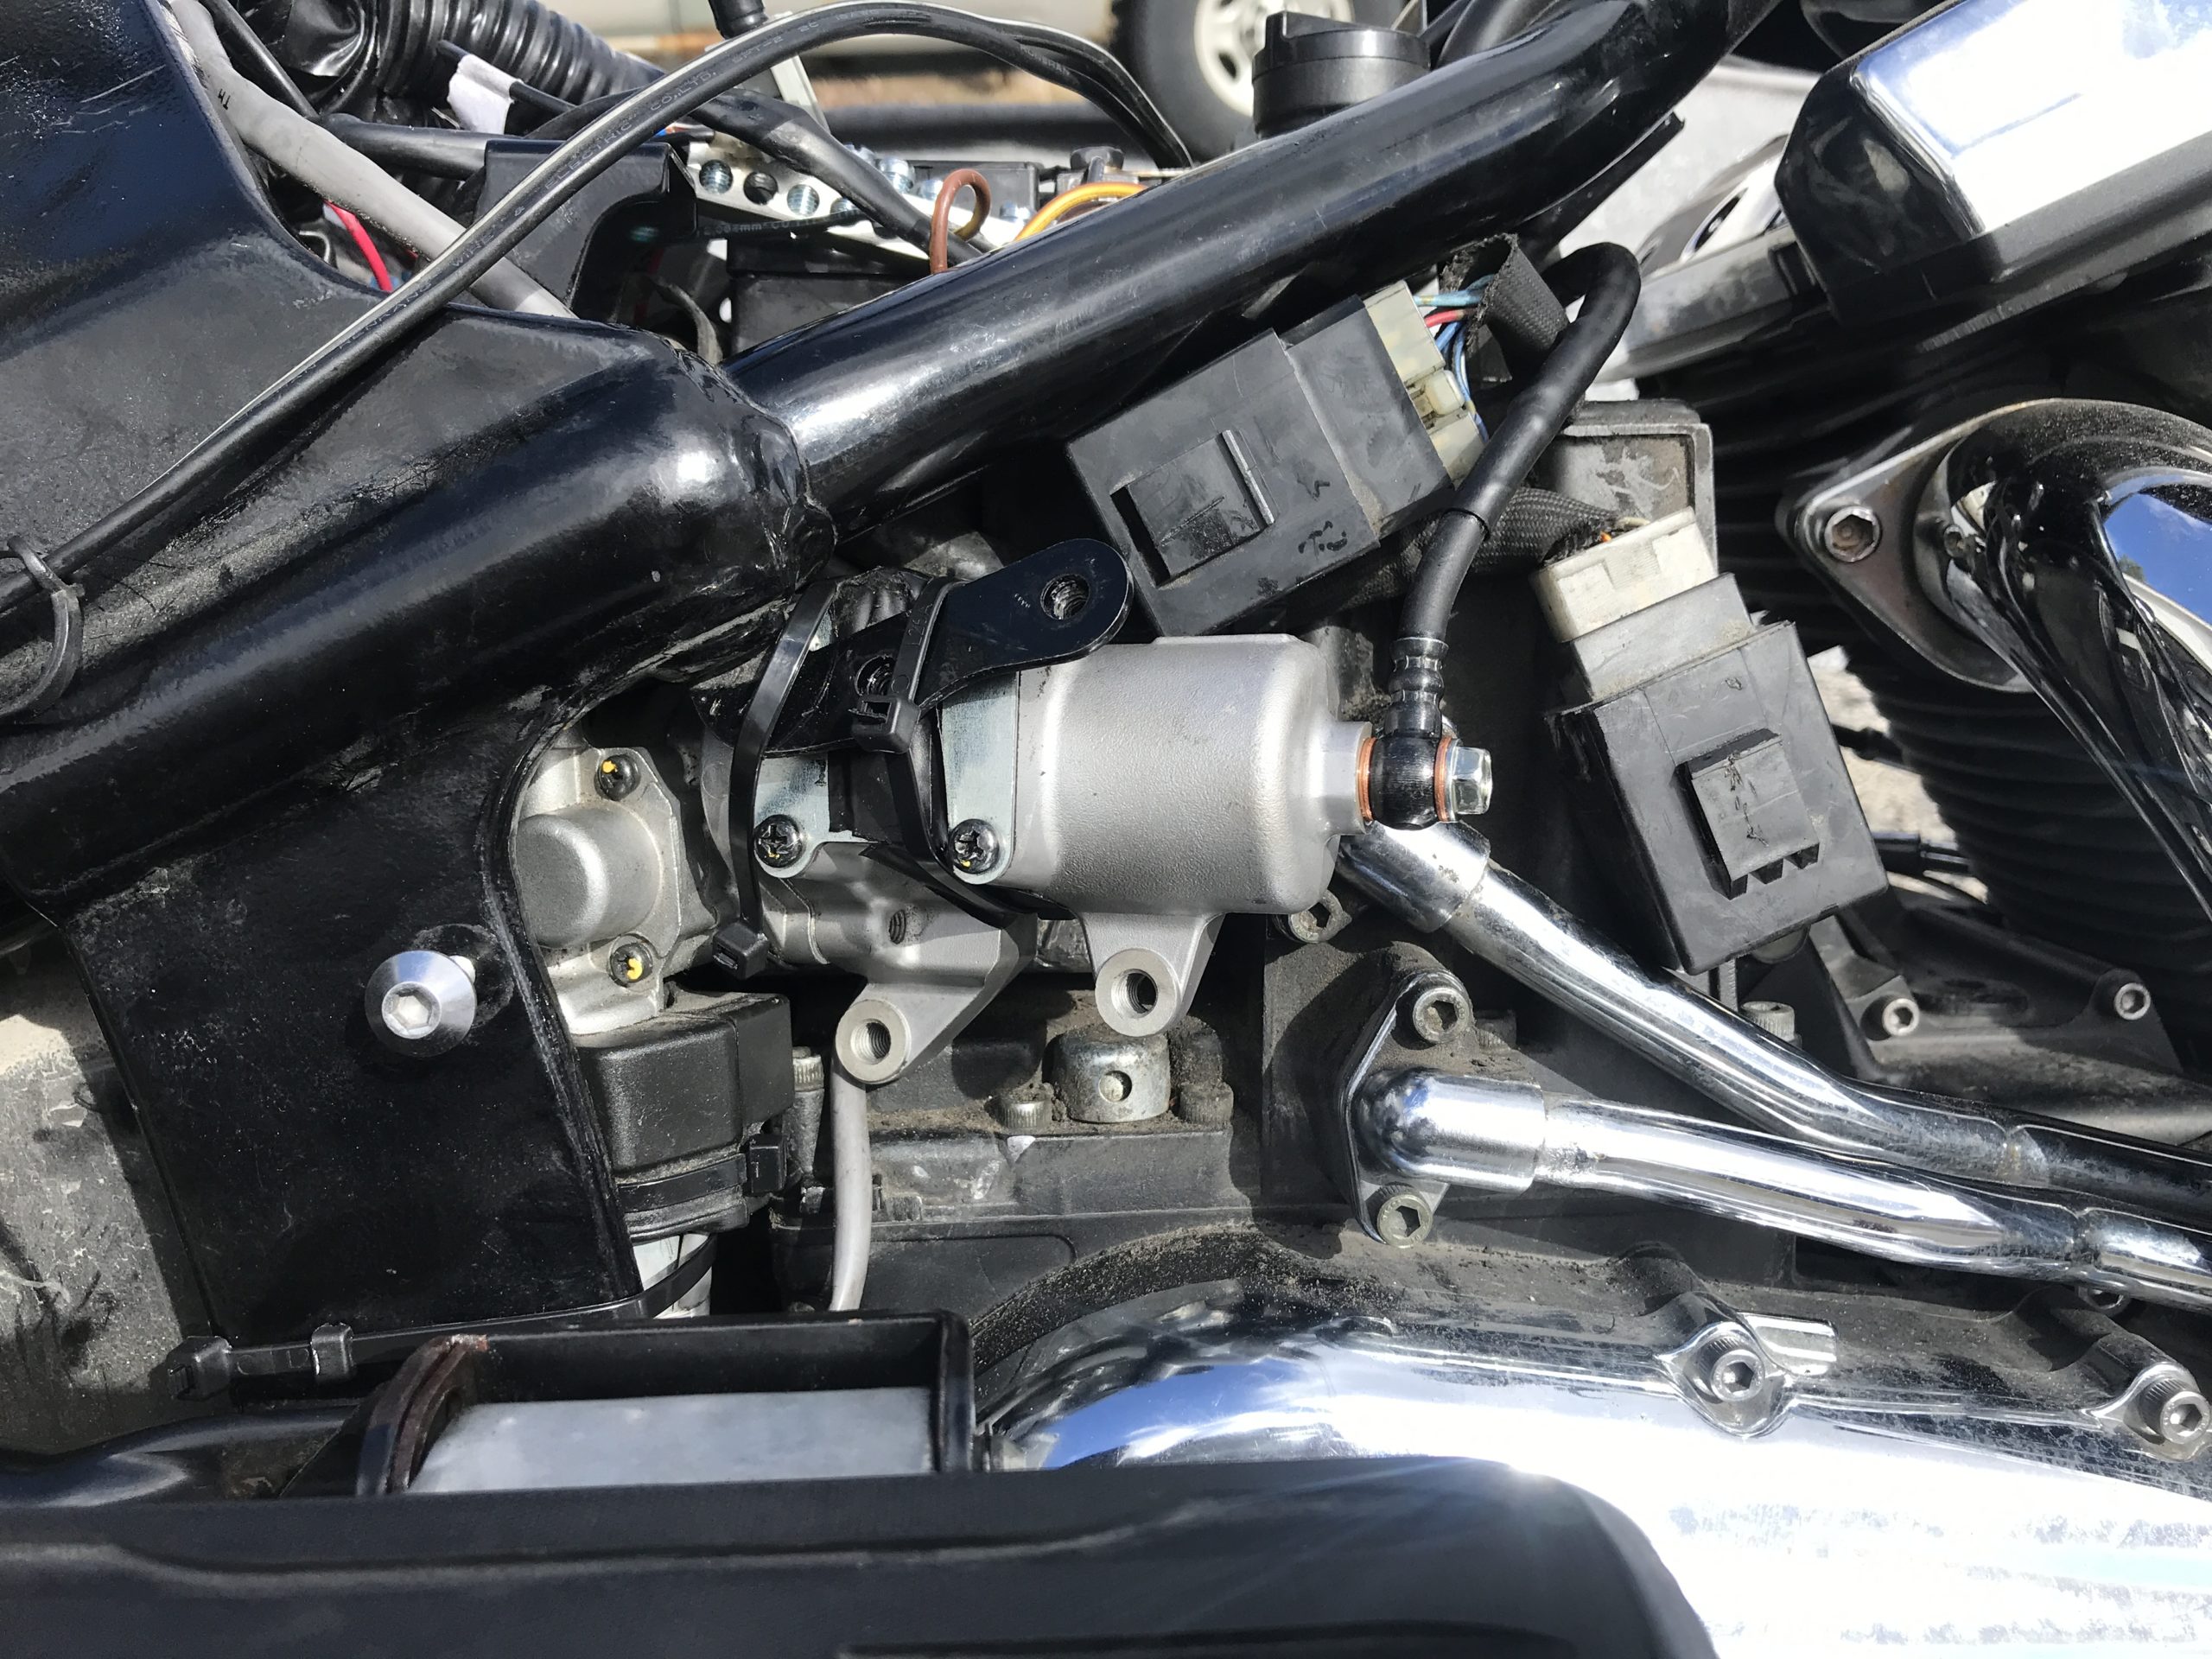
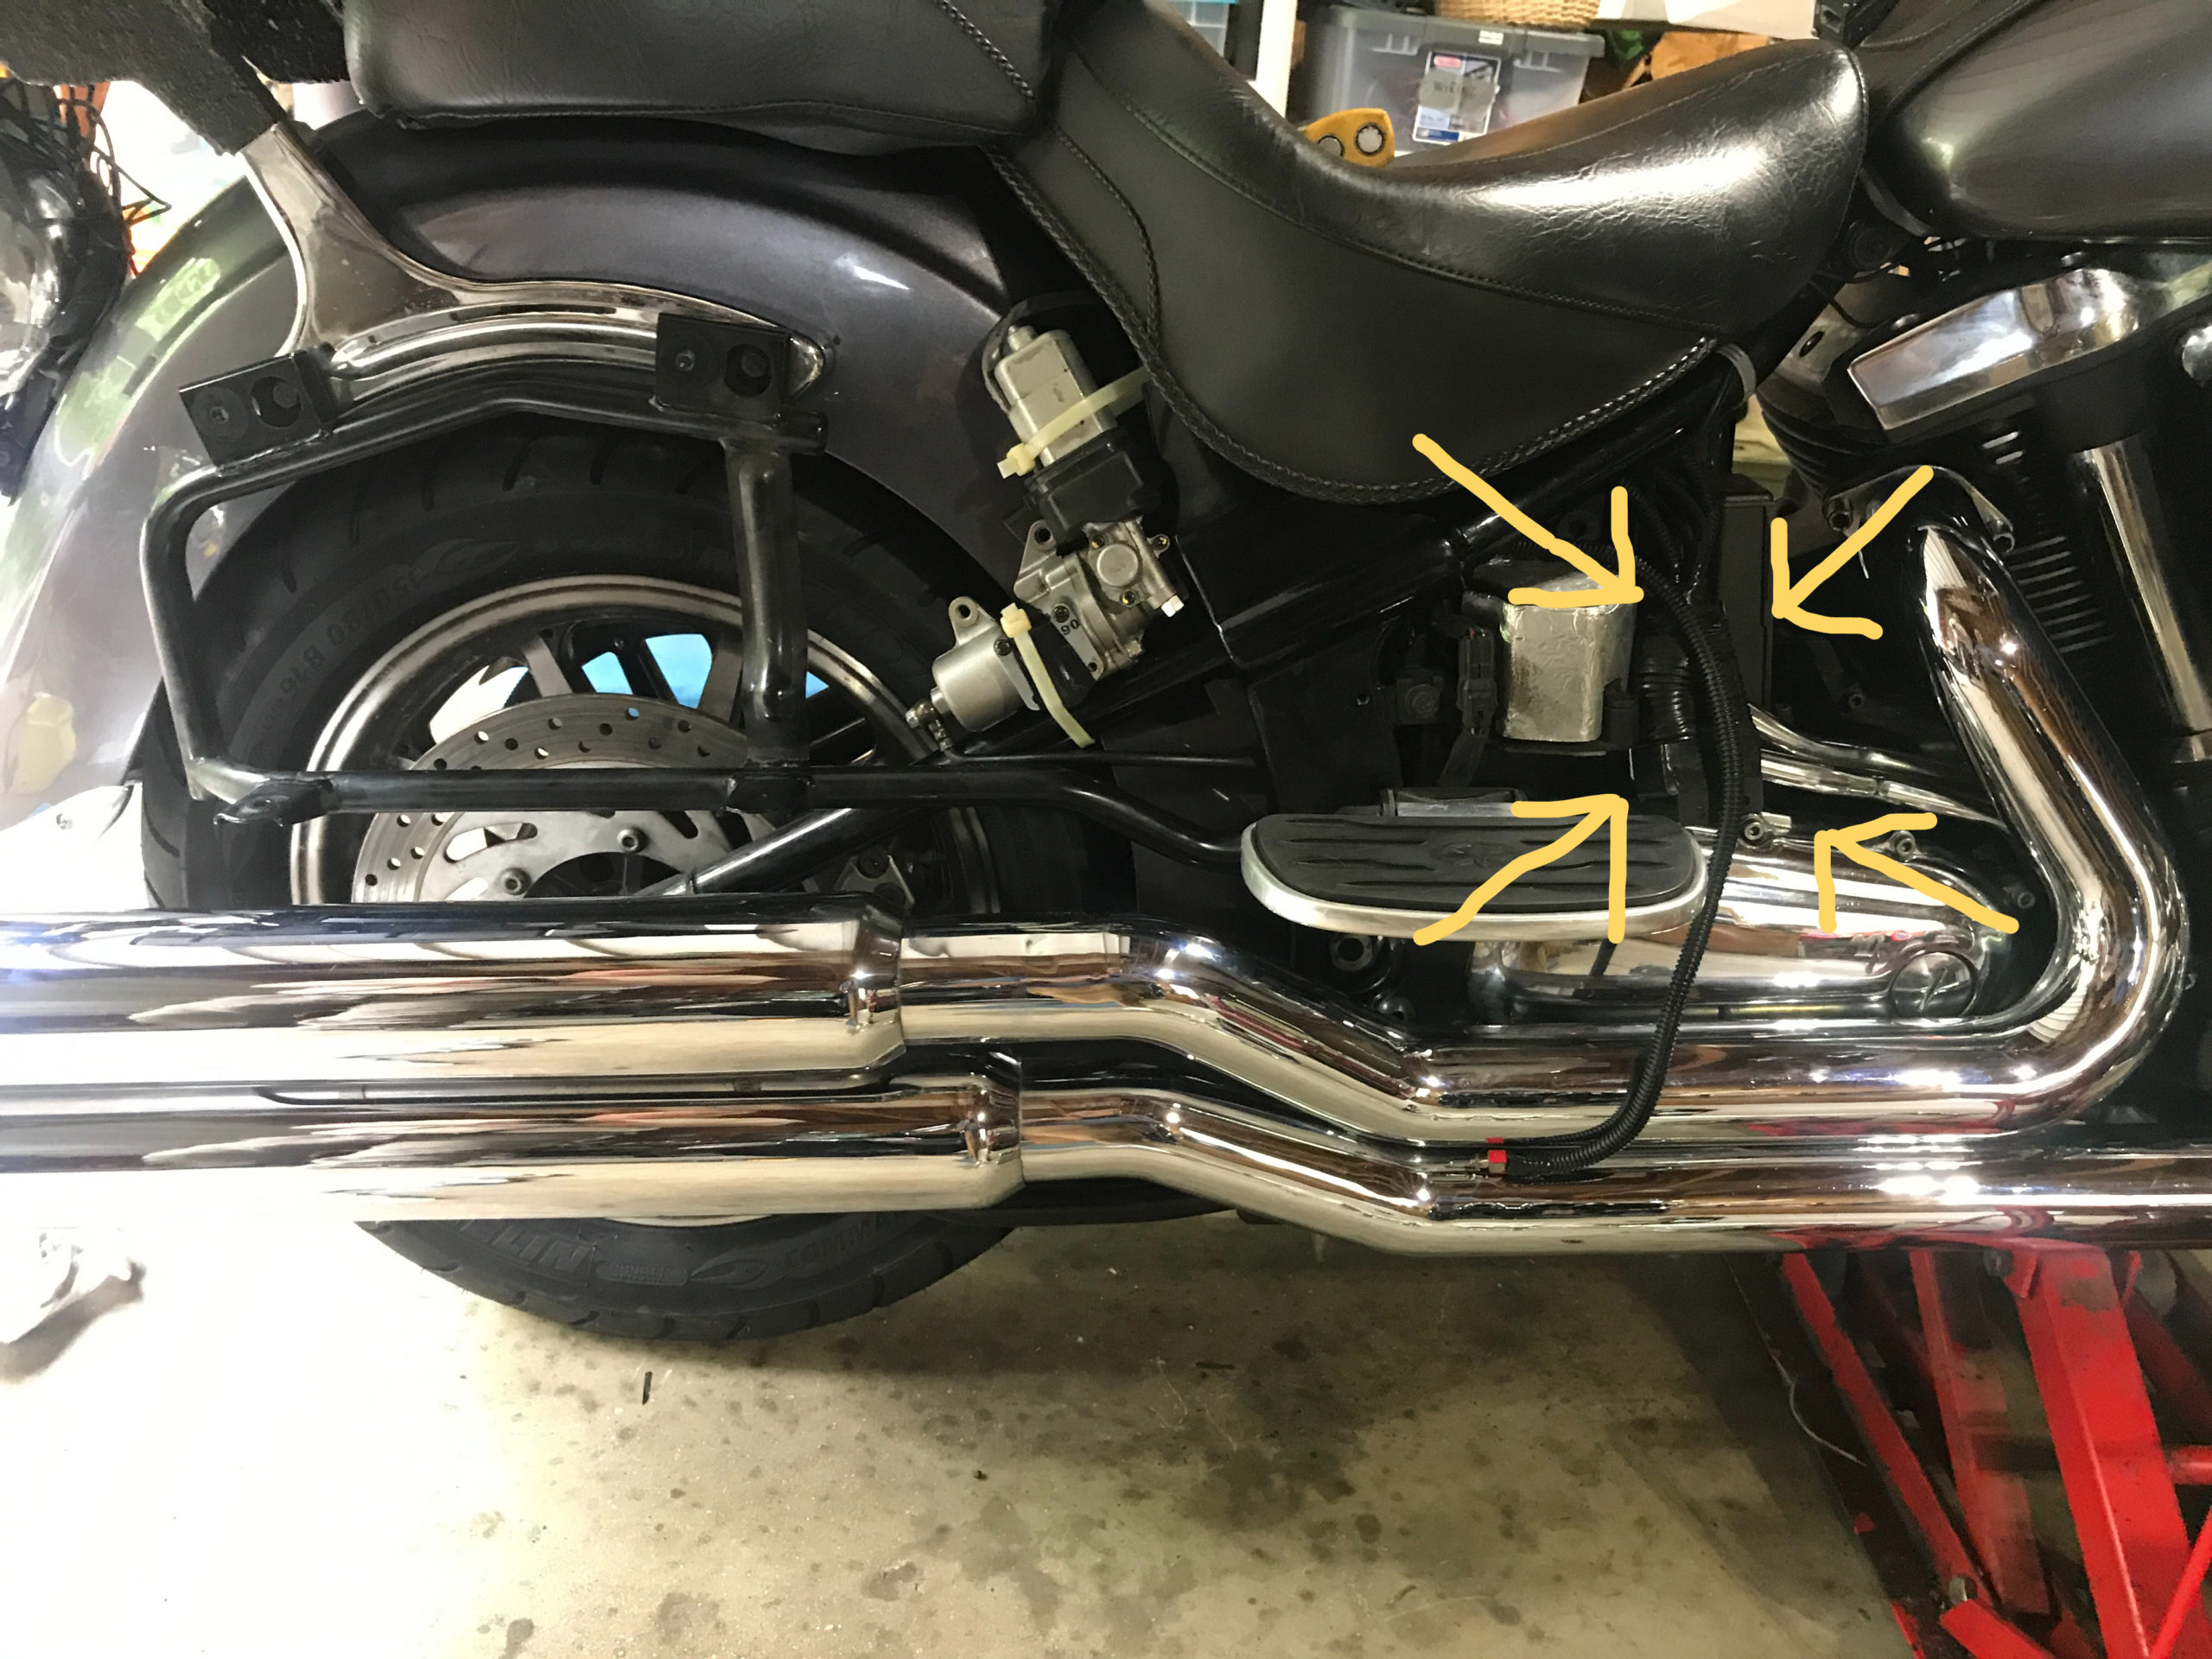
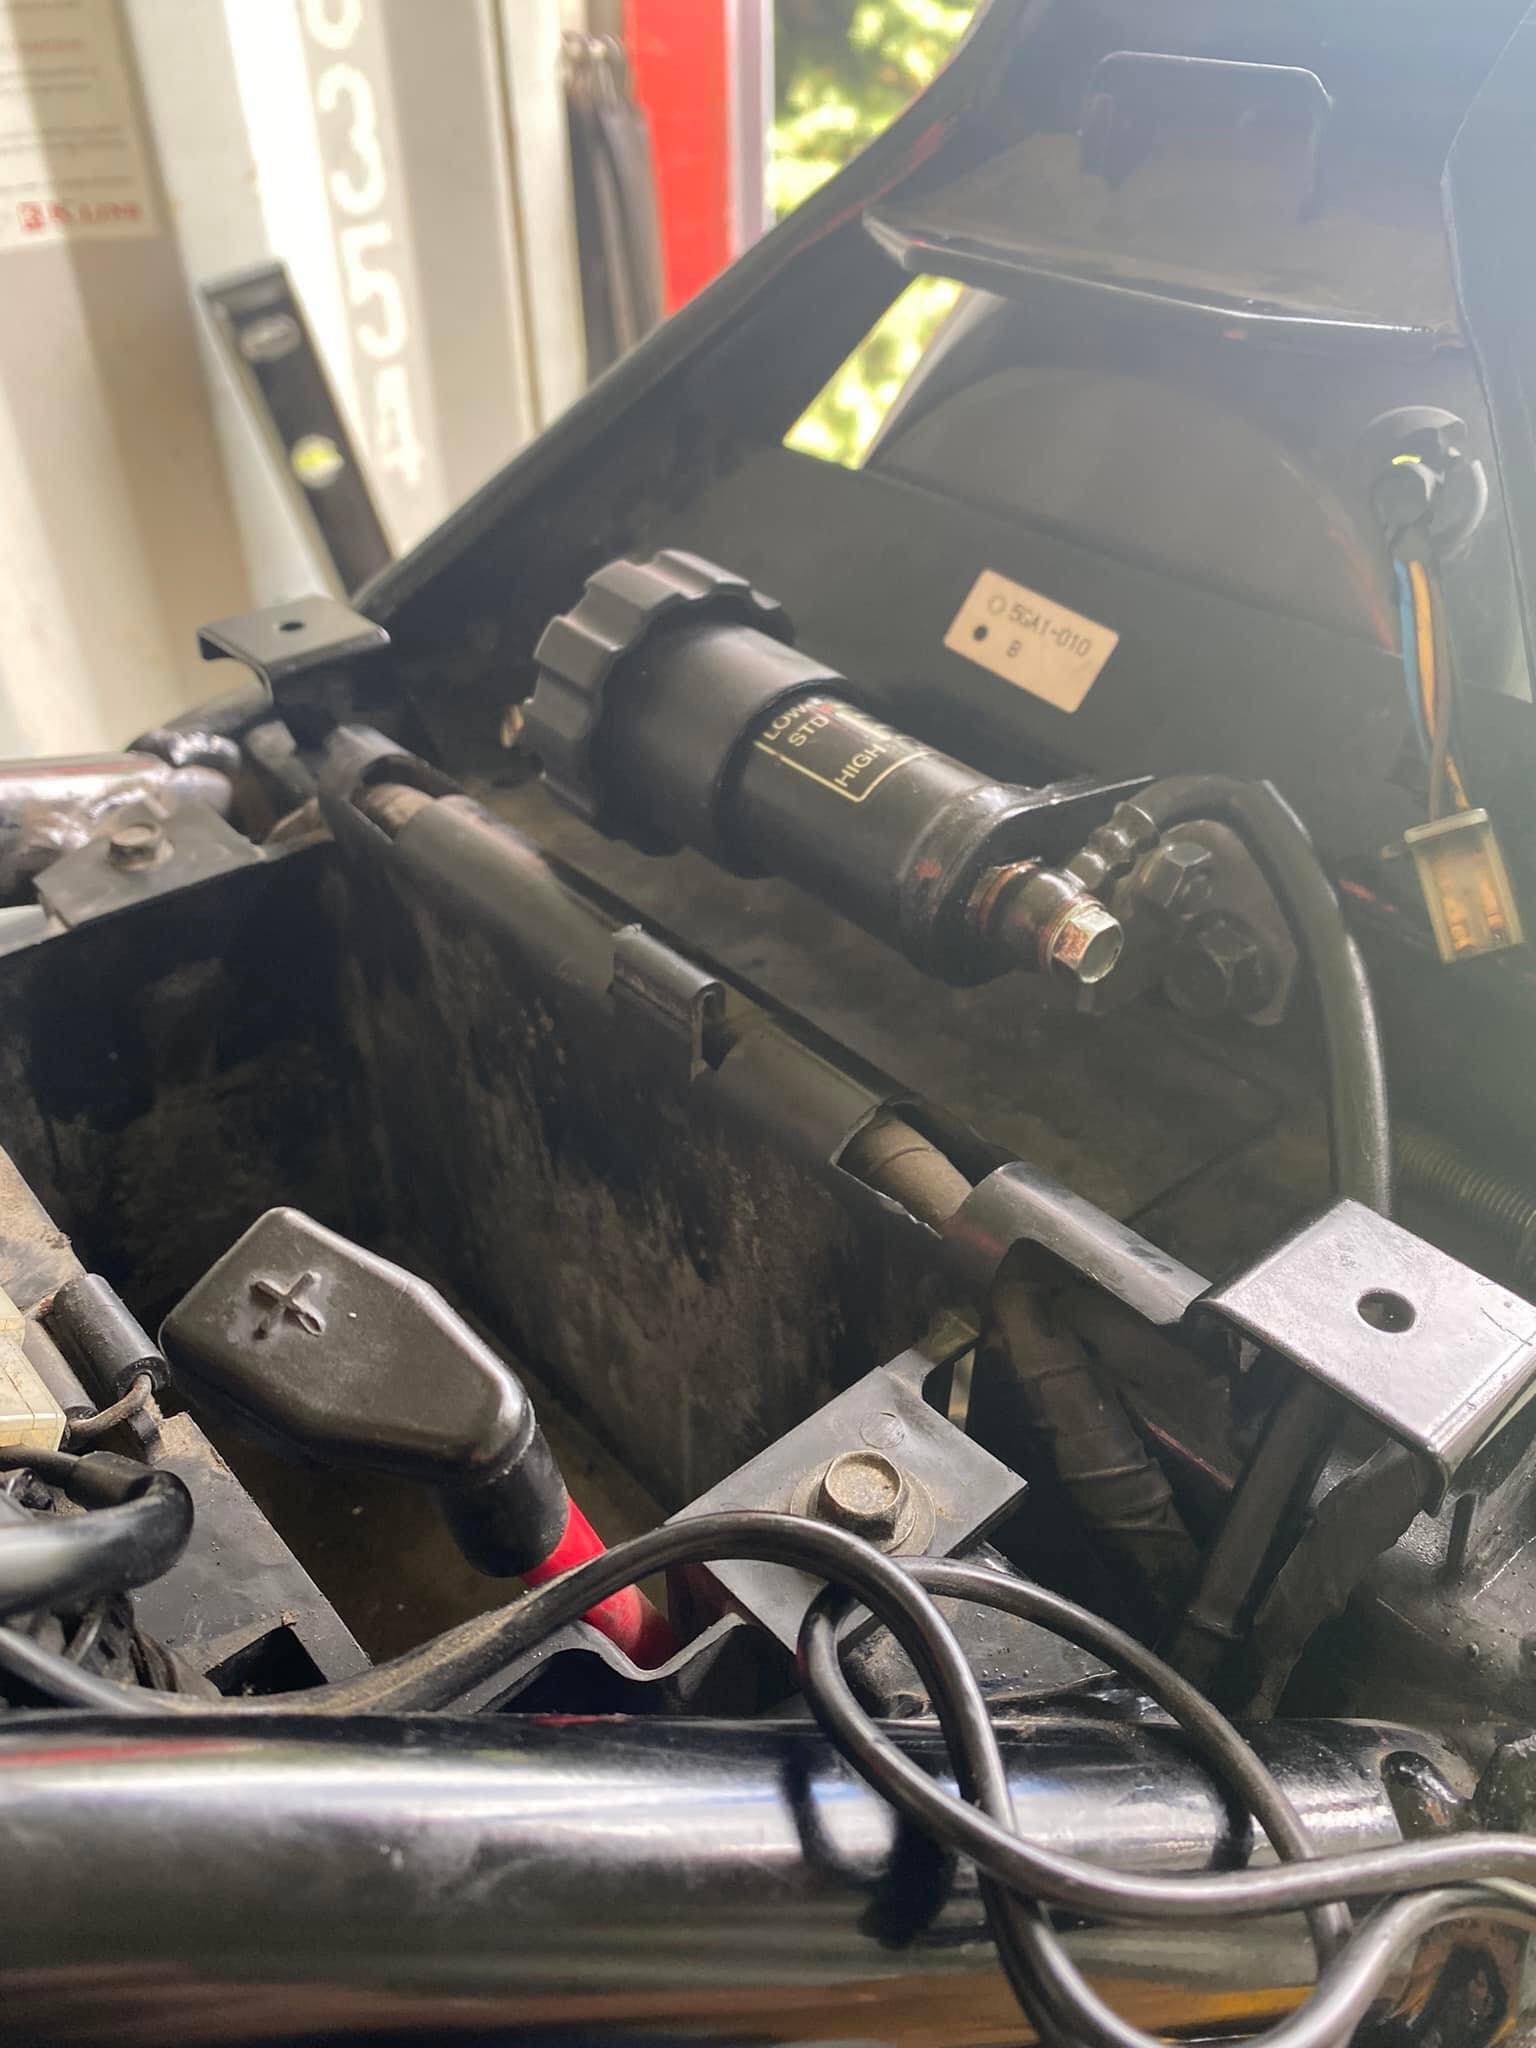
- I stayed with the original Honda pump therefore I needed to find a place to put it. Chris Jones suggests that for the 99-07 models you locate it under the right side-cover. You will have to remove the little bracket that holds two relays (10mm socket) slightly bend the mount point out (so you can get the pump in) and push the relays aside so you can feed the pump in. You can see the location of the hose mount and where it is coming from in the picture. This is the best option to hide it and utilize it. Zip ties hold it in nicely. I used two zip ties to secure it to that mount point and one on the bottom of the pump to the frame. You can see the two relays (one on top and one to the side. Also note the area where the hose comes out. It all tucks under the side cover nicely.
You will want to remove the connection on the side of the pump prior to install. It is not necessary. I just put black tape over the hole which is covered by the mount point. I also had to replace the two screws on the top.

1999-2007 – Carburated 
1999-2007 – Carburated 
1999-2007 – Carburated 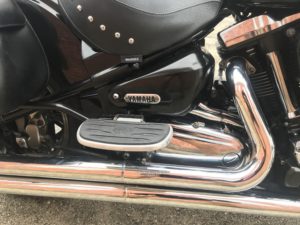
1999-2007 – Carburated If you have an 08-14 you cannot locate the electric pump in the same spot. I recently helped a member install a RoadWing on an 08. We were able to feed the line to the back and locate the electric RAP on the swing arm just in front of the bag. It didn’t interfere with the bag. We zip tied it to the frame in two spots. We put a little padding between the electric RAP and the rear fender so that it didn’t cause any damage to the fender or make noise from vibration.
2008-2014 – Fuel Injected 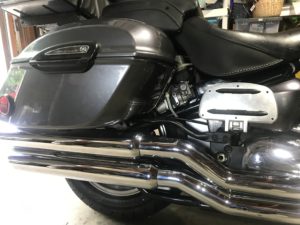
2008-2014 – Fuel Injected It is not easy to see but we located the electrical harness (from Chris Jones) under the right side-cover. I forgot to get a good picture of it.

- I located my switch on the left side under the passenger floorboard. Once I install a batwing I will mount it there.

If you have a manual RAP, here are a couple ideas on where to locate it.


Mounting the manual RAP adjuster

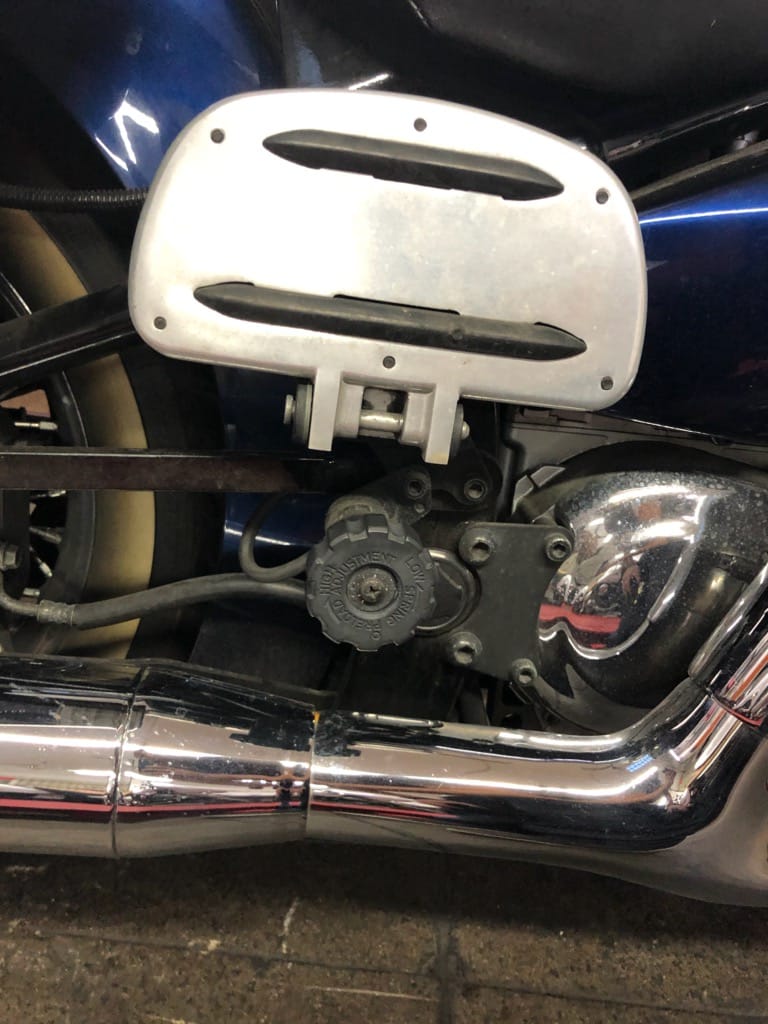

under Floorboard
- In order to get the best result, you will want to bleed the air out of the system. Below is a video by Henry Swanson that will give you some details on how to refresh the fluid and bleed it. I have also included a link to a Goldwing owner’s video and a Goldwing owners page for those that have the electric pump. Both sources provide great information on either set up. NOTE: Sometimes renewing the fluid will increase the preload ability. If you convert your own shock you know it needs to be done. Unless your RoadWIng comes fully assembled it is likely that the fluid has been drained and will need to be filled.
Bleeding the pump (https://www.youtube.com/watch?v=TaIvk0Q__Nc)
Henry Swanson
Goldwing
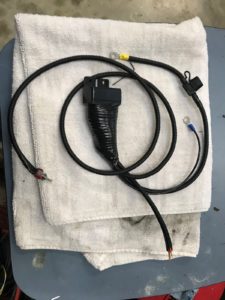
http://goldwing.eurekaboy.com/reservoirfill.htm – Goldwing - Chris Jones makes a harness for the original Honda pump. You can pick it up here.
https://www.flippingonzo.com/2020/05/roadwing-electrical-harness-hi-im-gonzo.html
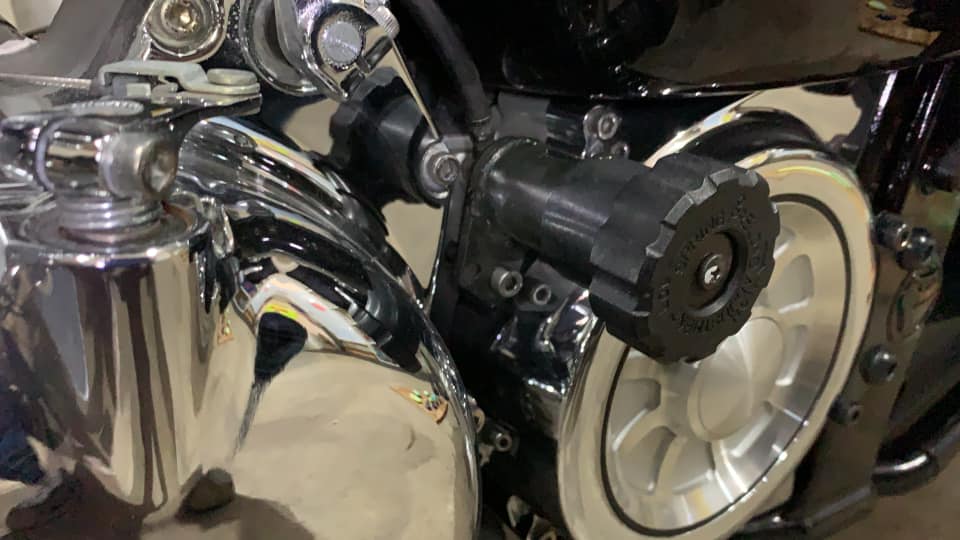
Decide where you want your toggle switch and mount it up.
Credit: Chris Jones There are a few different options when it comes to Manual RAP adjusters. Check out this page for details on which ones work.
Whether you have the electric or manual RAP you will want test it to make sure it is connected properly, and it works as it should before you buckle everything up.
- Put your horn, trim pieces, seat, etc. back on and you are ready to ride (you can clean up your tools later – get out and ride!).
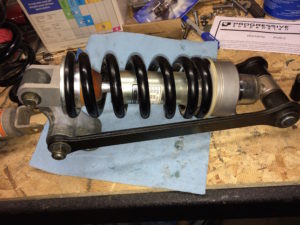
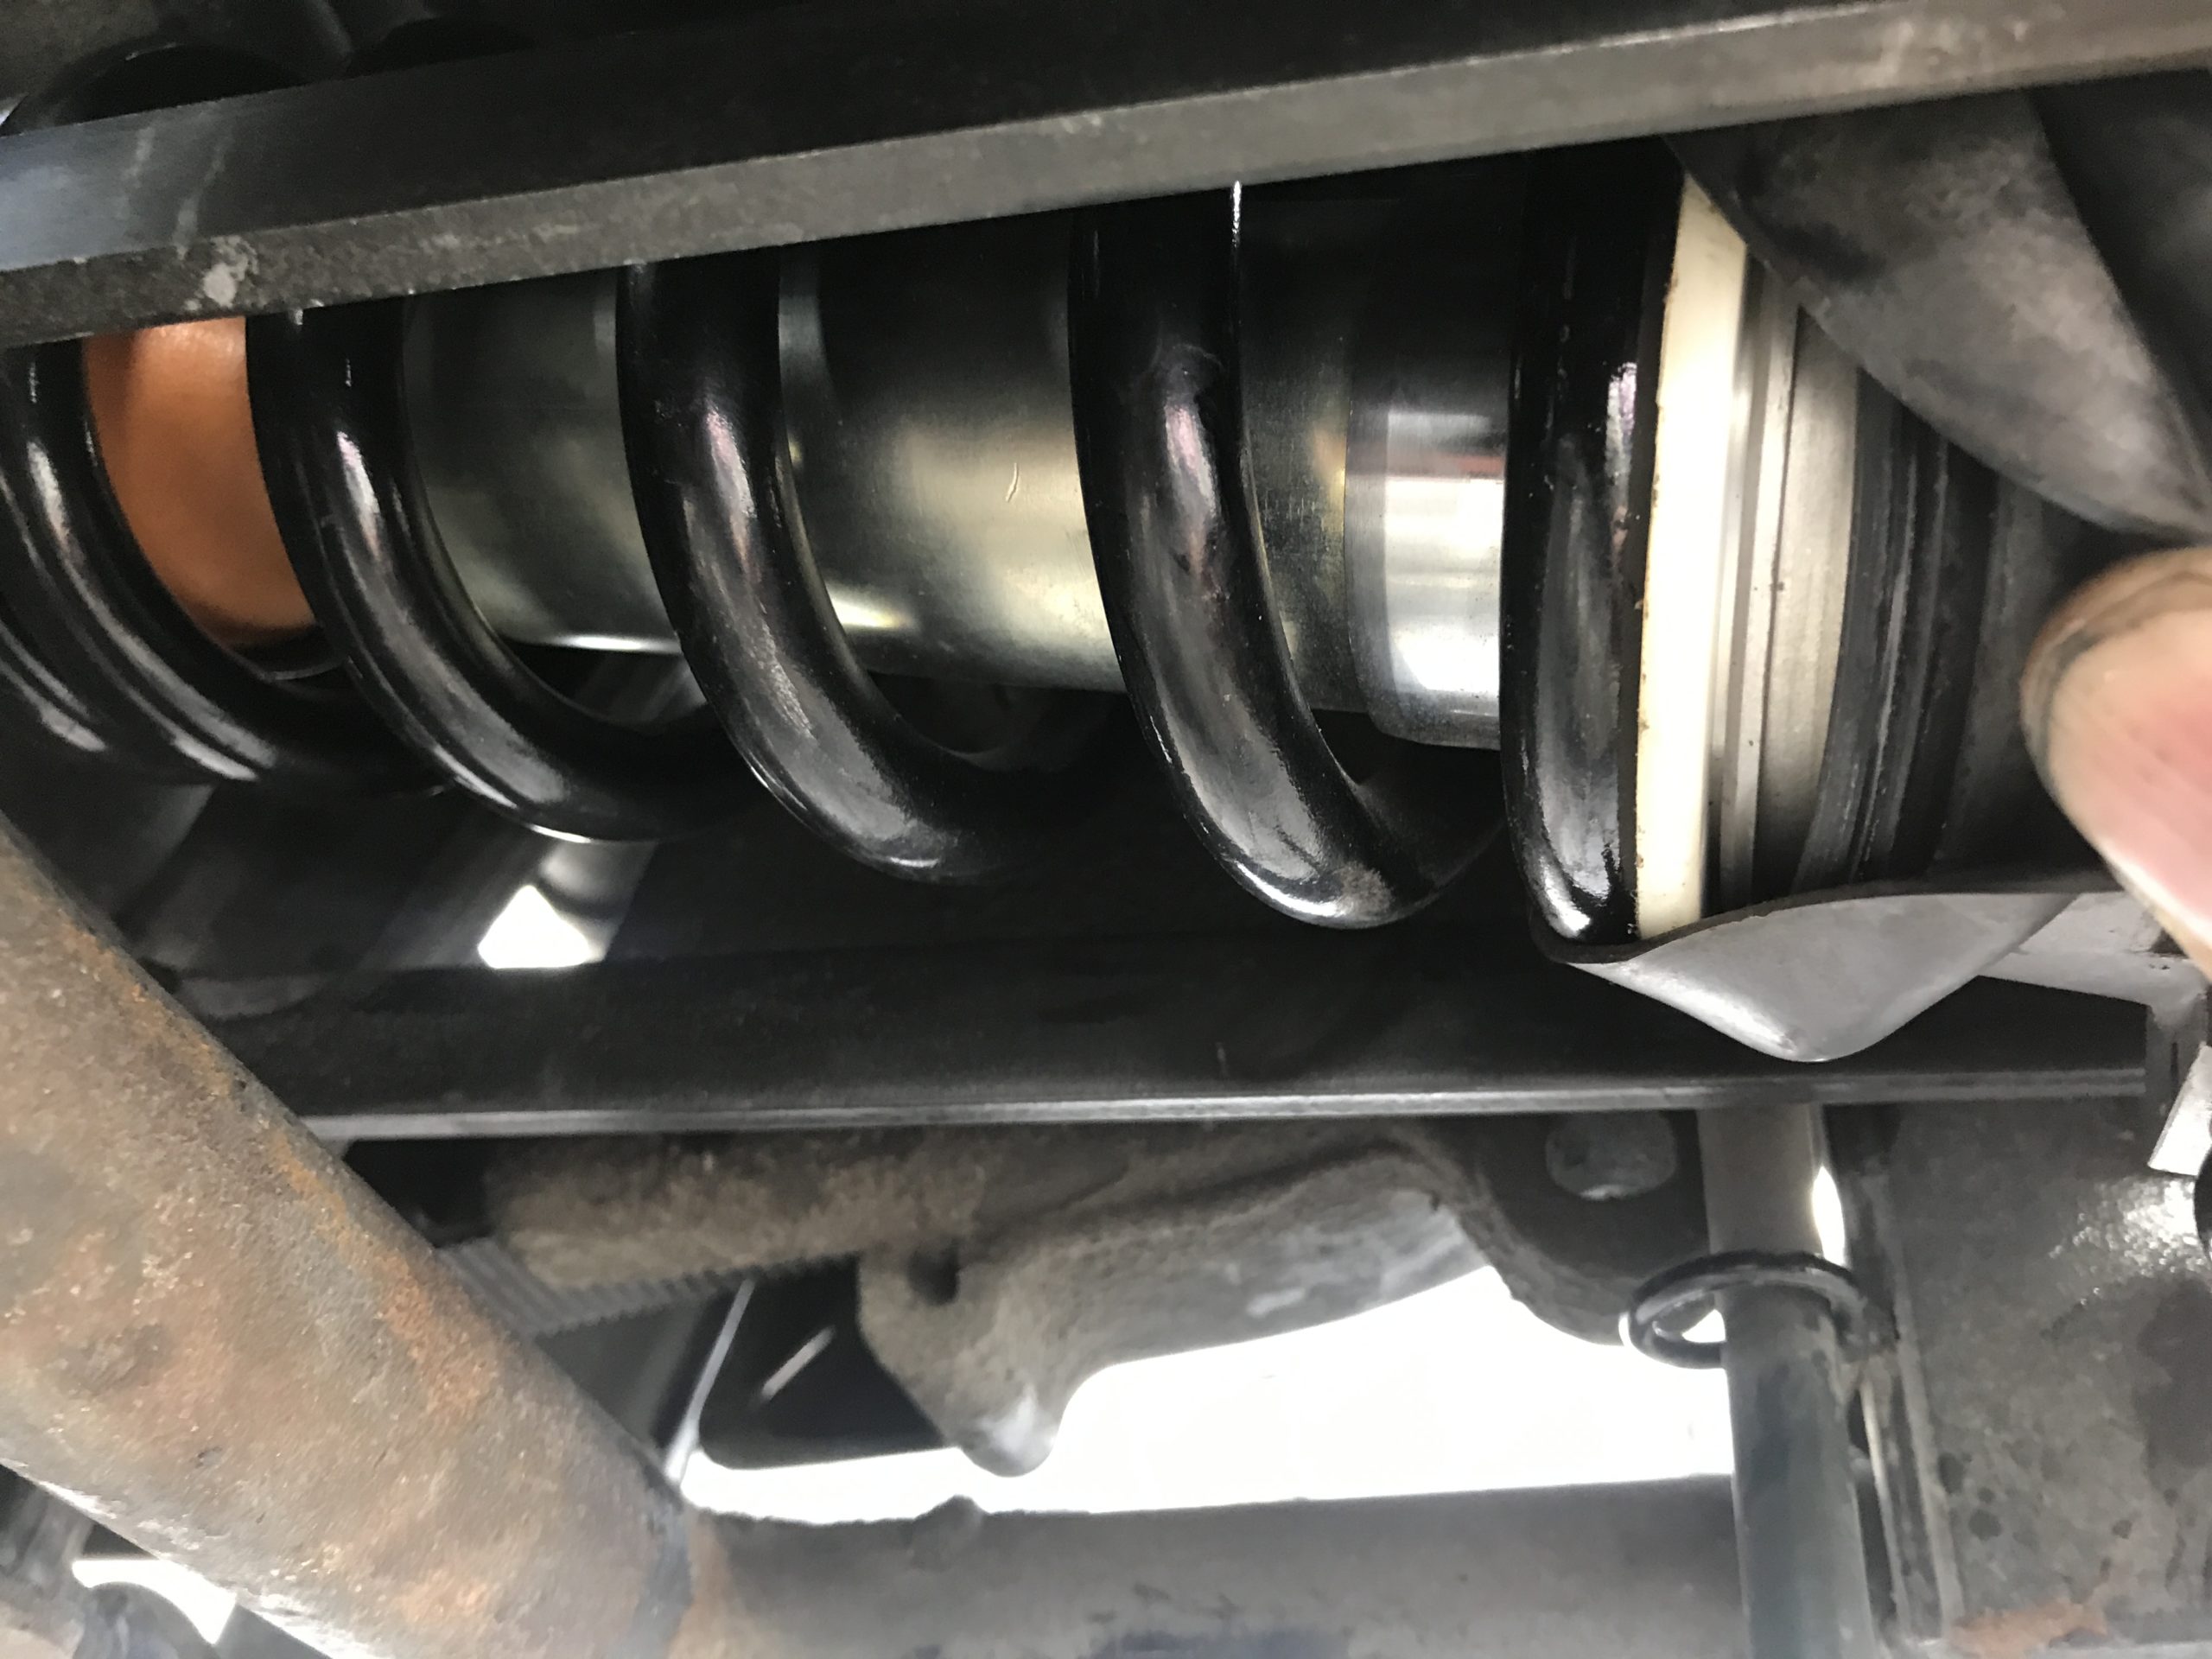
Here is a picture of my shock installed at 0 and fully loaded.
Thanks to Jason John Cowart for producing this instructional video.
Here is the direct link to the video.