
RoadWing Shock Conversion Instructions
so it can be used on a Yamaha Road Star 1600/1700
These instructions are a compilation of details, information, images and videos made available by Chris Jones (aka Gonzodad on the RSC), Dan Shingler (dshingler), James Daniel (jdace750), Jason Woody (smokescreens) and Darrell (Tykes_Place) on the Road Star Clinic and my own experience converting and installing my RoadWing Shock. Credit is also due to Henry Swanson who has built a large number of RoadWings and helped & encouraged me to build my own. In addition, credit is due the Road Star Clinic community and Road Star owners who refuse to settle for the original design by the Yamaha engineers and have utilized this upgrade.
YOU ASSUME ALL RISK BY FOLLOWING THESE DIRECTIONS – BE CAREFUL!
I BELIEVE I COVERED EVERYTHING BUT IF YOU FIND ANY OMISSIONS OR ERRORS IN THESE INSTRUCTIONS OR HAVE SUGGESTIONS PLEASE LET ME KNOW BY CONTACTING ME THROUGH THE CONTACT FORM OR FACEBOOK
Credit links:
- https://www.tykesplace.com/yamaha-roadstar/roadwing/
- https://www.tykesplace.com/yamaha-roadstar/roadwing/roadwing-shock-install/
- https://www.roadstarclinic.com/
- https://www.flippingonzo.com/2020/05/roadwing-electrical-harness-hi-im-gonzo.html
A RoadWing Shock is a Honda Goldwing GL1800 mono shock that has been modified and converted to fit on a Yamaha Road Star. This replacement to the stock shock adds to the weight capacity of the Road Star. In addition, the preload can be adjusted to increase the weight capacity. The shock also provides better stability, especially in the corners.
It would be a good idea to read through the entire instructions prior to beginning this conversion so that you are familiar with all that it entails, so you will not be met by any surprises.
Tools and supplies you will need
- Pulley/Gear Puller – I borrowed one from Oreilly’s Auto Tool Loaner Program.
- OR a Bench Press
- 1/2″ 22mm medium well socket to push old bushing into
- 3/8″ 15mm/16mm shallow (regular) well socket to push against the bushing in the bench press (1/2″ socket is too thick and will get stuck in the collar – ask me how I know)
- Air or electric impact gun
- Rotary Tool Kit – https://www.harborfreight.com/rotary-tool-kit-80-pc-63235.htm
- Sanding drum on Rotary Tool to bore out the shock collar for the bushing and bore out bushing a little.
- Drill Press (to drill new mounting holes in the flange) – I paid a local machine shop to drill the holes in the flange. Shop around because the prices varied by machine shop in my area.
- Hack saw or angle grinder with cut off wheels. You could also use a table saw with the right blade.
- Penetrating oil
- Rubber mallet
- Shop towels
- Mechanics gloves
Conversion Parts list
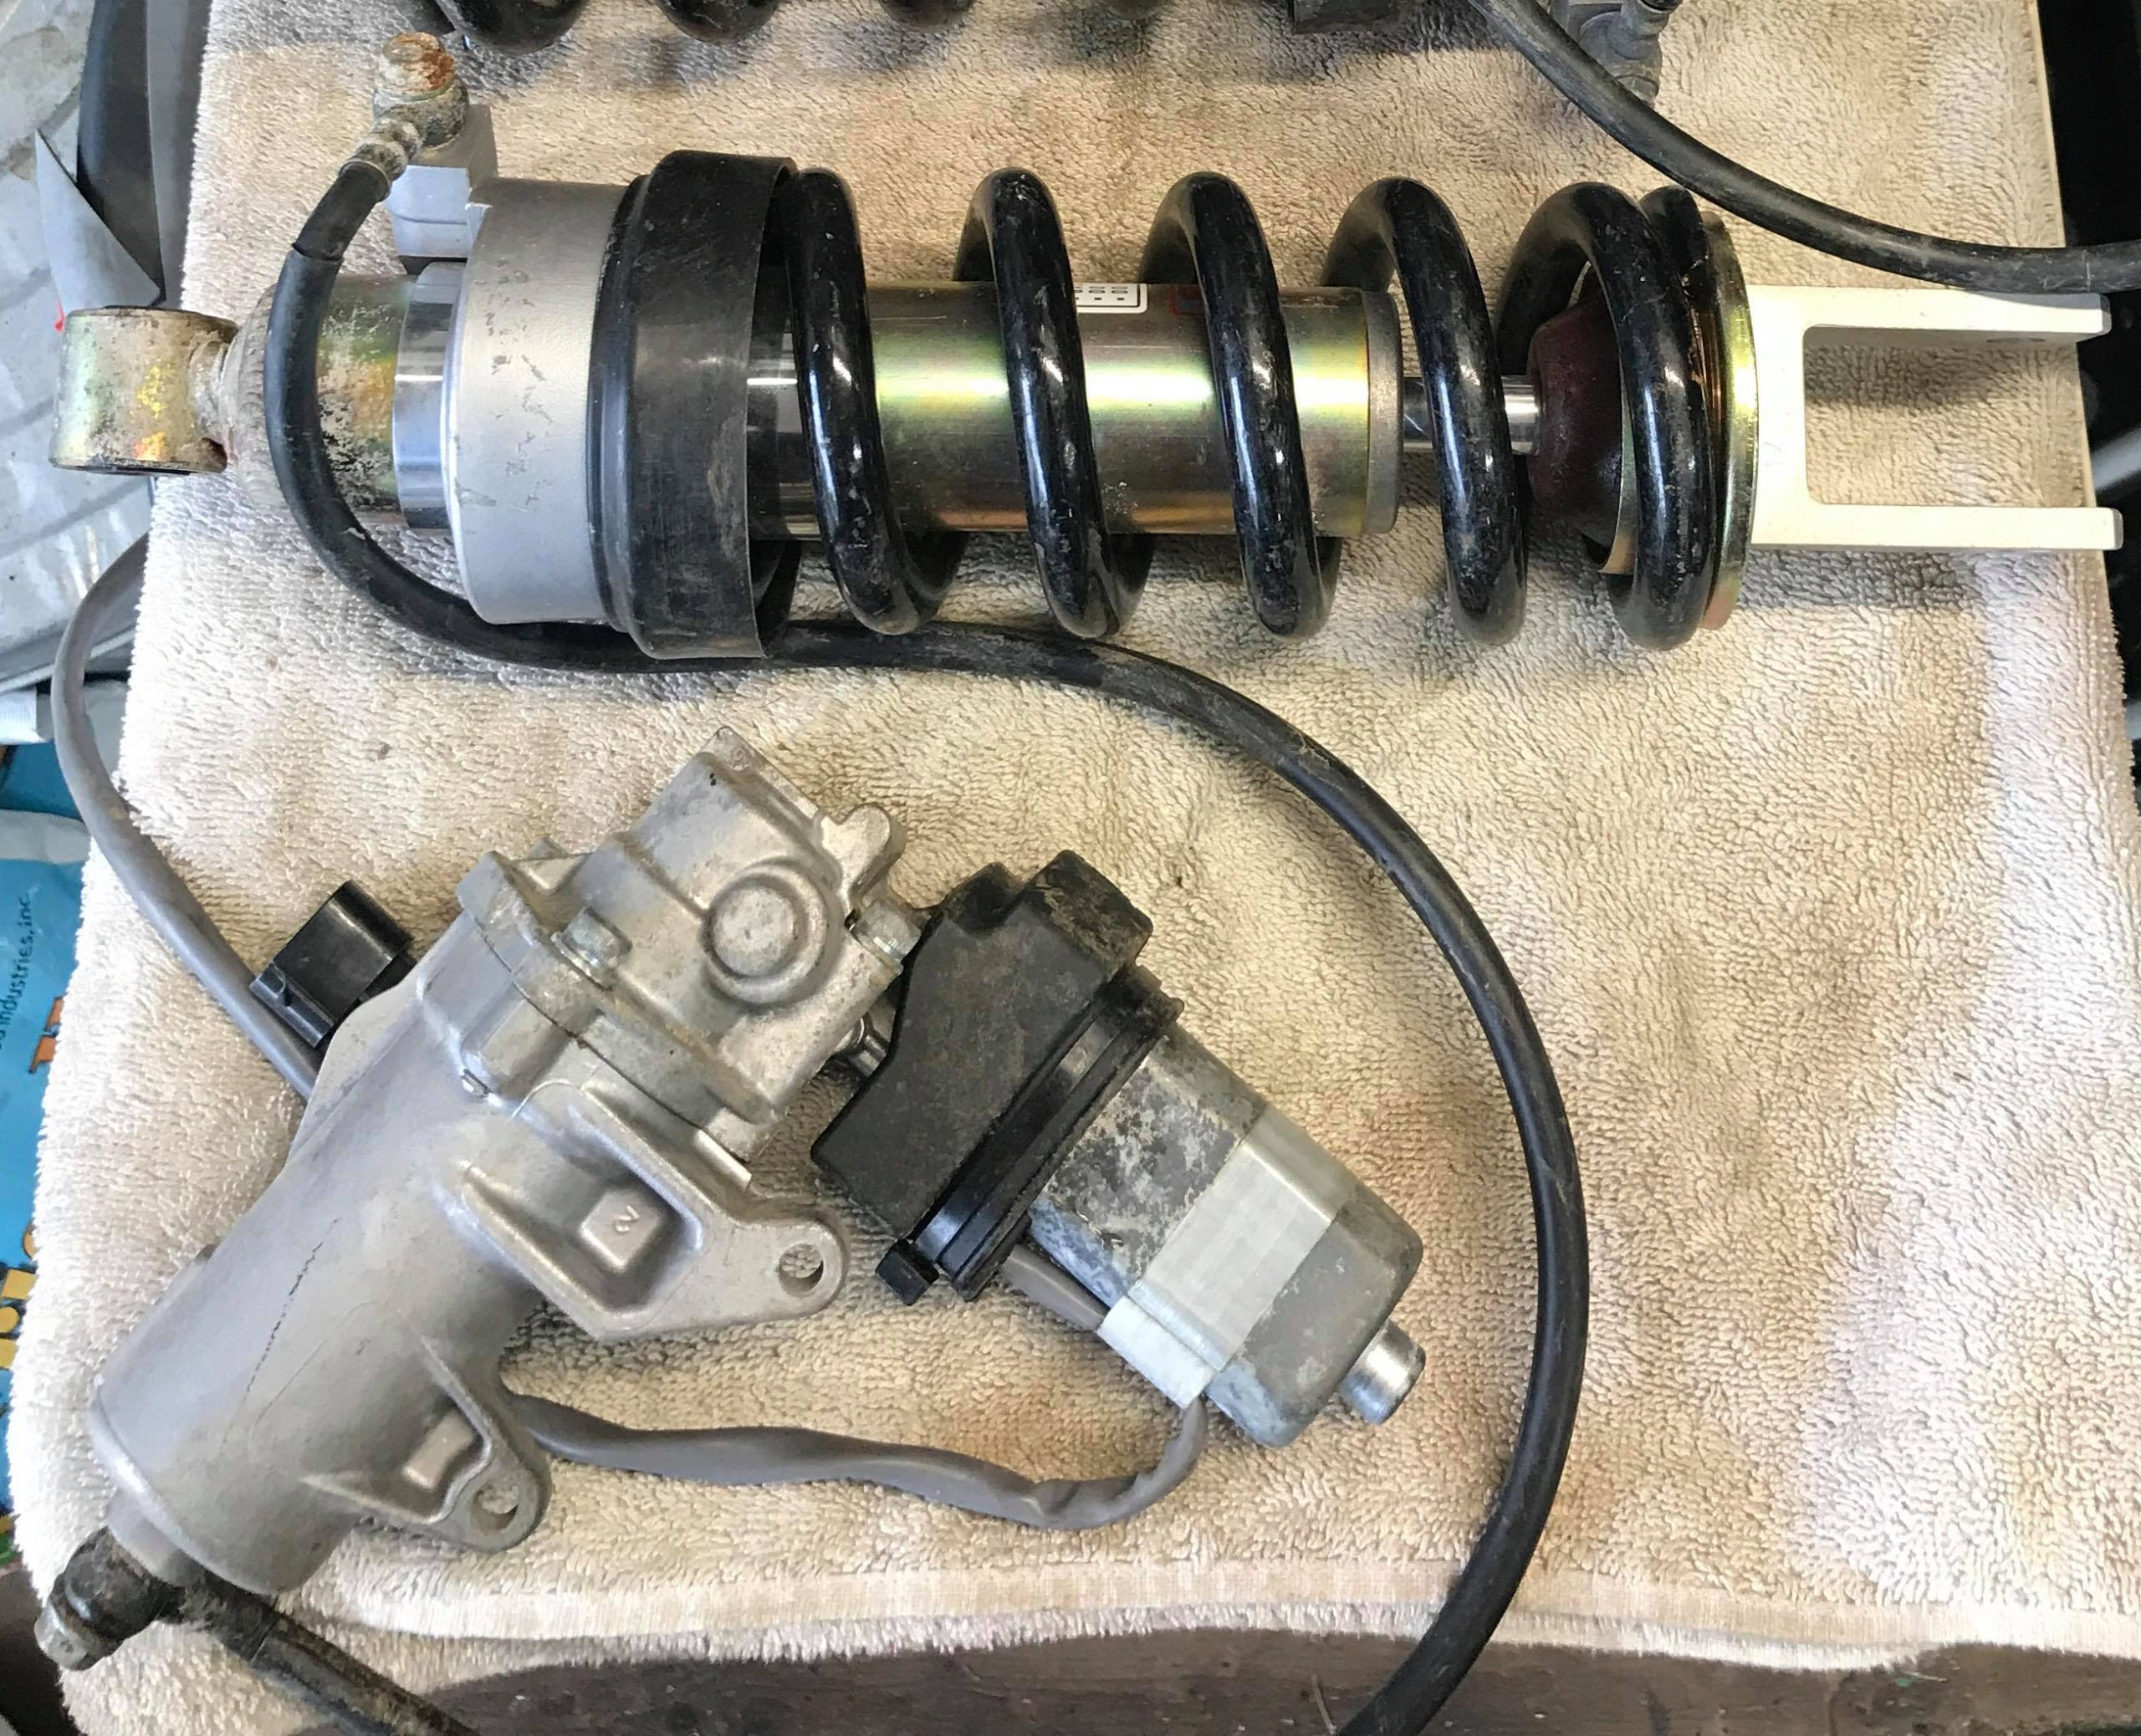
- 2001 – 2017 GL1800 Goldwing rear mono-shock with air pump and slave cylinder intact (ensure the electric pump [RAP] and slave cylinder work prior to purchase).
- Fork Oil (5w) – I used Lucas Oil 10771 Fork Oil 16 oz.
- OPTIONAL: Remote Adjustable Preload (RAP) for manual operation – from a BMW 650, 1100, 1150 or 1200 motorcycle. (ensure it works prior to purchase).
- Two (2) – Oil Embedded Flanged Sleeve Bearing – https://www.mcmaster.com/6659K36/
- Two (2) 18-8 Stainless Steel Round Shim, 2mm Thick, 22mm ID – – They come in ten packs. – https://www.mcmaster.com/98089A467/ (You could also make your own out of M14 flat washers from the Hardware Store – directions below).
DIRECTIONS – (Clicking on an image will enlarge it – You have to click the arrow in your browser to go back to the directions)
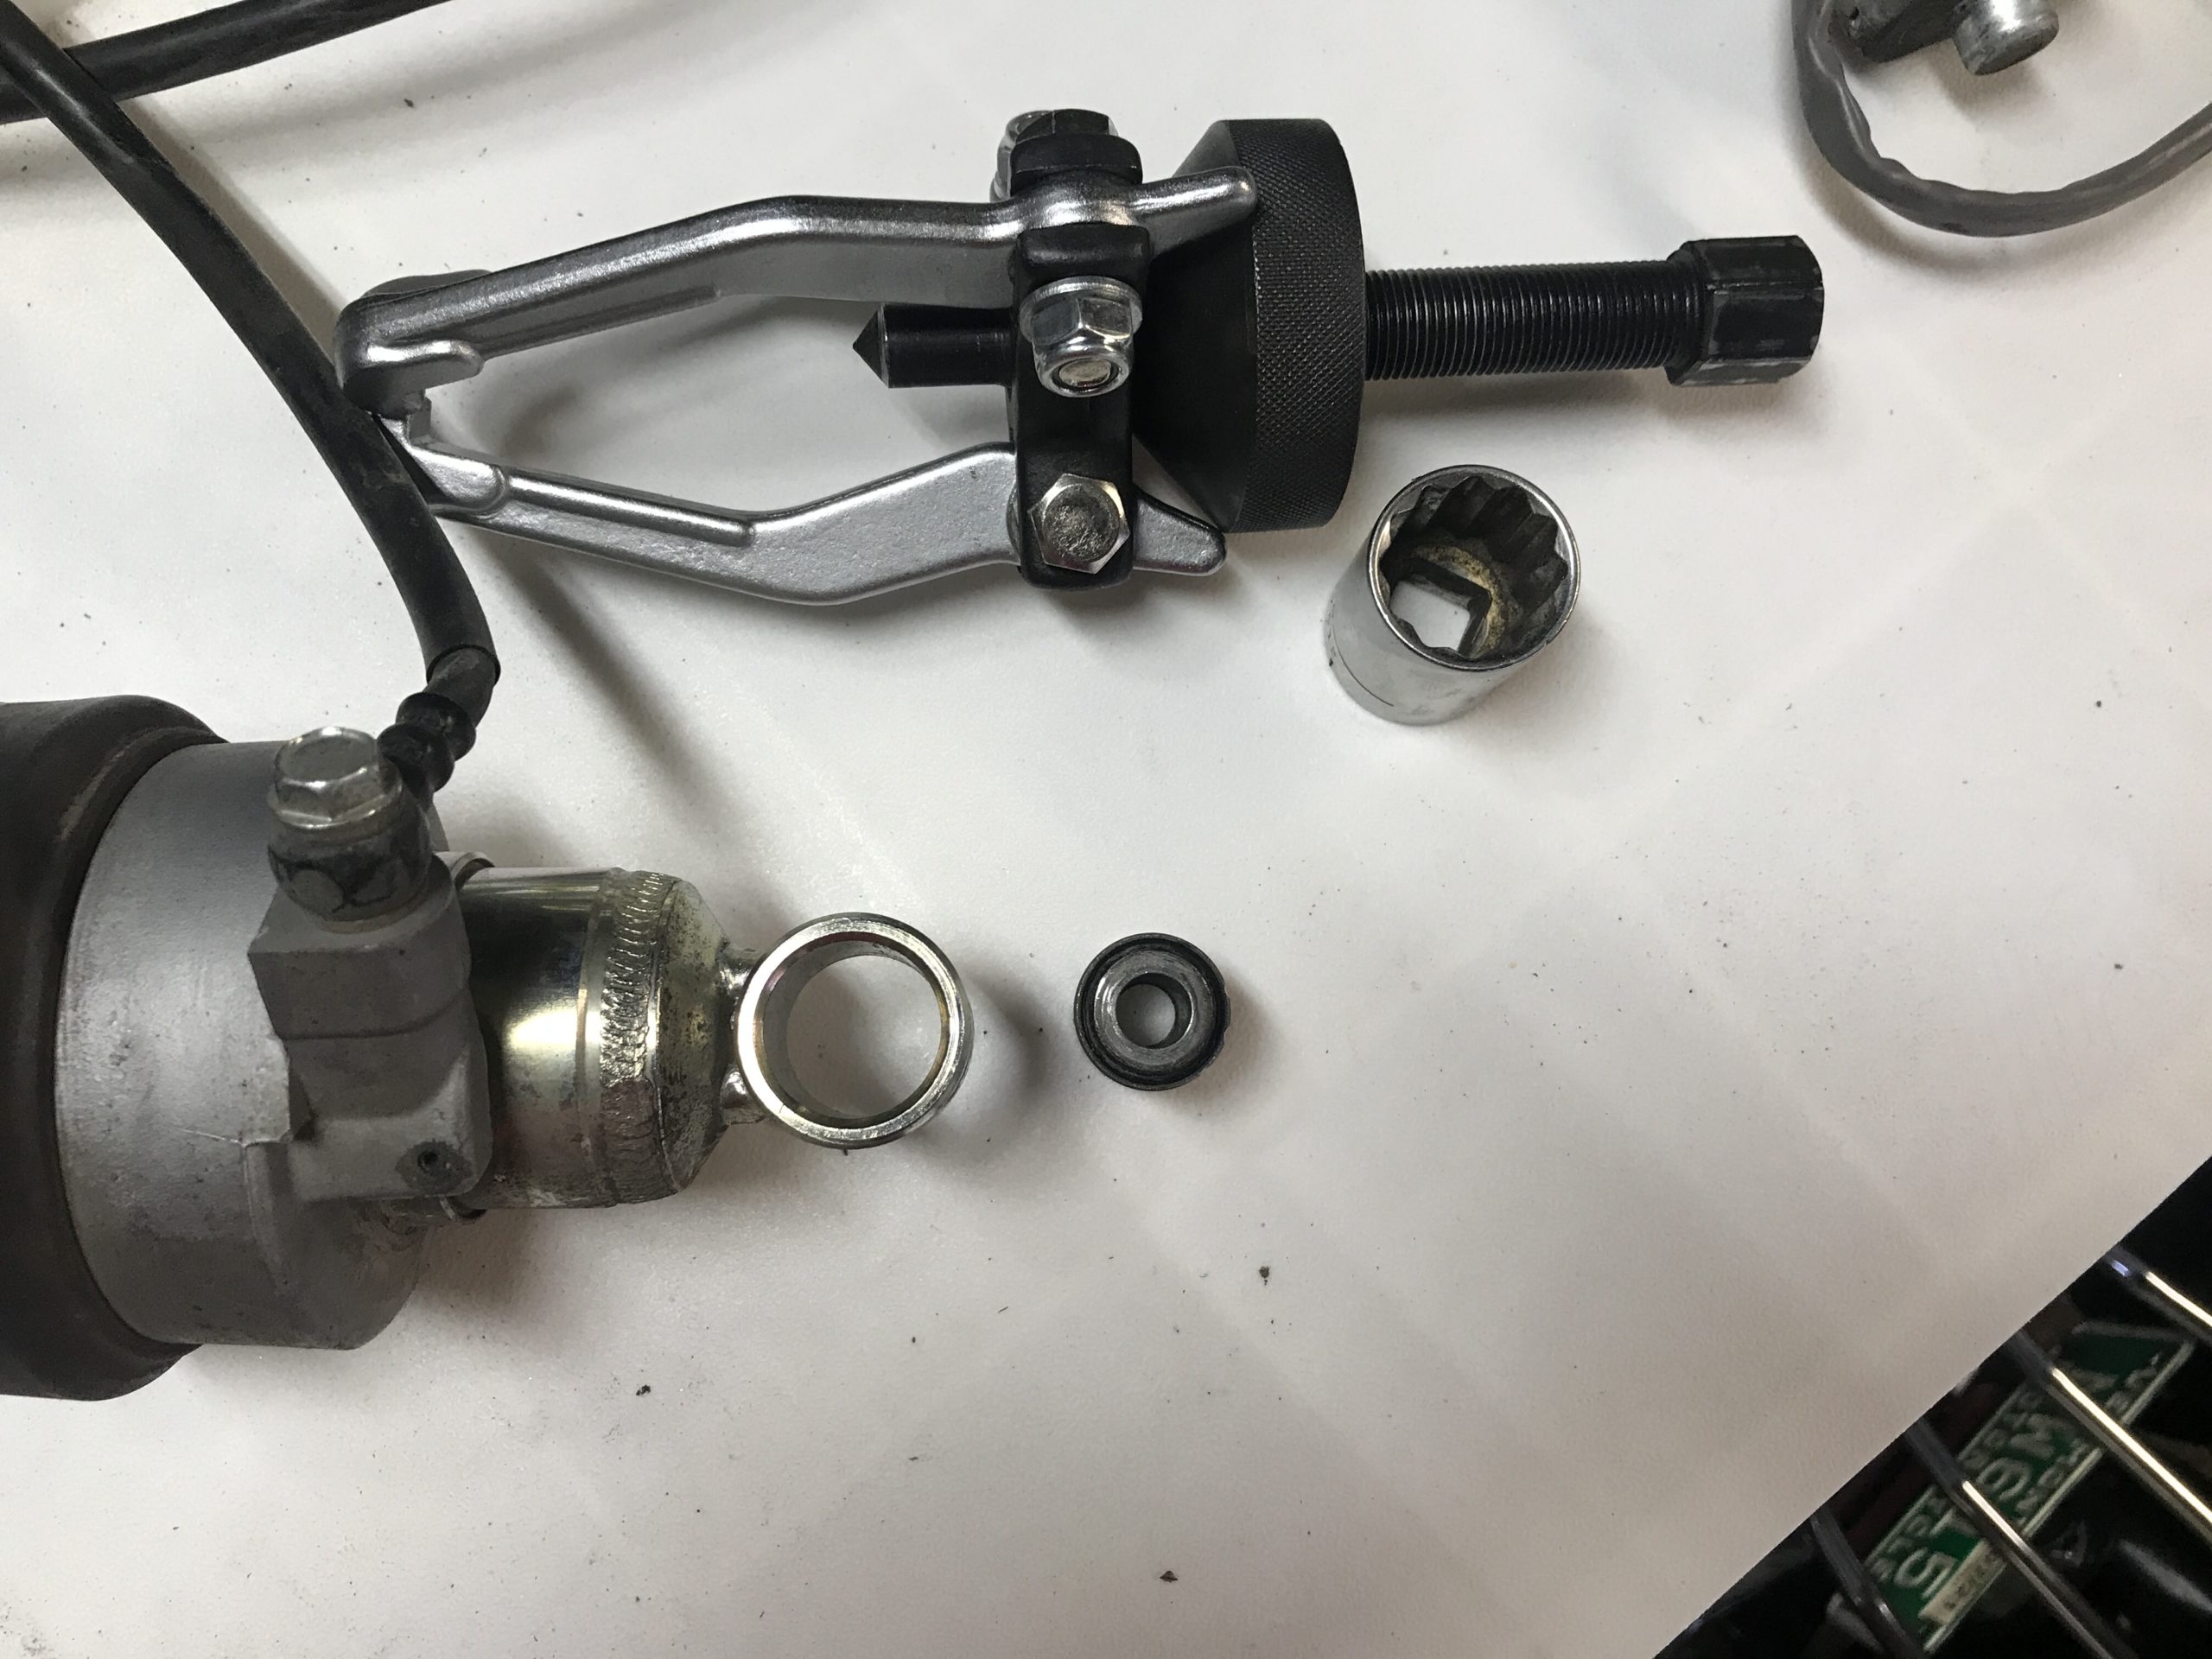
- Remove the three-piece bushing. You may need to turn the collar so that the hose is out of the way. Loosen the small hex set screw (4mm) and tap the collar with rubber mallet and align the banjo in way so you can access it from under the bike if you ever need to bleed it.
There’s a metal inner bushing, a rubber ring, and a thin metal outer ring. One way to pull it is to cut it out (not suggested since you may cut the shock collar). Another way is to use a table vice and push it out. You will use a 3/8″ 15mm or 16mm shallow (regular) well socket to push it out and a 1/2″ 22 mm medium well on the other end to push it into.
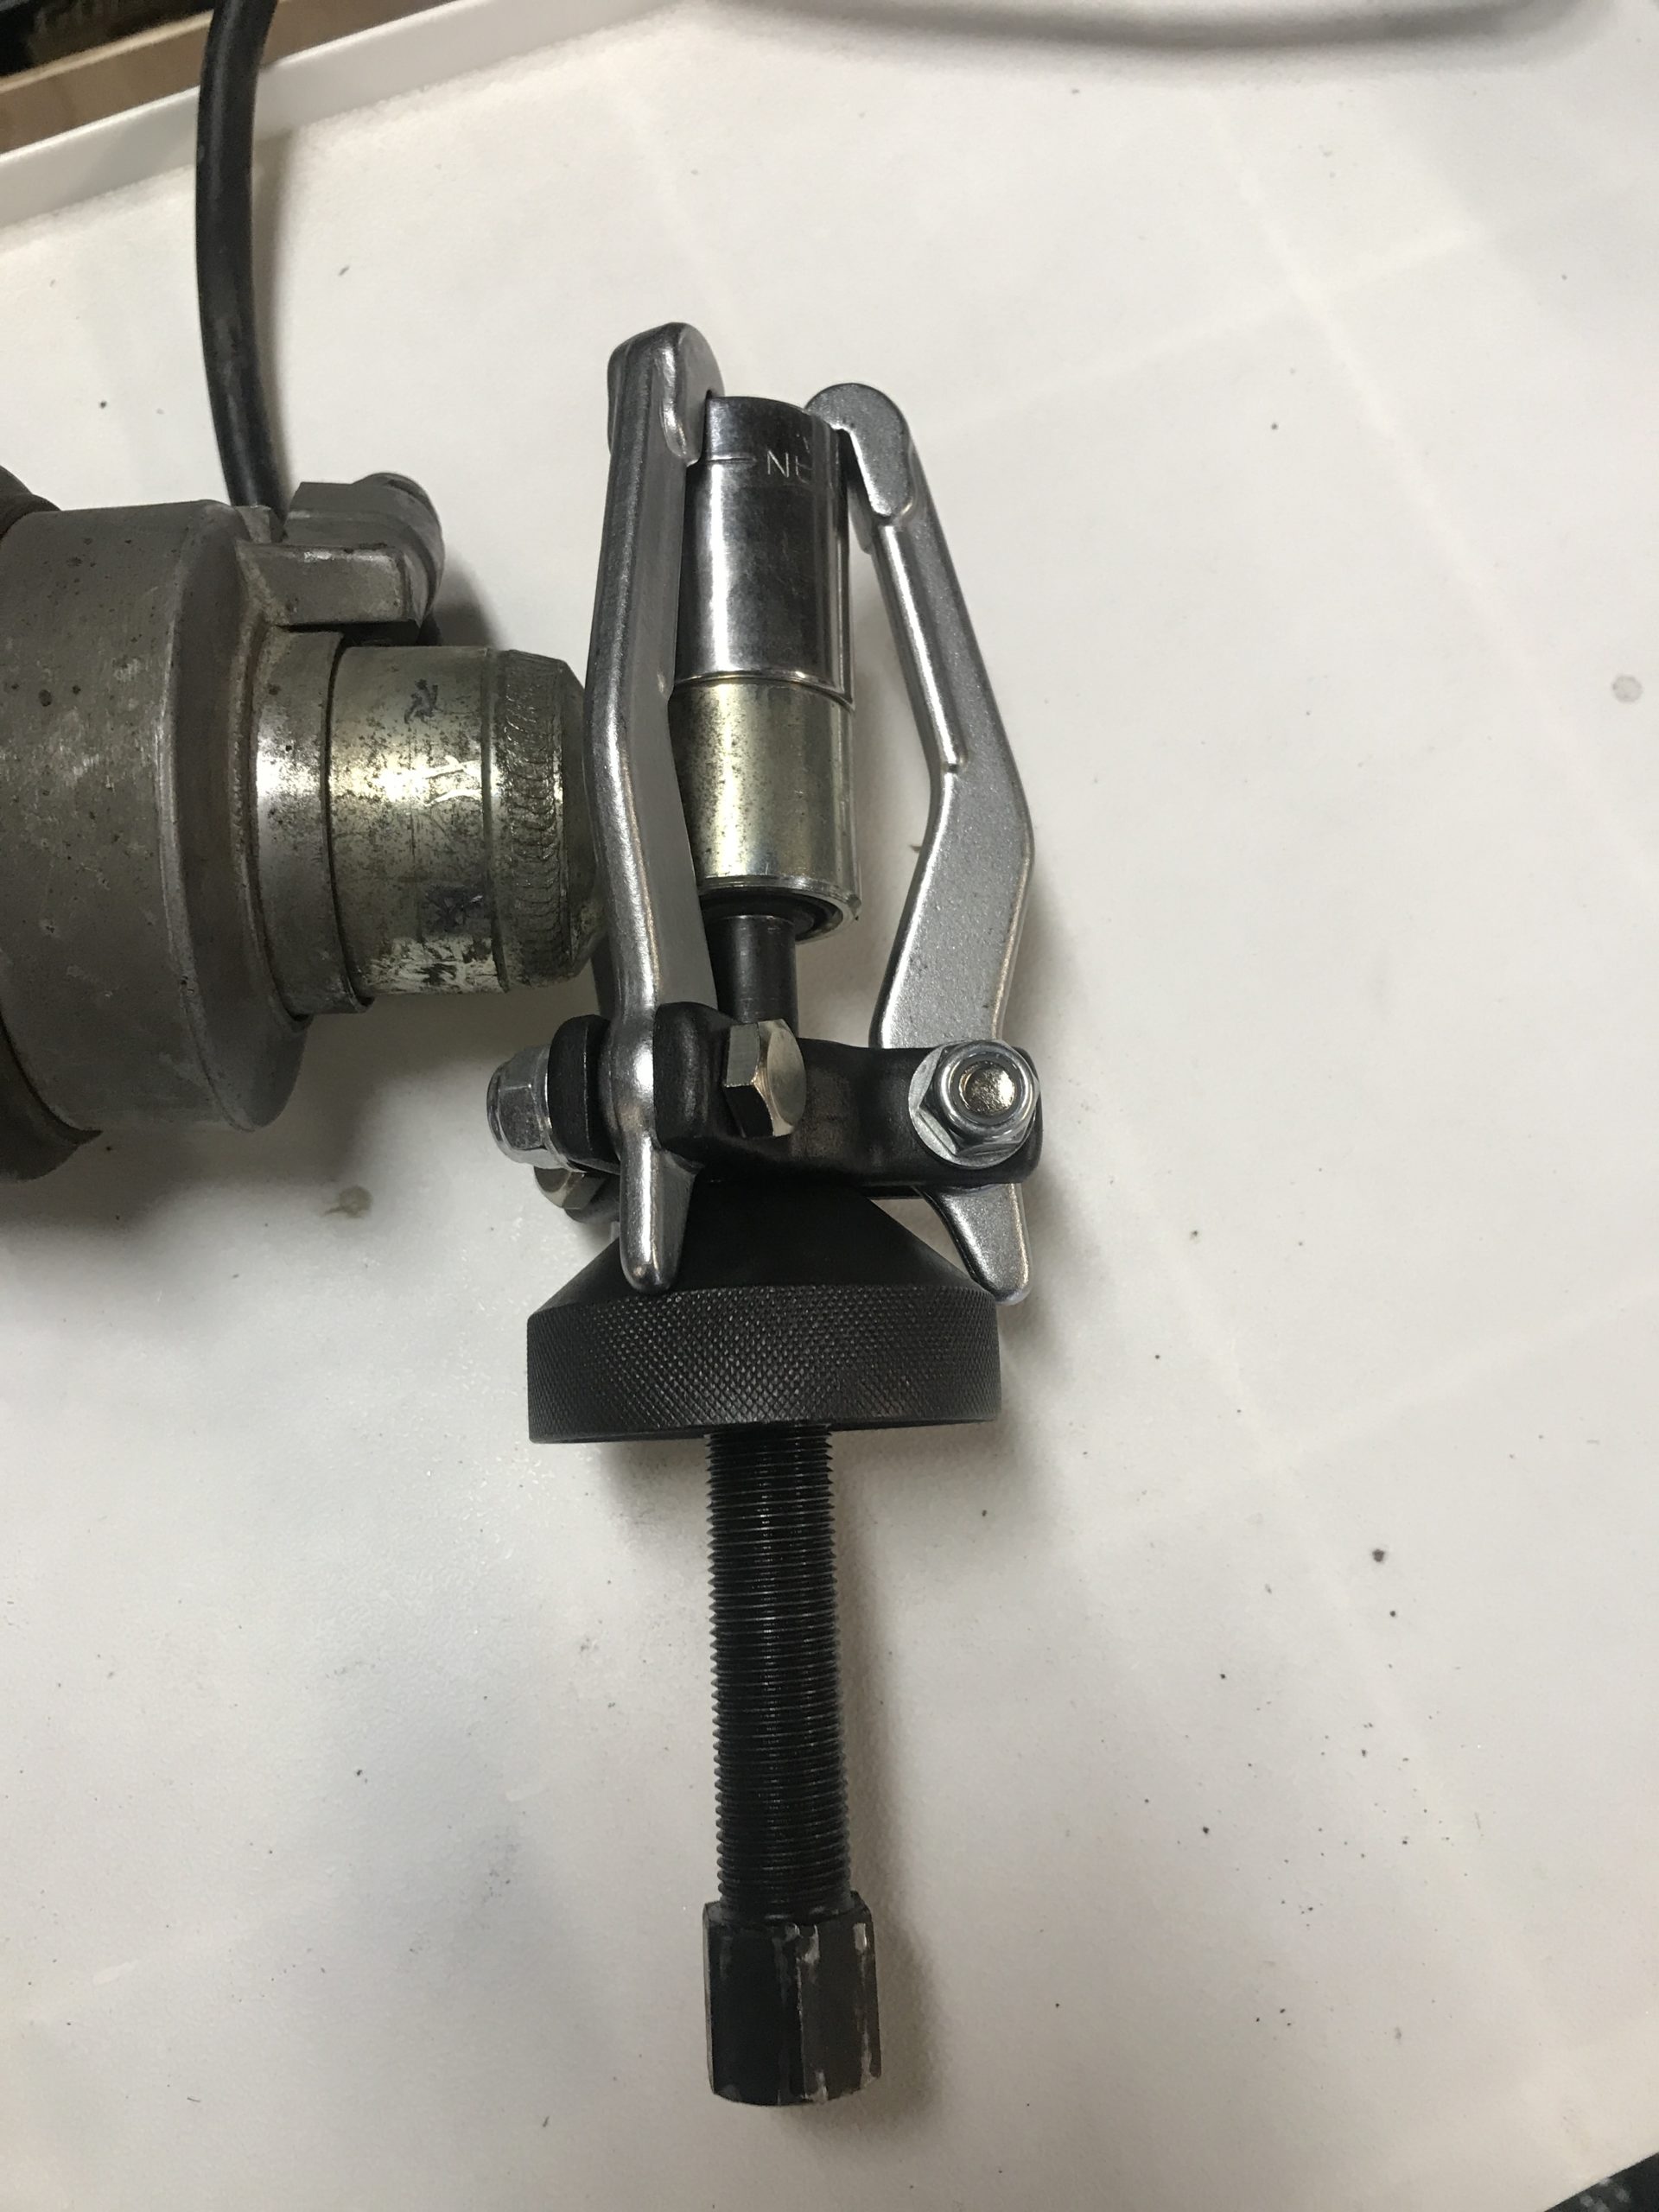
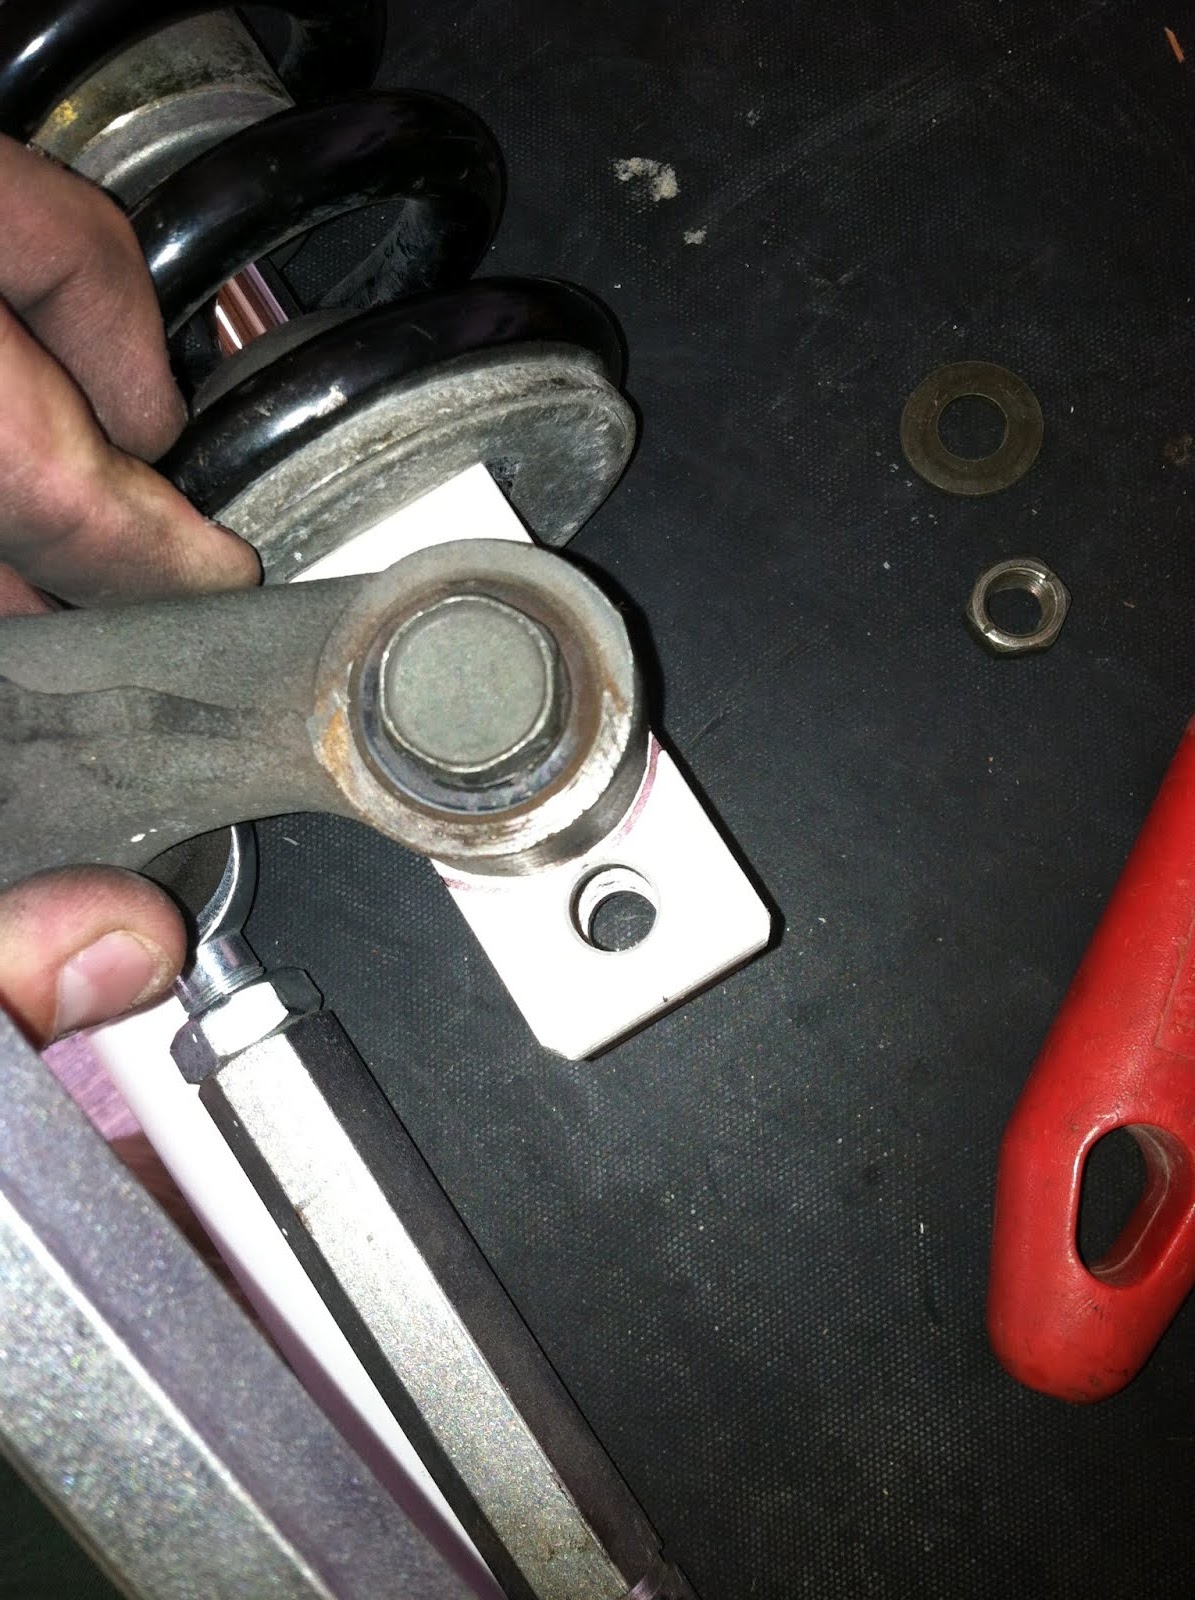
First spray a little penetrating oil on one end and let it sit. To pull the bushing, I borrowed a Pulley/Gear Puller from my local auto parts store to allow me to press the bushing out with an air impact gun. The picture below depicts the set-up that allowed me to use the pulley/gear puller to push the bushing out. I used a 22mm socket on the back side and used the pulley/gear puller to push the bushing into it. Some guys found success using a bench press but I found it easiest to use the set-up I describe. Sometimes just the inner part of the bushing will push out and leave the outer part of the bushing. In this case you can use a 16mm socket to push that part out. I had to do that on a bench press. I pushed it part way out and finished it with the pulley/gear puller and air impact gun.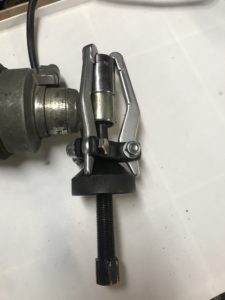

Or you can use a bench press to push the bushing out. You will need
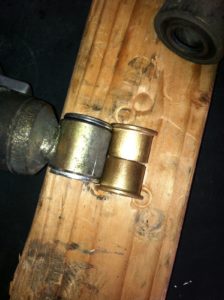
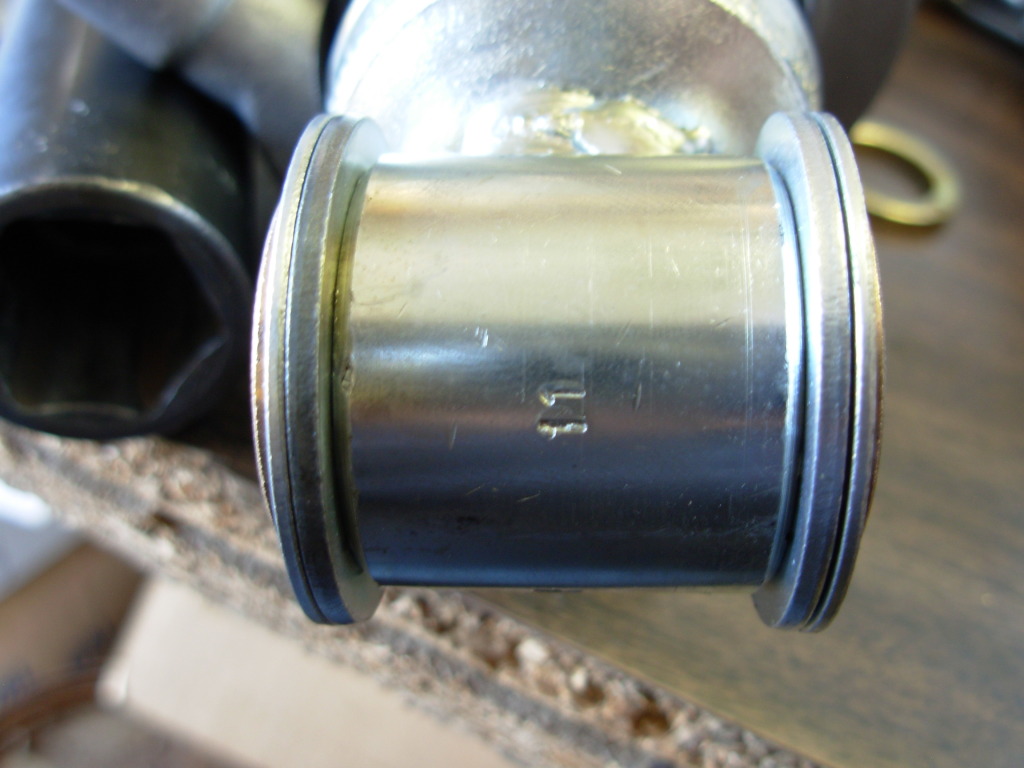
Now you’ll install the new brass bushings and washers. Here the washers are beside the shock head and the bushing next to it to confirm the spacing and fit.
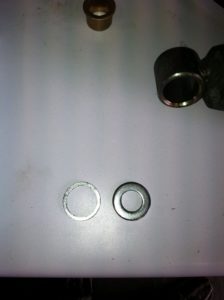
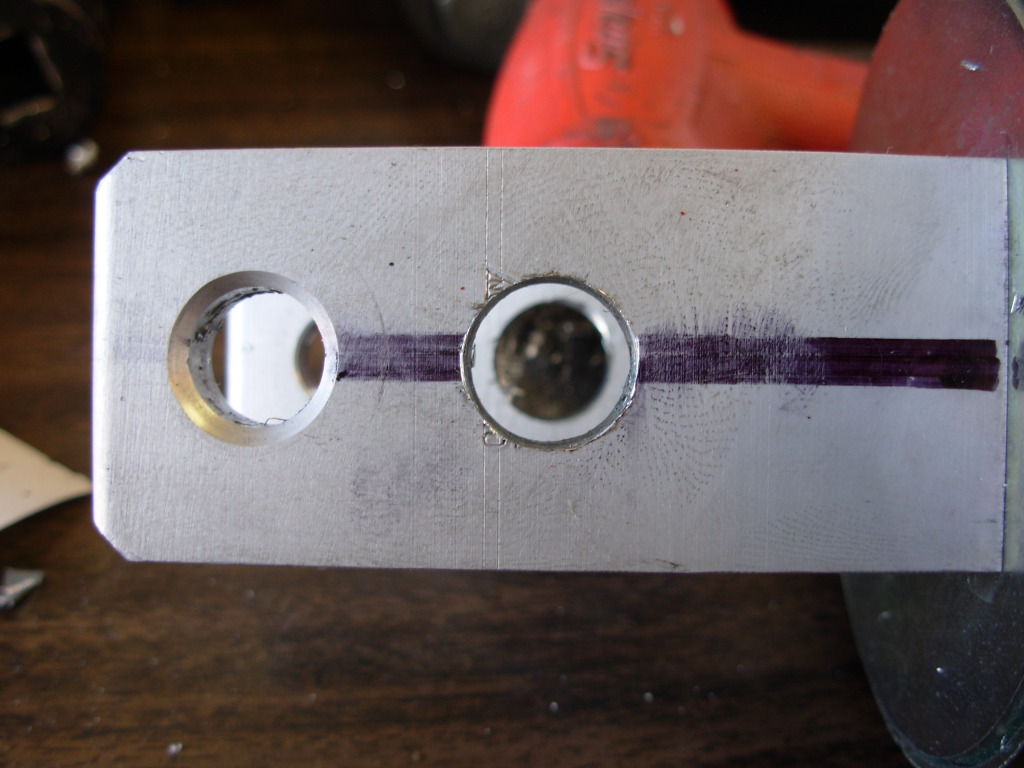
Credit Tyke’s Place If you choose to use regular washers, you’ll need to grind out the washers to fit on the bushing. The washer on the left is modified to fit, the one on the right is as it was bought. You might prefer to order the stainless steel shims from McMaster-Carr.
Credit Tyke’s Place In order to install the brass bushings you will need to bore out the collar slightly. I used a rotary tool with a sanding drum (Harbor Freight) to do this. Be careful not to take too much off. You want it to still be a slightly tight fit so that you have to use a rubber mallet to tap it in.
[PICTURES OF THE ROTARY TOOL COMING SOON]
I found that I needed to bore out the bushing itself, slightly to get the mounting rod through it.
Install one washer onto each bushing, and insert each busing into the shock head. This could be a tight fit. Don’t hammer on it or you could mess up the bushing. Use a rubber mallet. You may have to bore it out a bit more if it is too hard to push in. Here’s how it should look when you’re done.

Credit Tyke’s Place

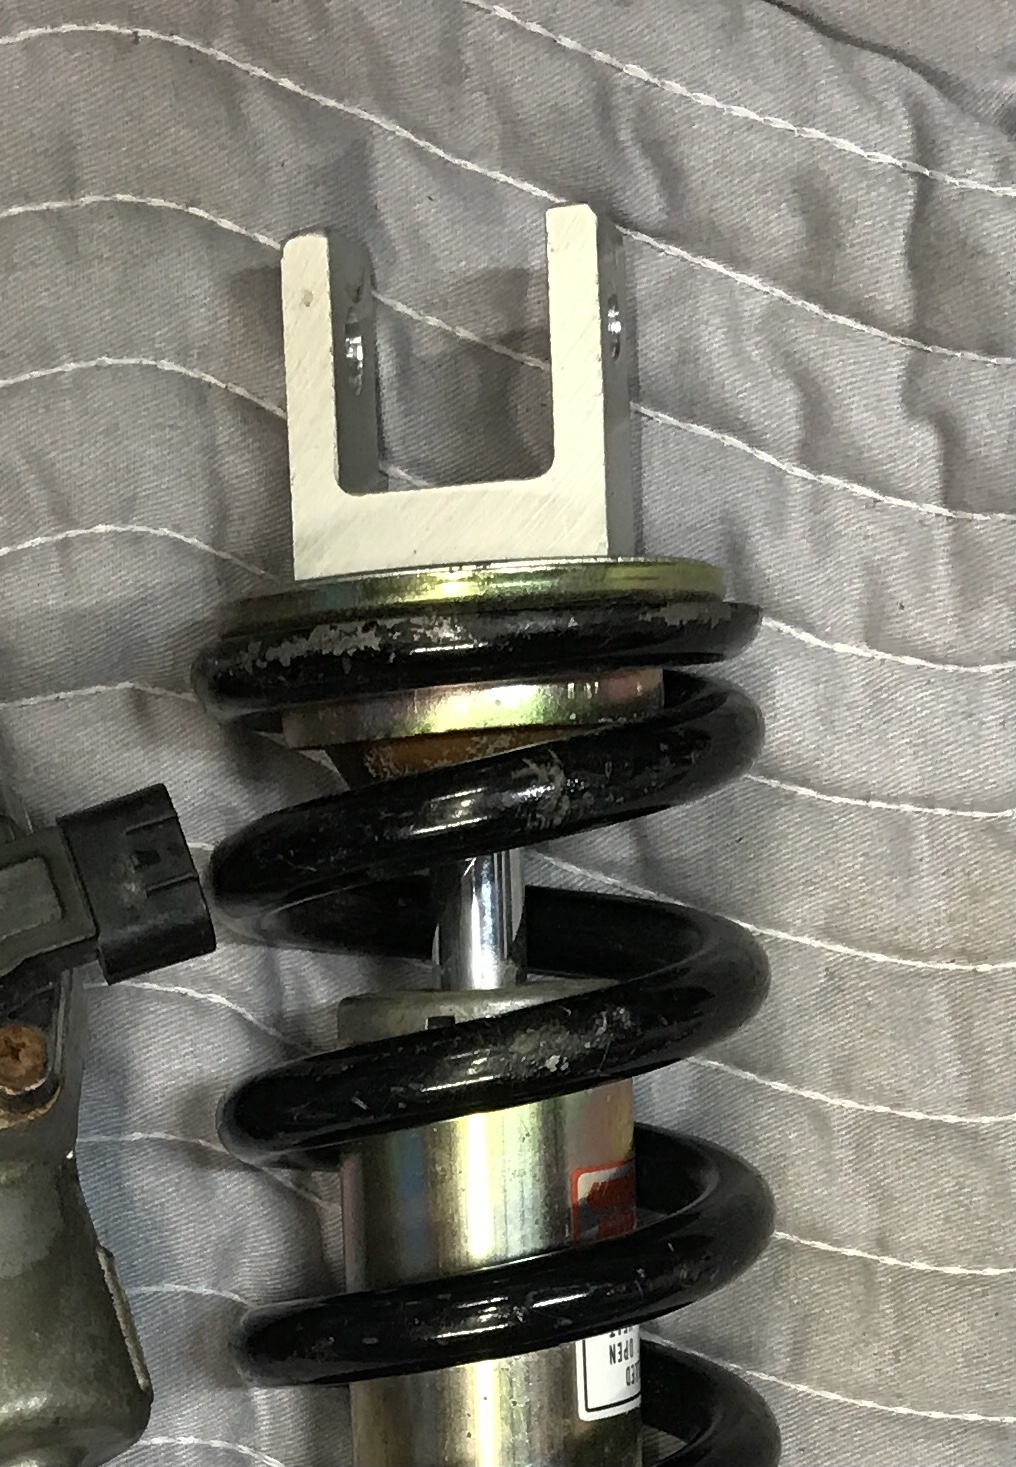
Next, work on the flange on the other end. Here you can see how much longer the Goldwing shock is compared to the Road Star shock.

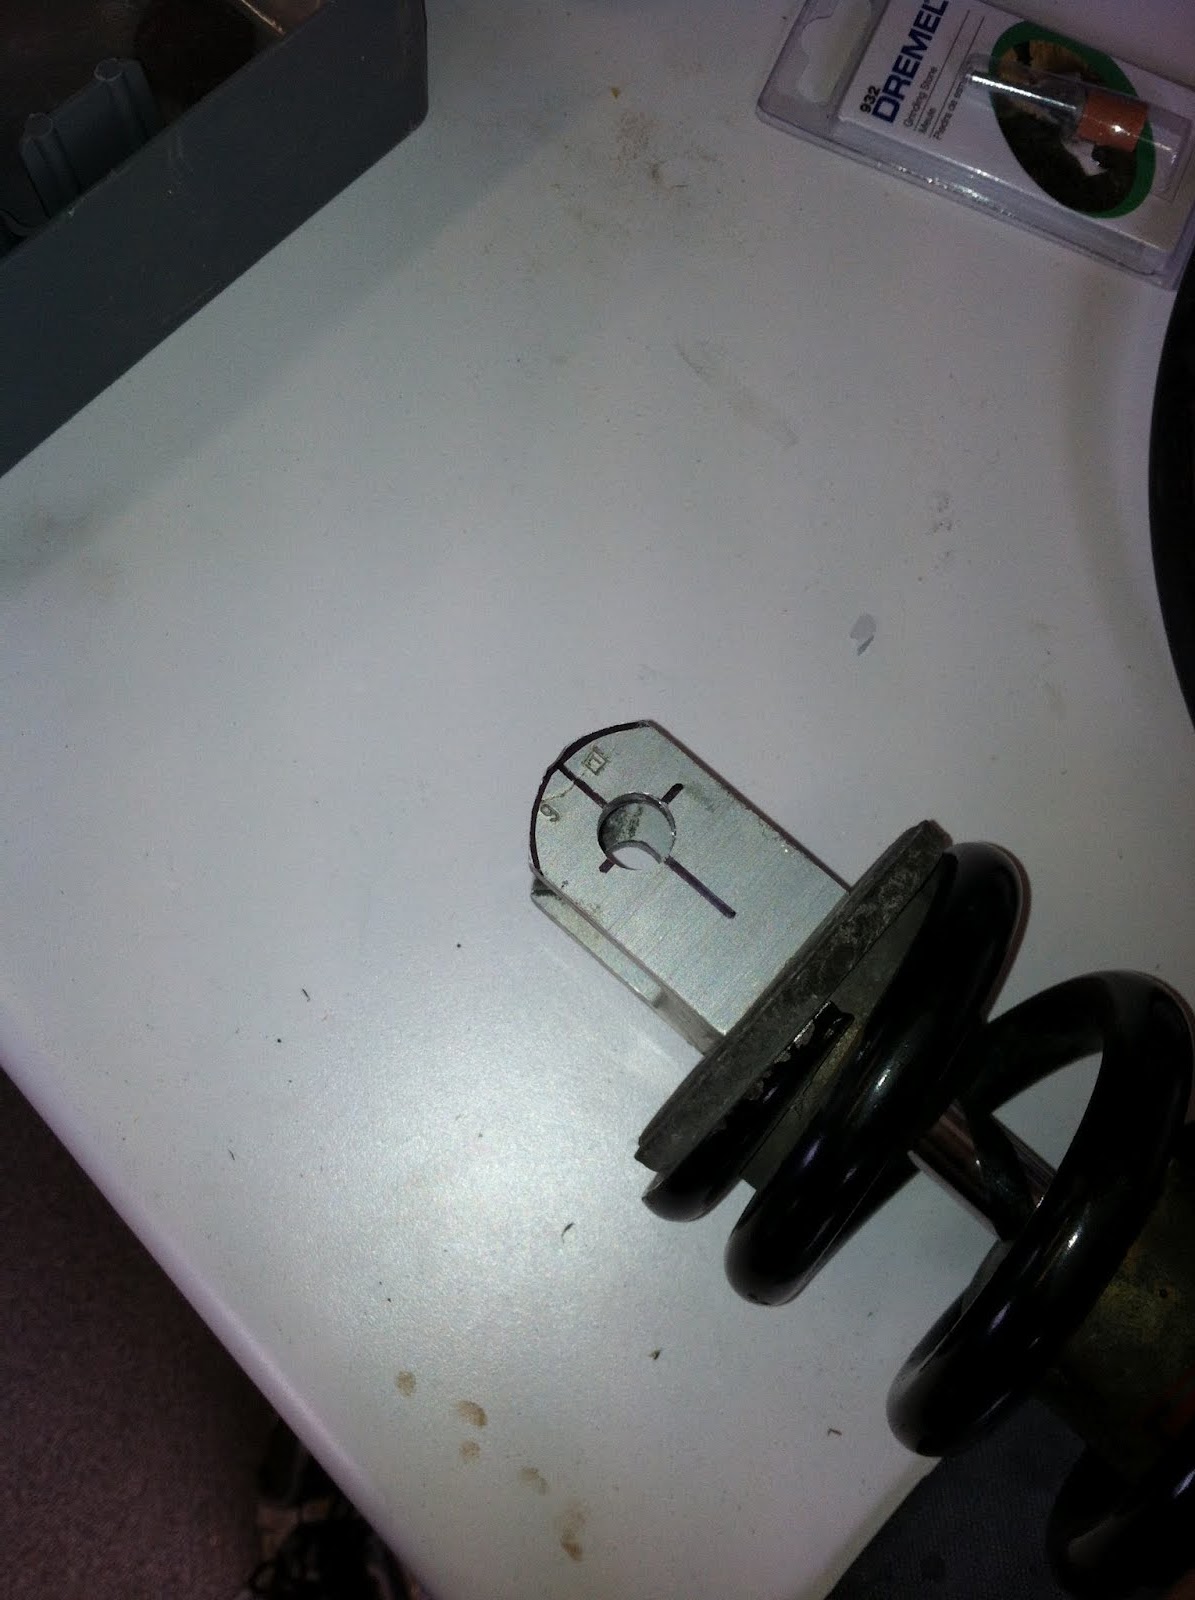
You’ll need to align or measure the shock and drill a hole into the shock flange.To measure it yourself you could insert a bolt through the top holes to align the shock, and then a bolt though bottom hole of the Road Star shock to set an alignment mark on the Goldwing shock. This measurement will be 13/16 from center of existing hole to center of new hole, and on the center line of the flange. Mark both sides exactly the same and drill each side with 15/32 drill bit. A drill press works best for this. Be sure that you drill each side exactly the same.
I didn’t pull my original shock before converting the shock so I decided to enlist a local machine shop to measure and cut the hole for me. You will want to check with different machine shops in your area as the prices may vary. Sometimes bringing the shock to the shop gives them a clear idea of what you want. I created a PDF to bring with me to explain what I needed. You can download it here.
Next you will want to cut the excess of the flange off. There are a few ways to do this. I just cut a straight line at the end of the old hole. Or, if you have your old shock off you can use the dog bone to measure around the dog bone and cut the excess off as depicted below.
Now your shock is ready to install in to the original set-up. Install directions can be found here.
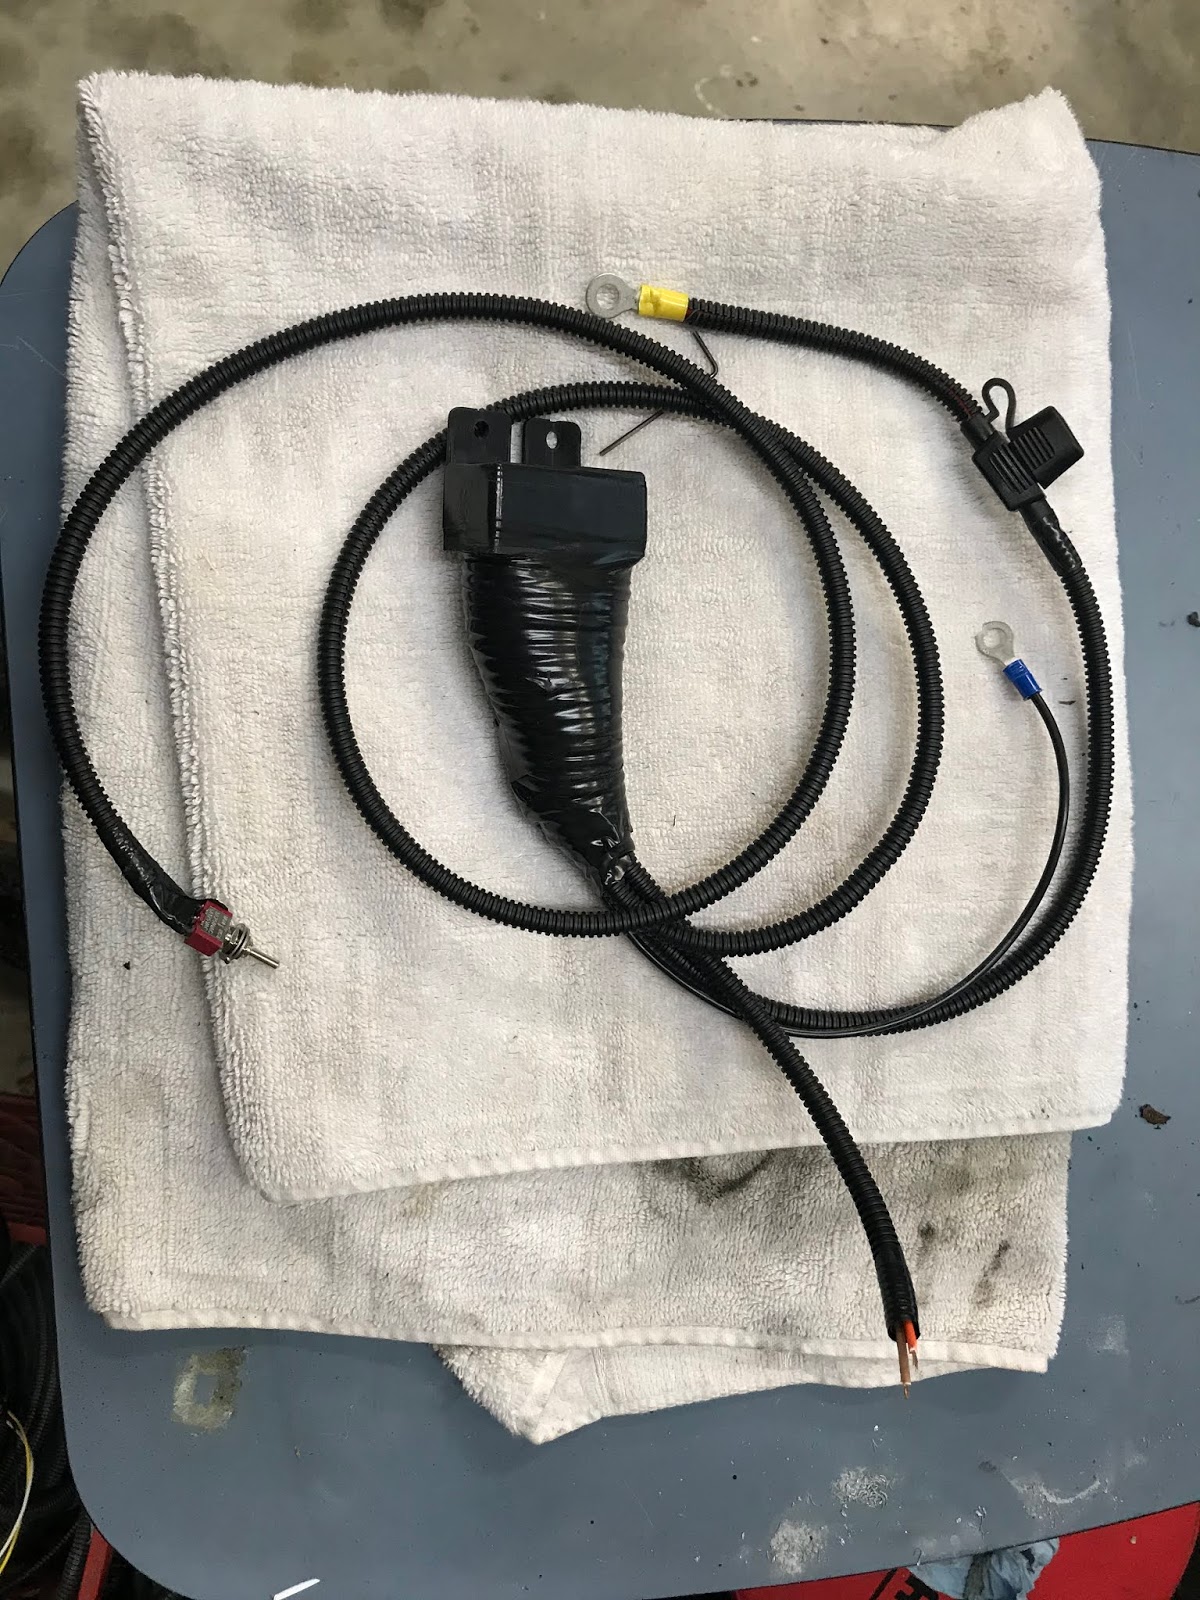
The shock usually comes with the original Honda electric motor/pump to increase/decrease the preload on the shock. In order to use the electric pump and motor you either need to create a harness or you can purchase one from Chris Jones (the inventor of the RoadWing). Check it out here.
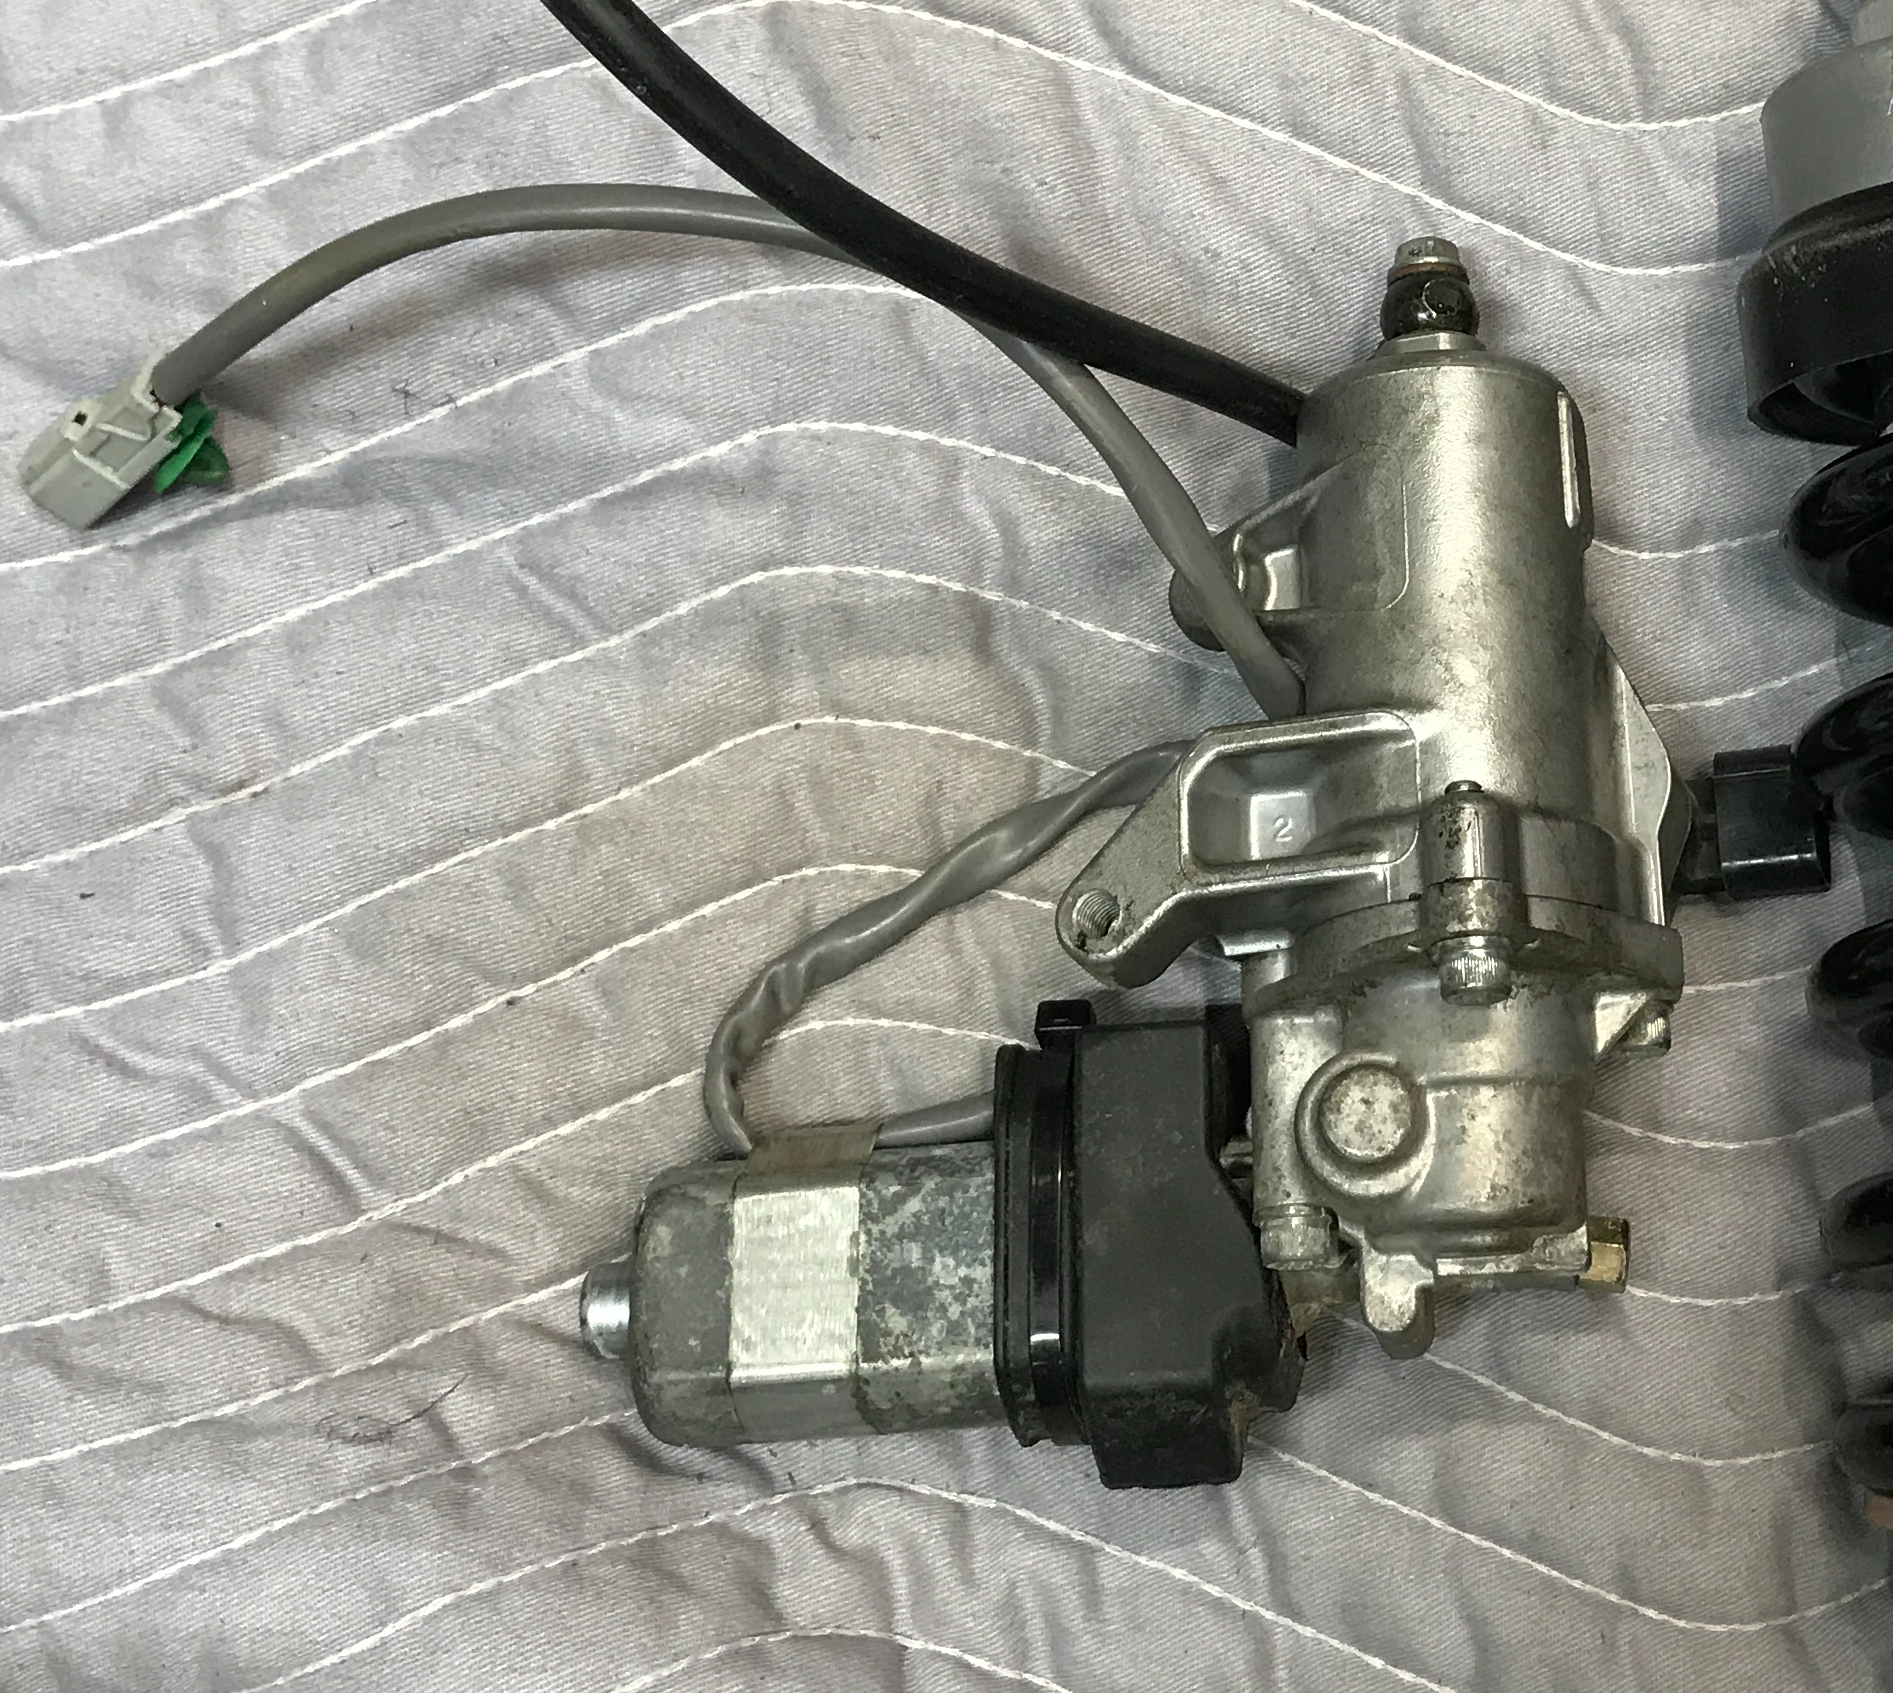
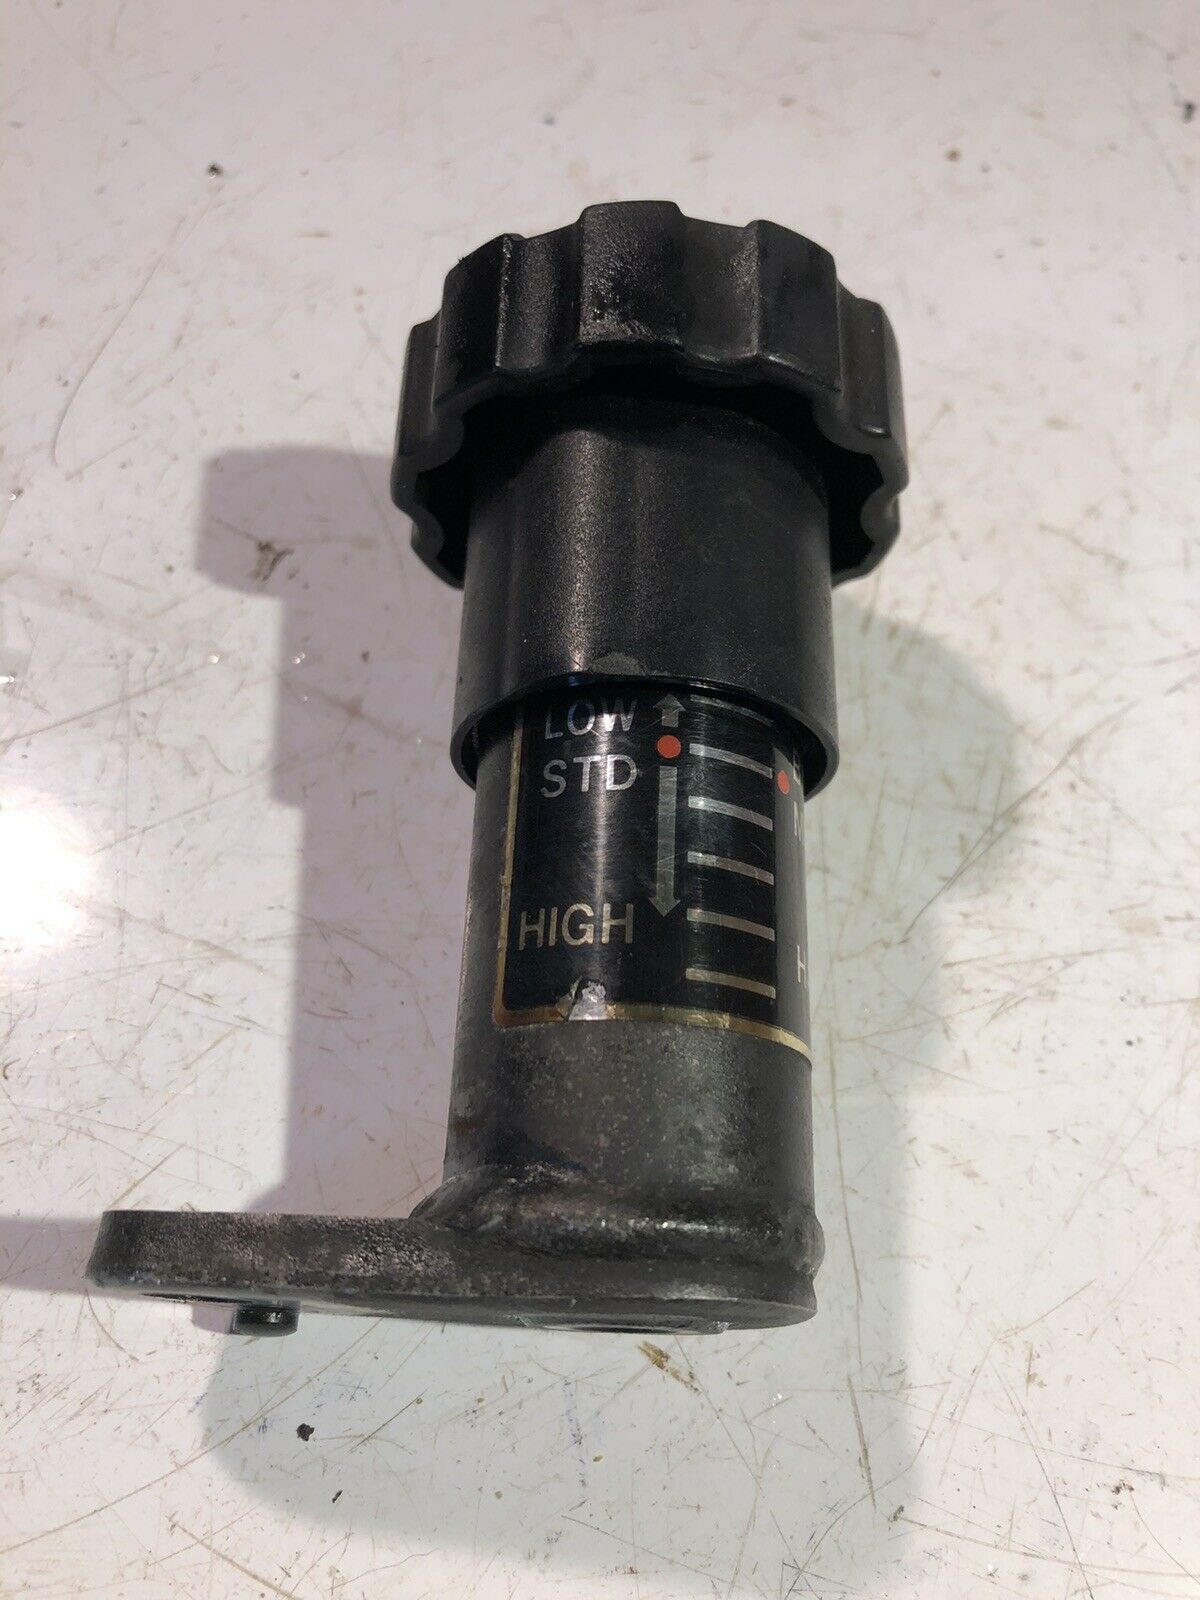
Another option is to purchase a Remote Adjustable Preload (RAP) for manual operation. You can find the RAP on eBay. You will want to search for one from a BMW 650, 1100, 1150 or 1200 motorcycle (rear mono shock). Not all of the shocks use the same RAP so here is a picture of the one that works with this set-up.
Kris Kohler on the Road Star Clinic Group on Facebook makes and sells manual RAPS to be used with the RoadWing. If you can’t find a BMW manual RAP I suggest you look him up and get a manual RAP from him. Here is what it looks like.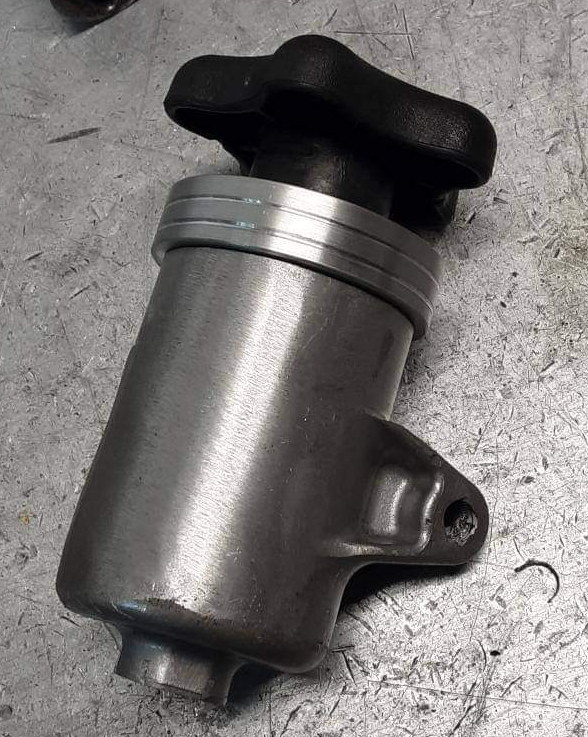
Reach out if you have any questions, etc.